35 Genius Ideas for Organizing a Small Kitchen (That Hold Up Daily)
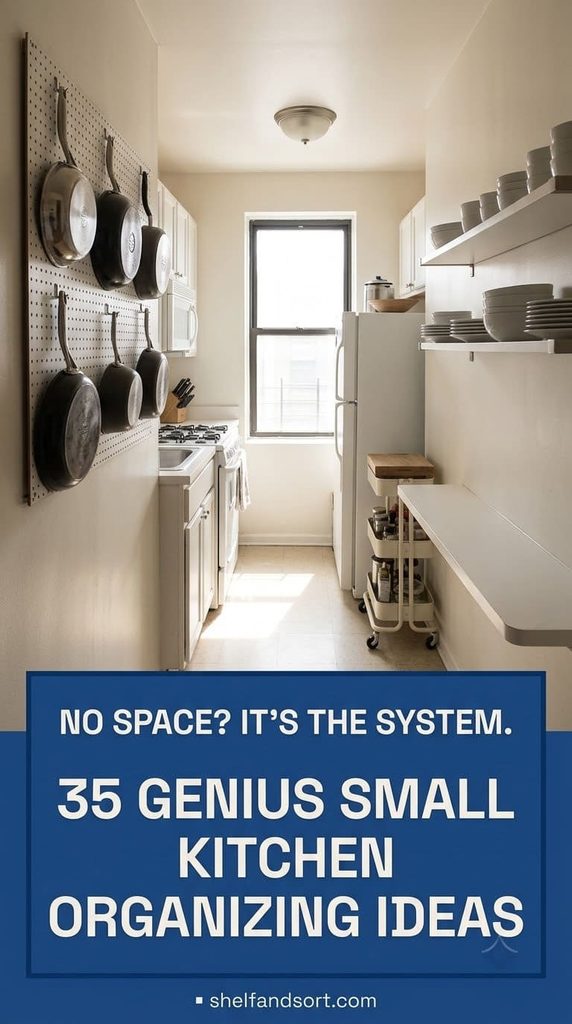
A small kitchen does not need more storage as much as it needs a system. These 35 ideas cover every zone, cabinets, drawers, counters, walls, and the awkward corners, plus the weekly habit that keeps a tight kitchen working instead of piling up.
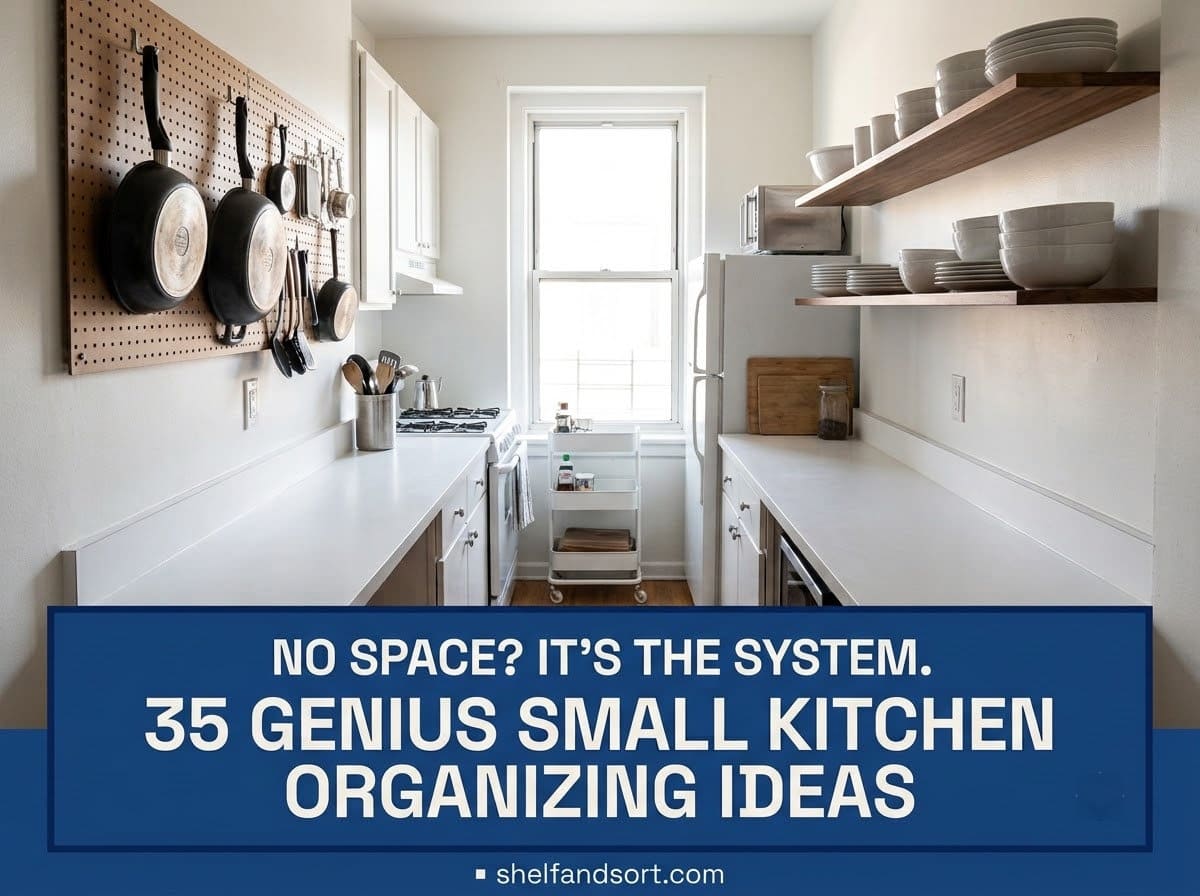
A small kitchen works when every item has a fixed home and the things you use daily sit closest to where you use them. Start by emptying all the cabinets and drawers, then purge duplicates and gadgets you have not touched in a year. Set up zones: prep near the cutting board, cooking by the stove, cleanup by the sink, and coffee or breakfast in one spot.
Double your cabinet space with stackable shelf risers, a top wire shelf, and slim racks on the inside of every cabinet door. Add adjustable dividers to every drawer so nothing shifts.
Keep only daily-use appliances on the counter and move the rest to a cabinet near their task. Go vertical on any open wall with a pegboard, a rail, or two narrow shelves. Then run a 10-minute reset once a week so the system holds.
Why small kitchens fall apart so fast
A small kitchen has no slack. One dirty pan on the counter and you have lost half your prep space. A drawer that will not close means the whole thing feels chaotic.
So the fixes have to be real systems, not just pretty bins. The goal is simple. Everything has a home, the home is close to where you use the thing, and putting it back takes one move.
The 35 ideas below are grouped by zone: the setup, cabinets, drawers, counters, walls, and the hard spots. Each one has a specific way to do it and a common mistake to skip. Work through the ones that fit your kitchen. You do not need all 35.
One note before you buy anything. Interior designer Rachel Blindauer, quoted in a Livingetc guide to small-kitchen organizing, puts it plainly. A daily-use appliance can live on the counter. Everything else should move to a cabinet near its task zone or a pull-out drawer. Start there and you free up space before spending a dollar.
Start with the system
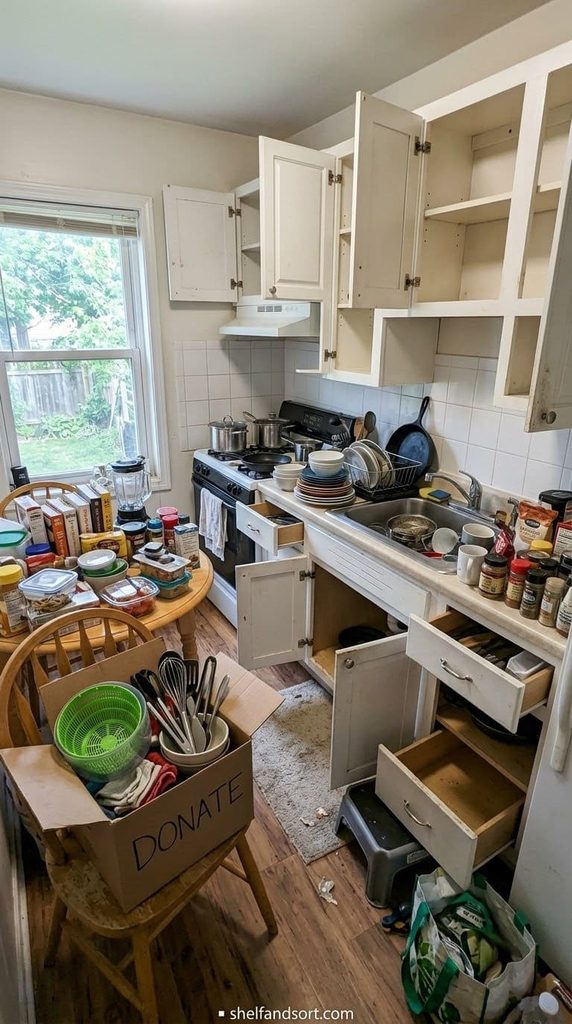
1. Empty every cabinet and drawer, then purge in one pass
Pull everything out. All of it, onto the table and counter. You cannot organize around clutter you should have removed.
Sort fast into keep, donate, and toss. Be honest about the salad spinner you used twice and the four half-used spice jars. Anything broken, expired, or duplicated goes.
The mistake is doing this cabinet by cabinet over a week. You lose momentum and end up shoving things back. Block off two hours and do the whole kitchen at once.
Short on time? Do just the drawers and the two lower cabinets you fight with most. That alone changes the daily feel.
2. Set up work zones around how you cook
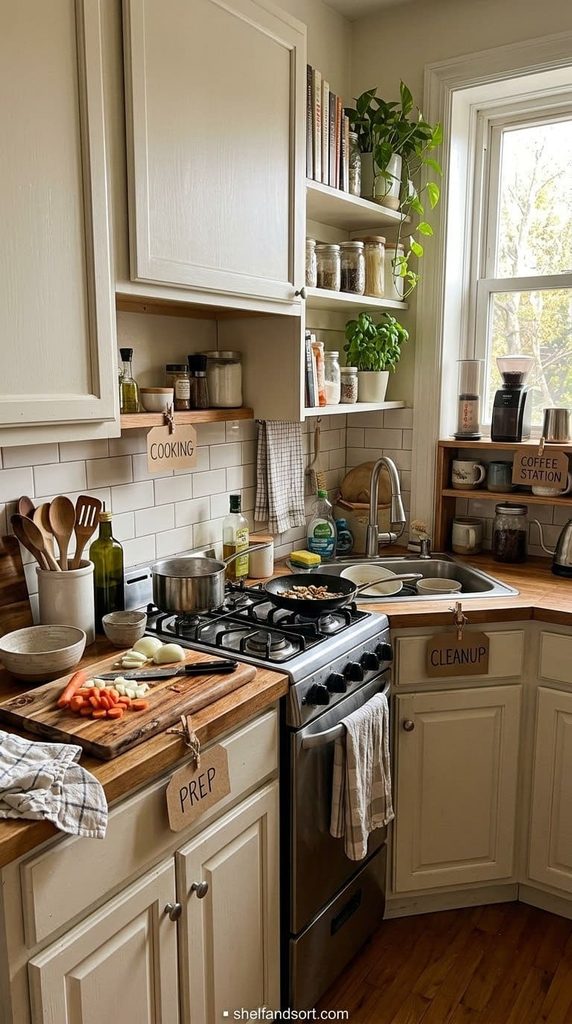
A zone is a spot where everything for one task lives together. Custom closet designer Angelia York, in that same Livingetc guide, calls it organizing by activity: coffee items together, baking supplies in one cabinet, prep tools near the cutting board.
Map four zones minimum. Prep by your main counter, cooking by the stove, cleanup by the sink, and one for coffee or breakfast. Store each zone’s tools in the nearest cabinet or drawer.
The mistake is organizing by item type instead, all the metal in one place, all the plastic in another. That looks tidy and wastes steps every single day.
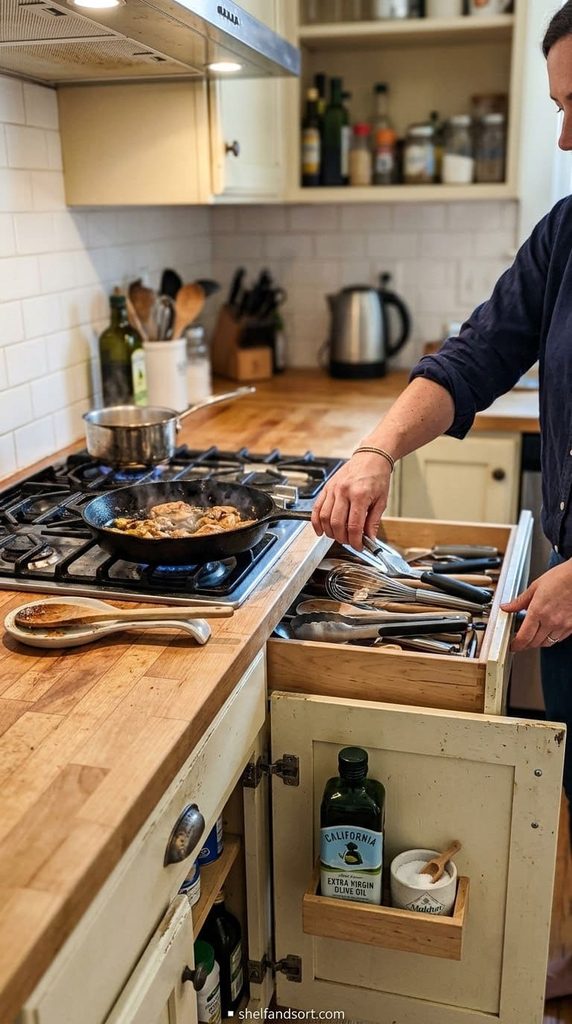
3. Keep only the daily tools within arm’s reach of the stove
Stand at your stove. Without moving your feet, you should be able to grab your spatula, your go-to pan, salt, oil, and a spoon rest.

This is the shelf-riser move from idea 6, and it has the biggest rating sample of anything here, so it is a safe first buy. It expands from about 12 to 22 inches wide and stacks, so one unit fits a plate cabinet, a mug cabinet, or under the sink. The steel top holds real weight, unlike the flexy acrylic versions.
Shop NowThis post contains affiliate links. We may earn a commission on qualifying purchases at no extra cost to you.
Put those in the closest drawer and the cabinet right below or beside the range. Everything you reach for while cooking lives in that arc.
The mistake is filling the prime stove-side cabinet with storage containers or baking sheets you use once a week. Prime real estate goes to prime-use items only.
4. Move rarely used gear out of the kitchen entirely
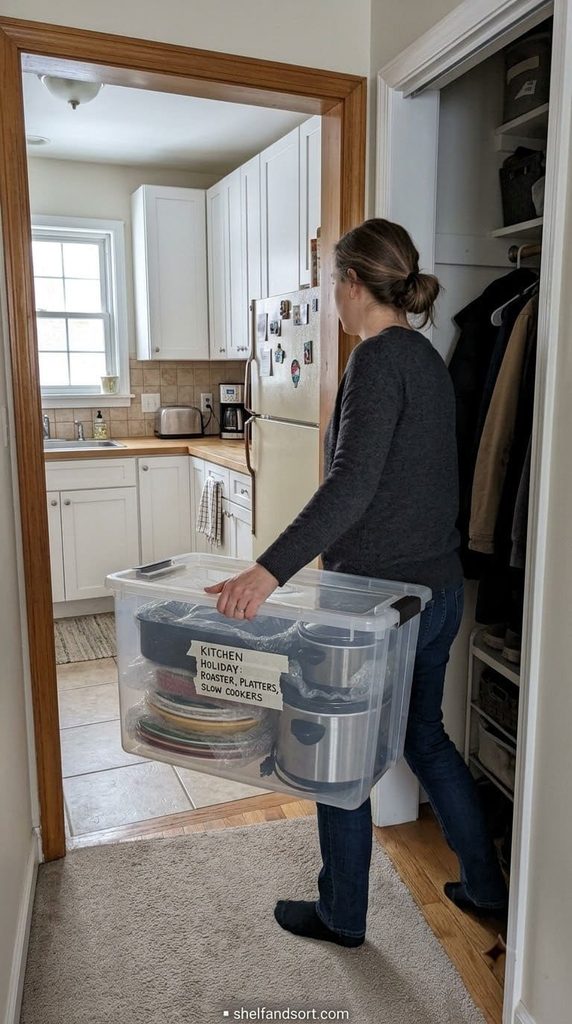
The turkey roaster, the punch bowl, the second slow cooker, the holiday platters. None of it needs to be in a small kitchen.
Box it, label the box by contents, and store it in a closet, a hall cabinet, under a bed, or on a high shelf elsewhere. You lose nothing but the daily clutter.
The mistake is keeping “just in case” items in the kitchen because moving them feels like admitting you do not use them. You do not. That is fine.
Renting with zero extra storage? A single labeled bin on the top shelf of a bedroom closet holds most of it.
5. Give every category a labeled home
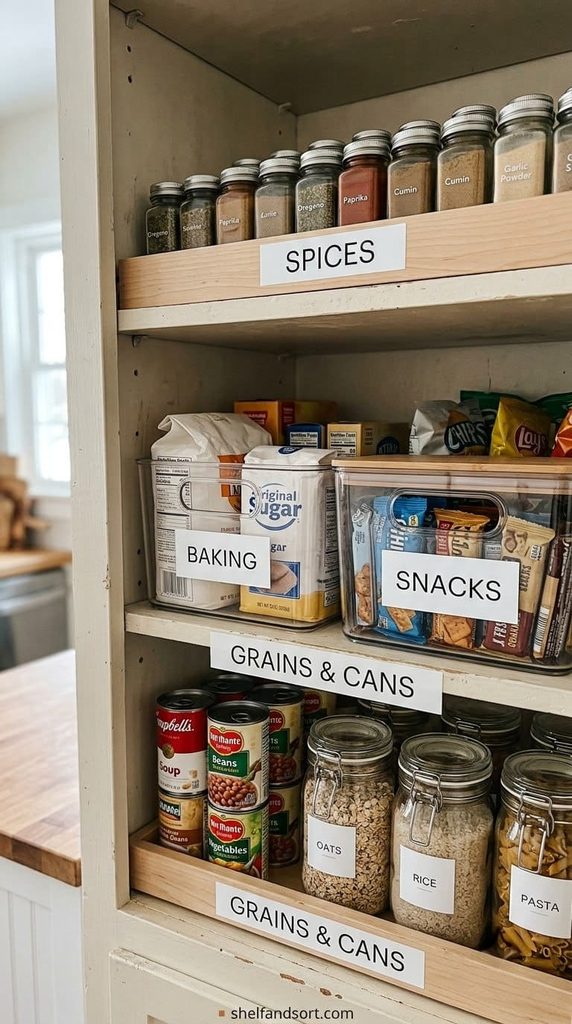
Once things are sorted into zones, label where each category lives. A small label on the shelf edge or the front of a bin.
Labels do two jobs. They tell everyone in the house where things go, so the system survives other people, and they stop the slow drift back to chaos.
The mistake is labeling the container but not the spot. When the container is in the dishwasher, nobody knows what goes on that shelf. Label the shelf too.
Double your cabinet space
6. Add stackable shelf risers inside every cabinet
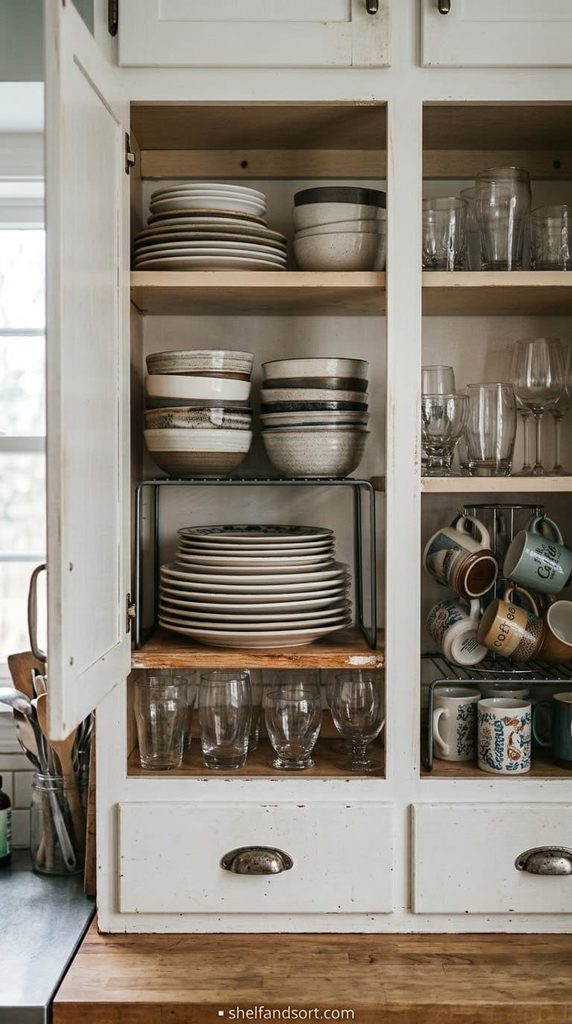
Most cabinet shelves have 12 inches of air above a stack of plates. A shelf riser splits that into two usable levels.
Put plates below, bowls on the riser. Or mugs below, short glasses above. Measure the interior height first so the riser and its load actually clear the shelf above.
The mistake is buying one size for every cabinet. Cabinets vary. Get adjustable or expandable risers so one product fits several spots.
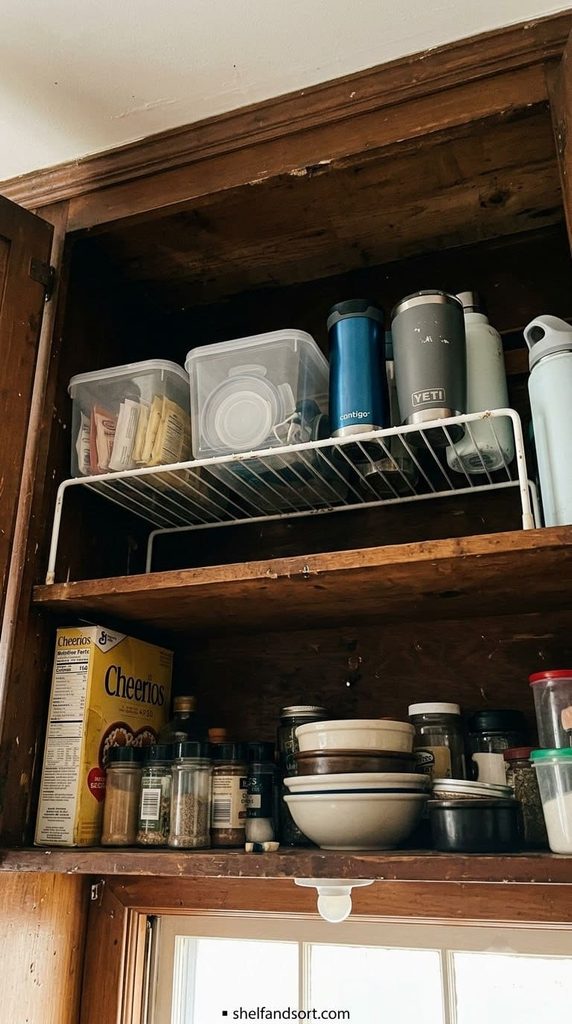
7. Use the full height with an extra wire shelf up top
The gap between your top cabinet shelf and the cabinet ceiling is dead space. A freestanding wire shelf or a stick-up shelf reclaims it for light, rarely used things.
Store the food processor bowl, extra travel mugs, or lunch containers up there. Light stuff only, since it is a reach.
The mistake is stacking heavy items in that top gap. It becomes a hazard when you pull one down. Keep the weight low, the height for light things.
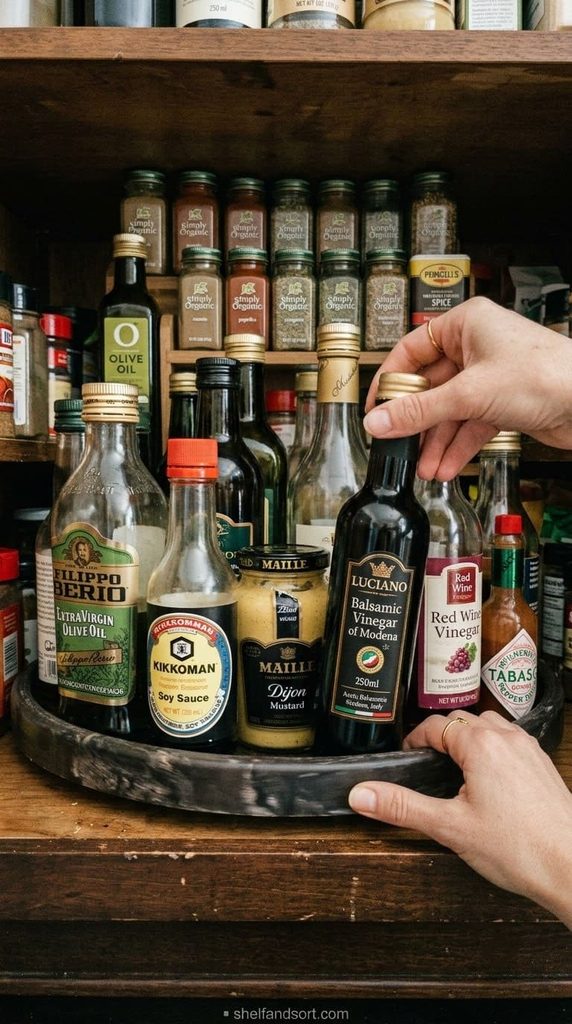
8. Put a turntable in the corner and the condiment cabinet
A lazy Susan turns a deep, dark cabinet into one spin. Use one for oils and vinegars, one for baking add-ins, one for the medicine and vitamins shelf.
Pick a turntable that leaves an inch of clearance on each side so it spins freely. Non-slip tops keep bottles from sliding when you turn it.
The mistake is a turntable so packed that nothing can move. Leave a gap. A turntable at 80 percent full still works, at 100 percent it is just a stuck tray.
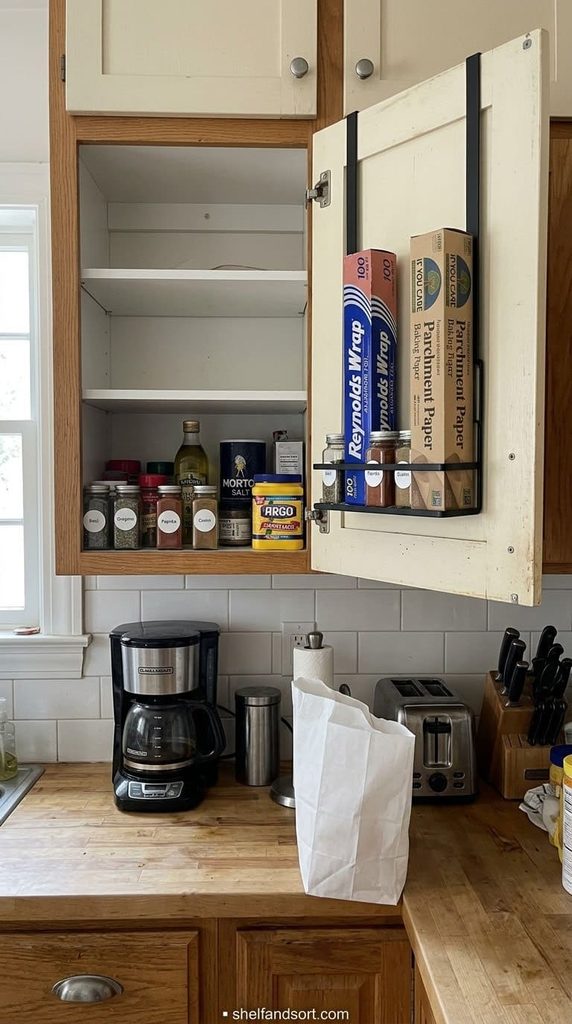
9. Hang a slim rack on the inside of every cabinet door
The back of a cabinet door is free square footage. A slim adhesive or over-the-door rack holds spices, wraps, measuring spoons, or cleaning sprays under the sink.
Put spices behind the door nearest the stove. Put foil, parchment, and bags behind the door nearest your prep counter. Measure so the rack clears the shelves when the door shuts.
The mistake is loading a door rack so heavy the door sags or the adhesive fails. Keep door storage light: one layer of small items, not a pantry.
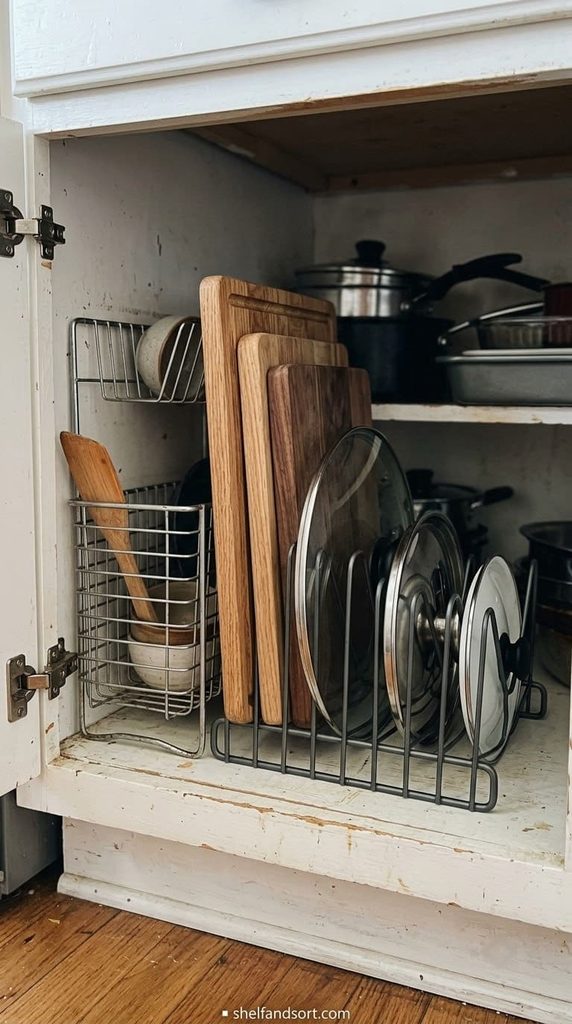
10. Store lids vertically in a dish rack or file holder
Pot lids and cutting boards are flat, so they slide into a mess when you stack them. Stand them up instead.
A cheap dish rack or a metal file sorter in a lower cabinet holds lids and boards upright, each one easy to grab without moving the others.
The mistake is keeping lids on the pots to save a step. It doubles the space each pot takes. Separate them, nest the pots, file the lids.
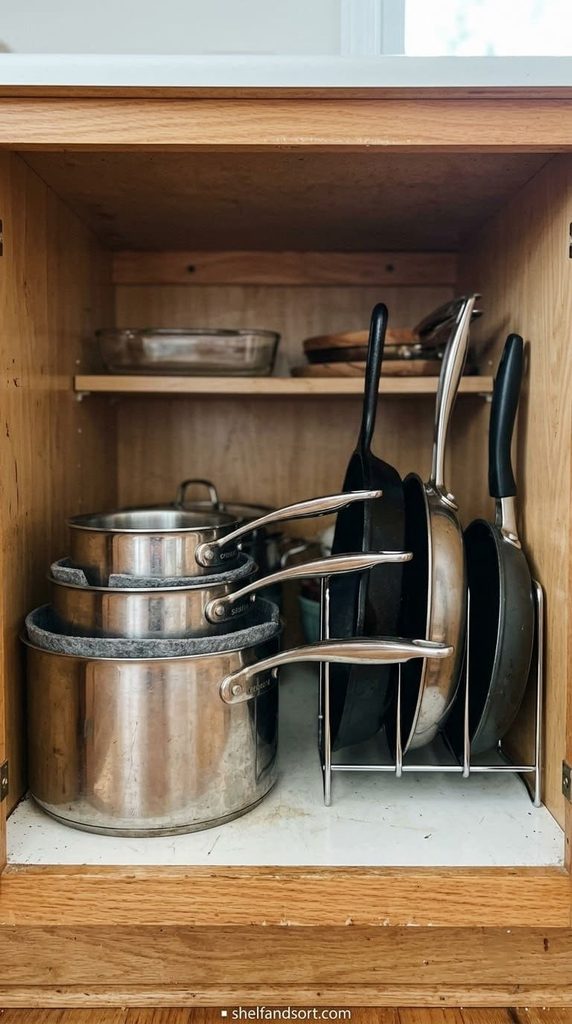
11. Nest pots and stand pans upright in a divider
Pots nest if you separate the lids. Slip a felt pad or a paper plate between them so they do not scratch, and stack biggest to smallest.
Pans do better standing up. A vertical divider or a wire organizer lets you pull the one you want without lifting three others off it.
The mistake is one tall stack of every pan you own. The pan you use most is always on the bottom. Stand them so every handle is visible.
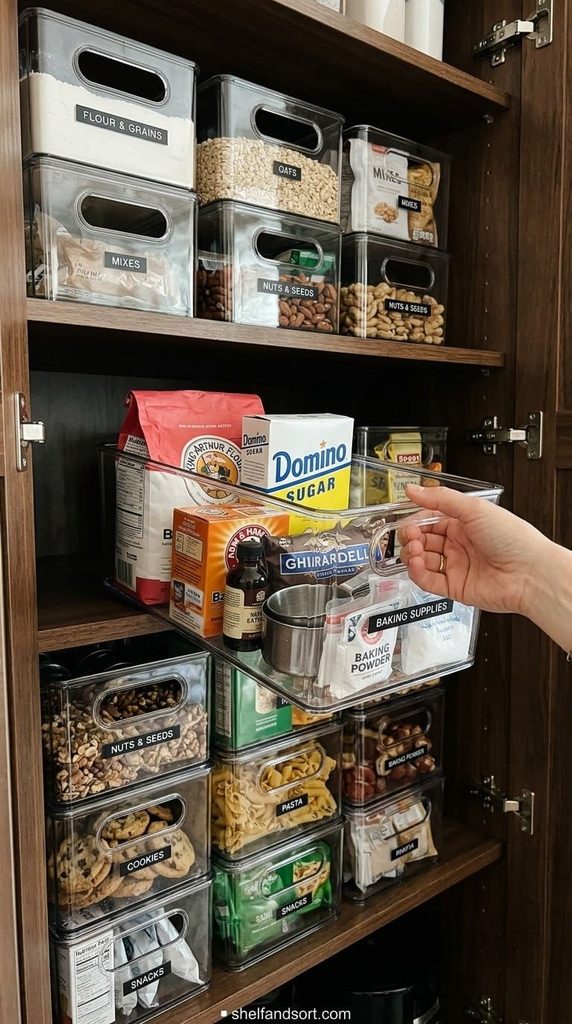
12. Use clear stackable bins for the cabinet you can’t see into
Every kitchen has one deep or high cabinet that swallows things. Clear stackable bins with handles turn it into pull-out drawers.
Group by category, one bin for snacks, one for baking, one for tea and coffee. Pull the whole bin down, take what you need, slide it back.
The mistake is opaque bins up high where you cannot see in. Clear only for the cabinets above eye level. Label the front either way.
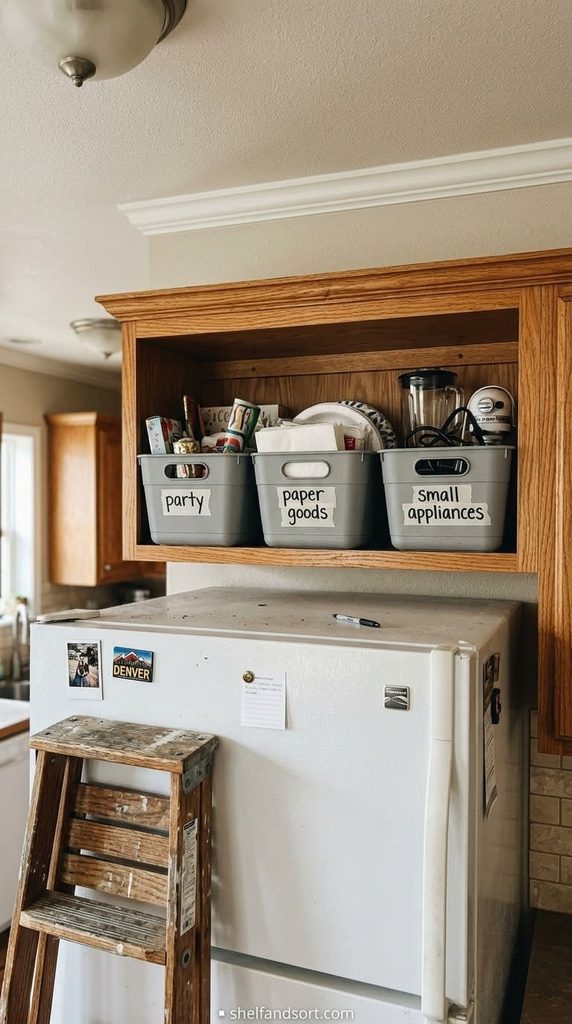
13. Store the cabinet-above-fridge stuff in labeled handled bins
The cabinet over the fridge is the worst spot in the kitchen: high, deep, and hard to reach. Do not fight it, just bin it.
Two or three handled bins, each labeled, holding things you need a few times a month. Party supplies, backup paper goods, the waffle iron. Grab the bin, not individual items.
The mistake is loose stacking up there. You knock three things down reaching for one. Bins make it a single safe pull.
Fix the drawers
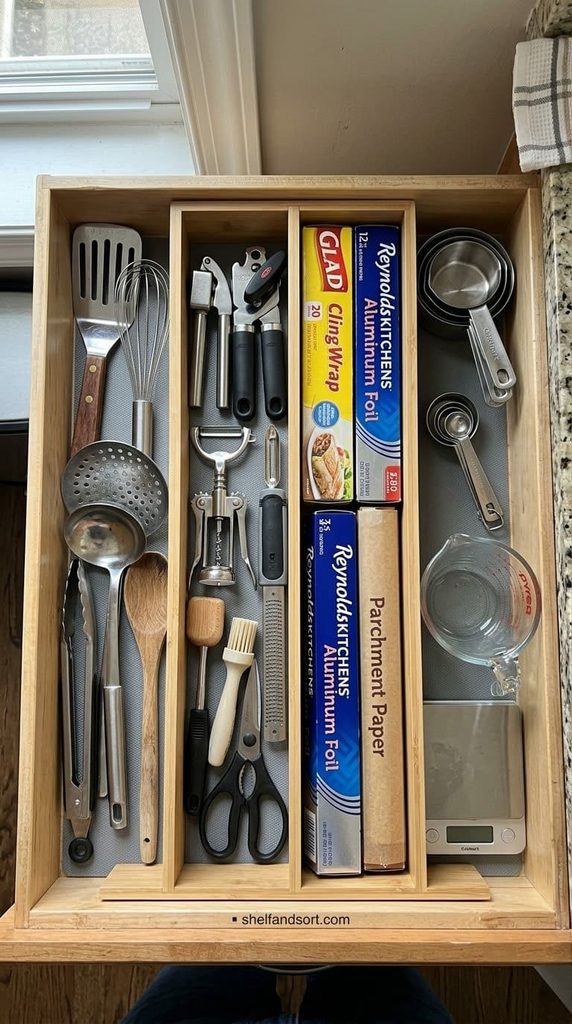
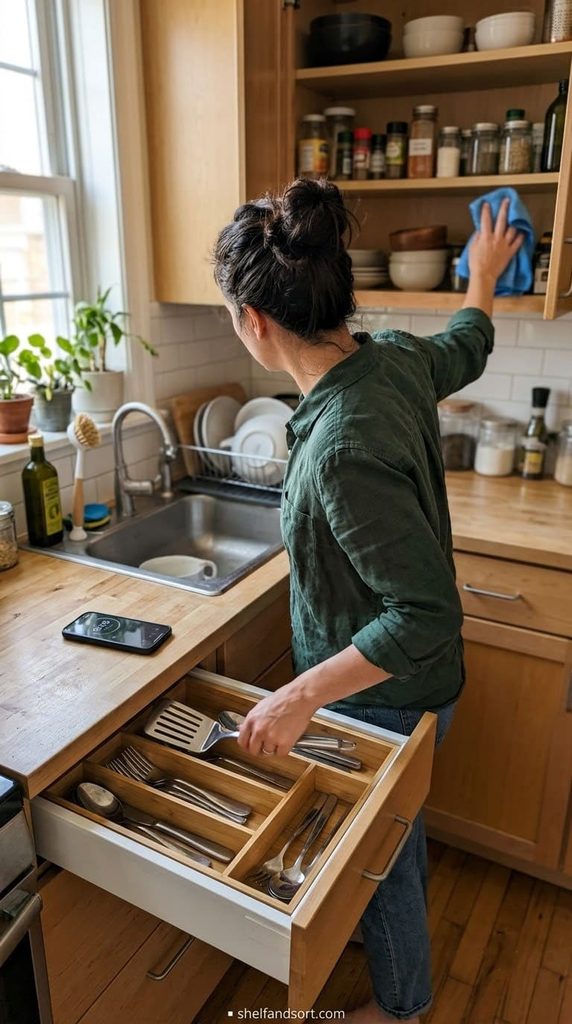
14. Add adjustable dividers to every drawer
Christian Pfeiffer, a professional organizer at Valley Organizing, told Homes and Gardens that dividers turn chaotic drawers into functional zones where every category has a defined home.
Measure each drawer’s interior, then fit spring-loaded or modular dividers so every group, utensils, gadgets, wraps, has its own lane. Bamboo or acrylic holds up. Cheap thin plastic bows and slides.
The mistake is dividers that do not span the drawer depth, so items slip behind them. Get ones that reach front to back or expand to fit.
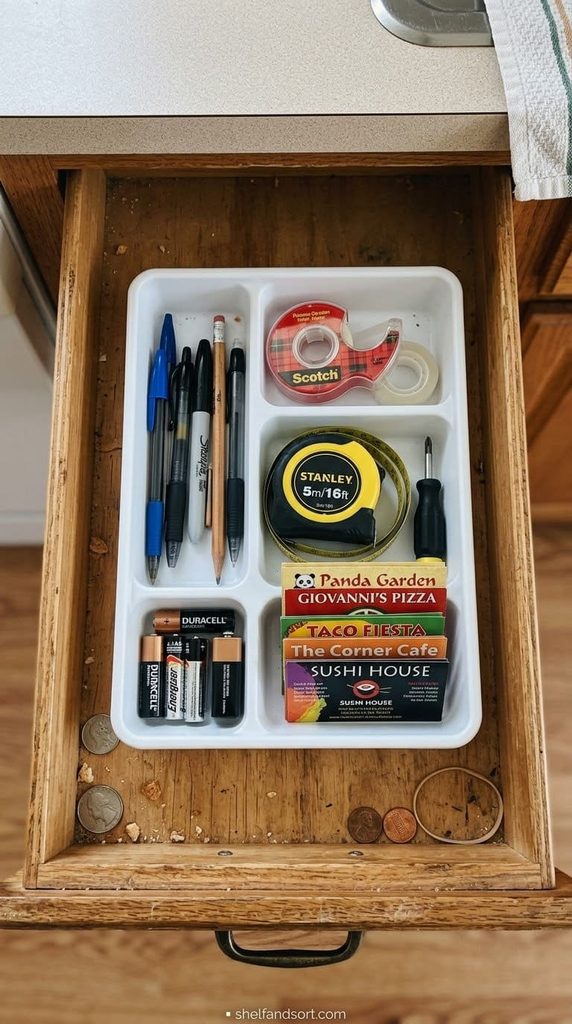
15. Give the junk drawer a small tray and a hard limit
Every kitchen gets one junk drawer. Accept it, then contain it. Drop in a small divided tray for pens, tape, batteries, and the takeout menus you actually keep.
The rule: if it does not fit in the tray, it does not live in the drawer. Once a season, dump the drawer and re-sort in five minutes.
The mistake is letting the junk drawer expand to a second drawer. One drawer, one tray, one limit.
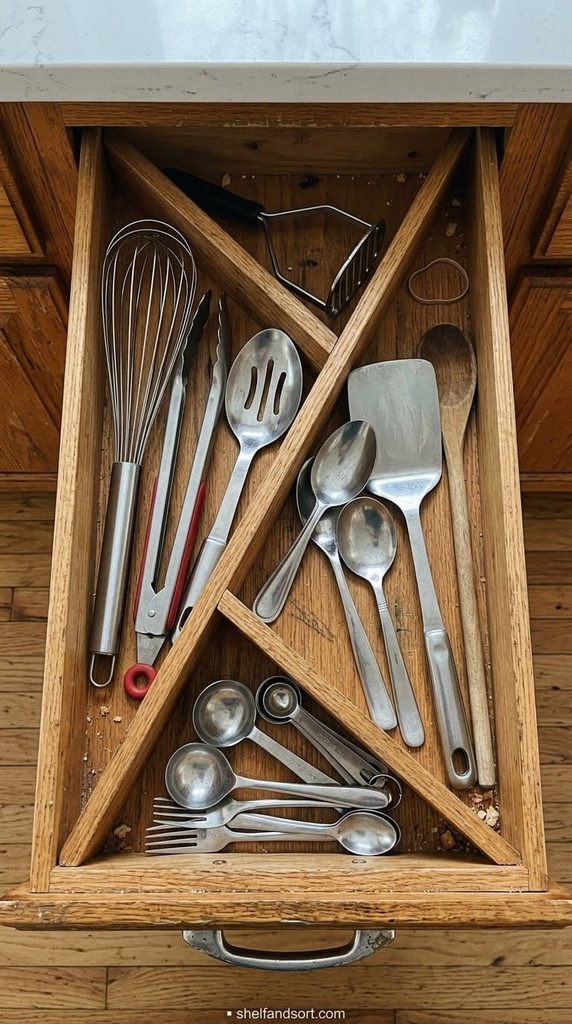
16. Store utensils diagonally to fit more
A drawer that is too short for your spatulas front to back will fit them on the diagonal. Set the divider corner to corner.
You gain a few inches of length and can often fit a whole extra row of tools. Works for long spoons, whisks, and tongs.
The mistake is forcing long utensils flat so the drawer will not close, then leaving it open an inch forever. Angle them.
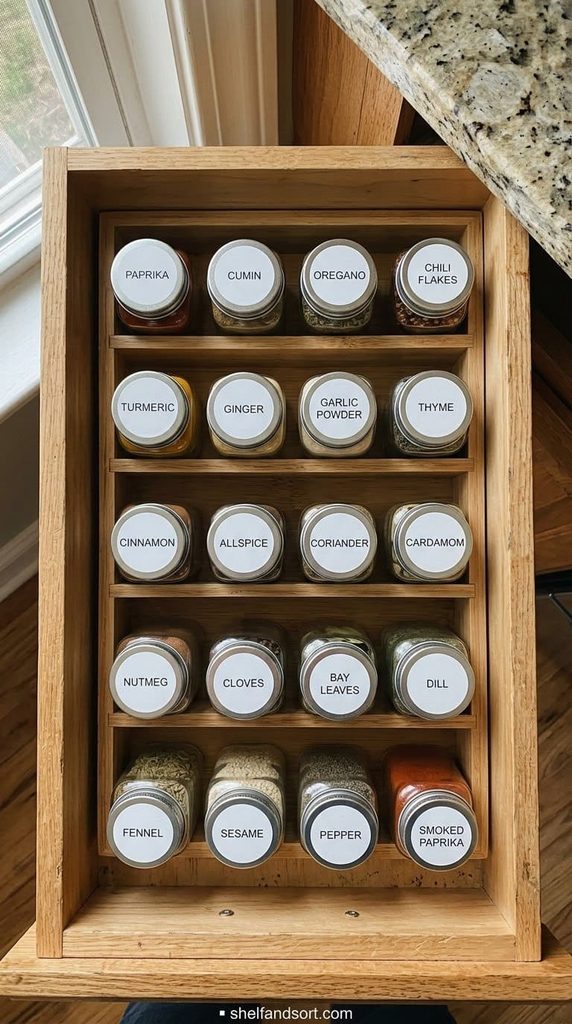
17. Move spices to a drawer insert, label the tops
Spices in a cabinet means digging and knocking jars over. A tiered drawer insert lays them flat so you read every label from above.
Decant into matching short jars if you want uniform, or just add a round label to the lid of what you have. Alphabetical or by cuisine, your call, just be consistent.
The mistake is a deep spice drawer with jars standing up. The back row is invisible and you rebuy cumin every few months. Lay them down.
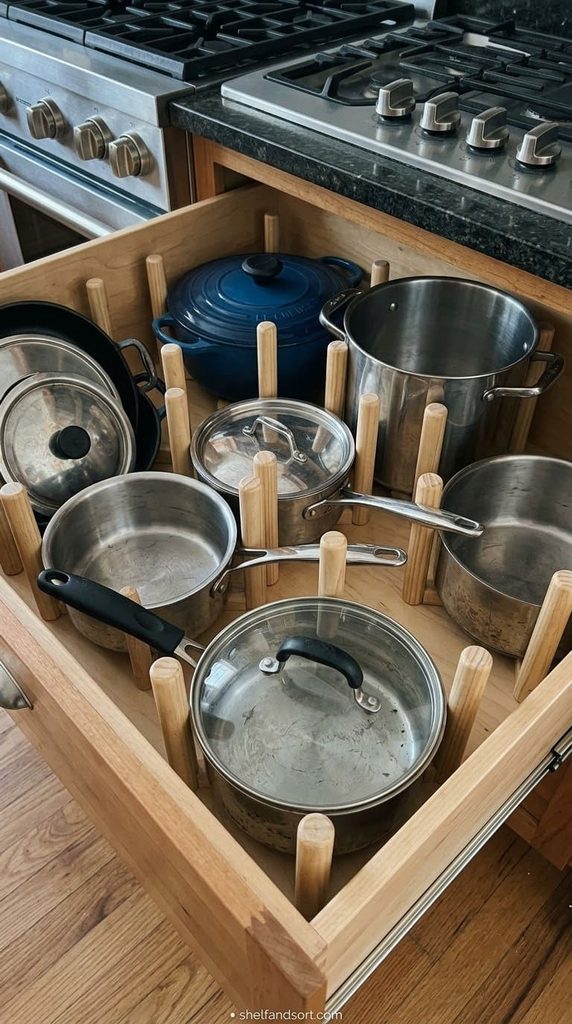
18. Keep a single deep drawer for pots with a divider
If you have a deep drawer under the stove, it beats a low cabinet for pots. No bending, no reaching into the dark.
Add tall pegs or a divider so pots do not slide and clang every time you open it. Heaviest at the back, everyday pot at the front.
The mistake is a deep drawer with no divider. Everything migrates to one corner and the drawer gets heavy and loud. Peg it.
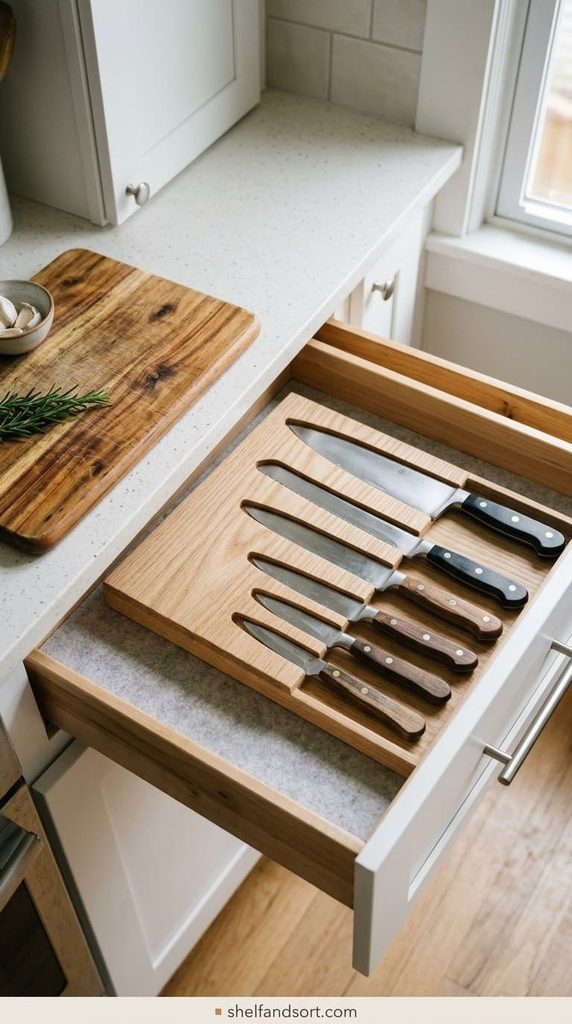
19. Use a drawer as a knife block with an in-drawer tray
A countertop knife block eats prime counter space. An in-drawer knife tray holds the same knives flat, blades protected, out of sight.
Put it in the drawer closest to your cutting board. Slots keep edges from banging together, which is what dulls them.
The mistake is loose knives in a drawer. It is a safety problem and it wrecks the blades. Use a slotted tray or a magnetic in-drawer strip.
Clear the counters
20. Follow the daily-use-only rule for counter appliances
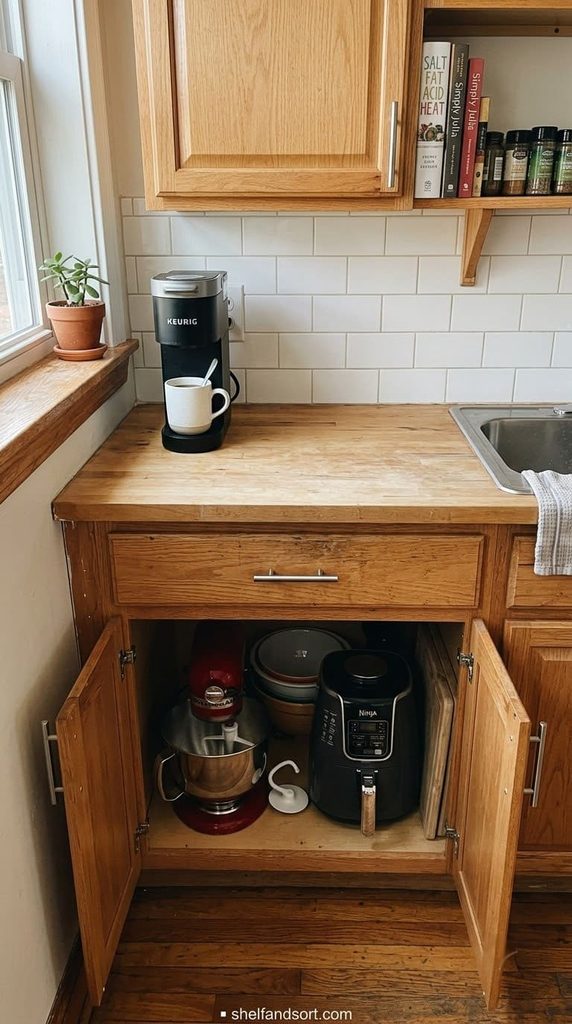
Look at every appliance on your counter. If you did not use it in the last two days, it comes off.
The stand mixer, the air fryer, the blender: unless they run daily, they go in a cabinet near their zone. The counter is for prep space, not appliance parking.
The mistake is leaving something out because it is heavy to move. Store it at the front of a low cabinet so lifting it out is easy, and the counter stays clear.
21. Corral the stuff that stays out on one tray
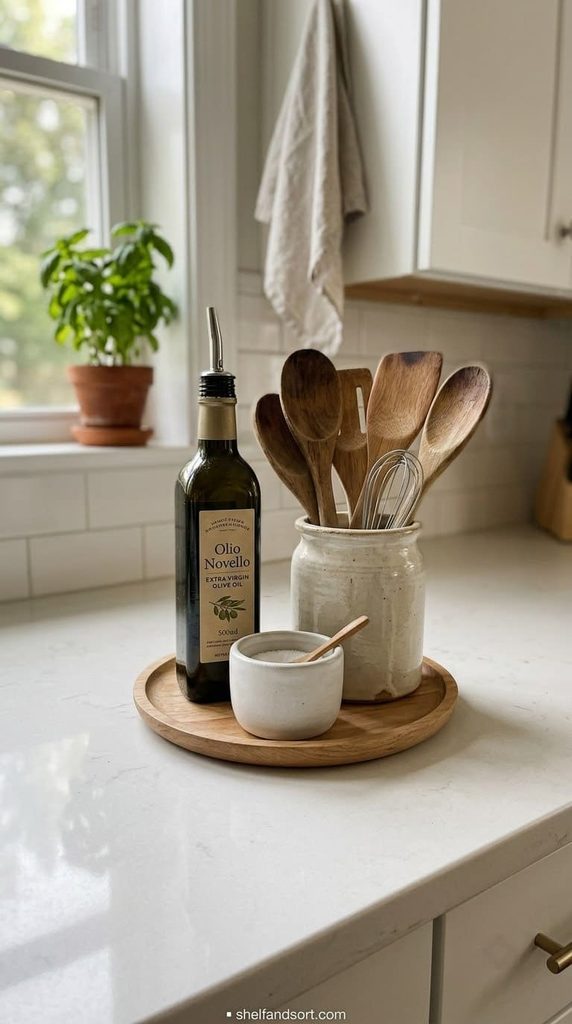
A few things earn a permanent counter spot: oil, salt, a utensil crock, maybe the coffee setup. Put them all on one small tray.
The tray draws a border around the clutter and makes wiping the counter a one-move job: lift the tray, wipe, set it back.
The mistake is those same items scattered across the whole counter. Same number of things, but it reads as mess instead of a station.
22. Add a rolling cart for the counter you don’t have
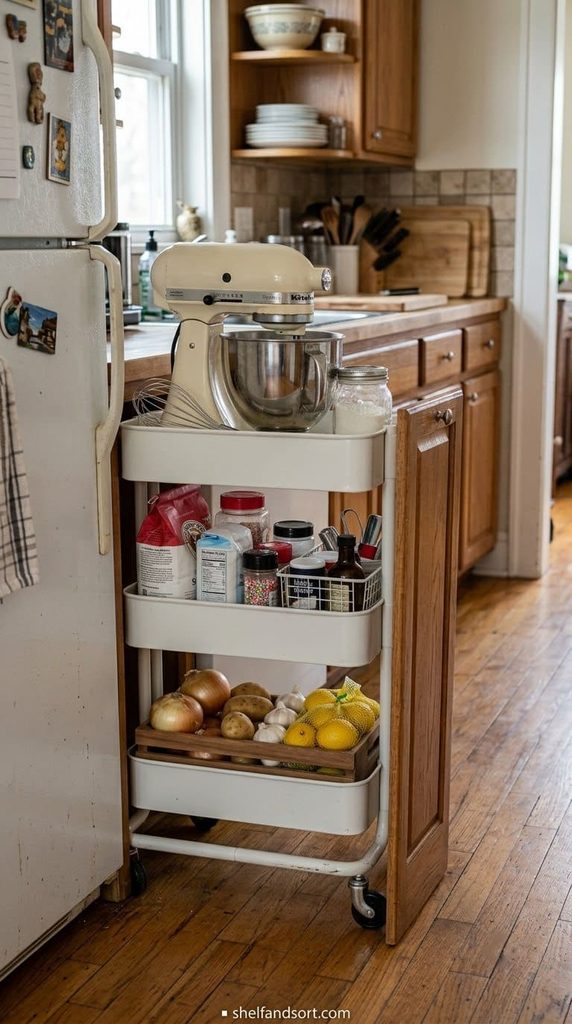
A slim rolling cart is extra counter and storage that tucks into a gap and rolls out when you need it. Park it beside the fridge or in a corner.
Use the top as prep surface, the shelves for produce, small appliances, or baking supplies. NKBA guidelines call for at least 24 inches of landing space beside a sink and 15 inches by the fridge. A cart can add that missing landing zone.
The mistake is a cart too wide for the walkway. Keep at least 36 inches of clear path. Measure the gap before you buy.
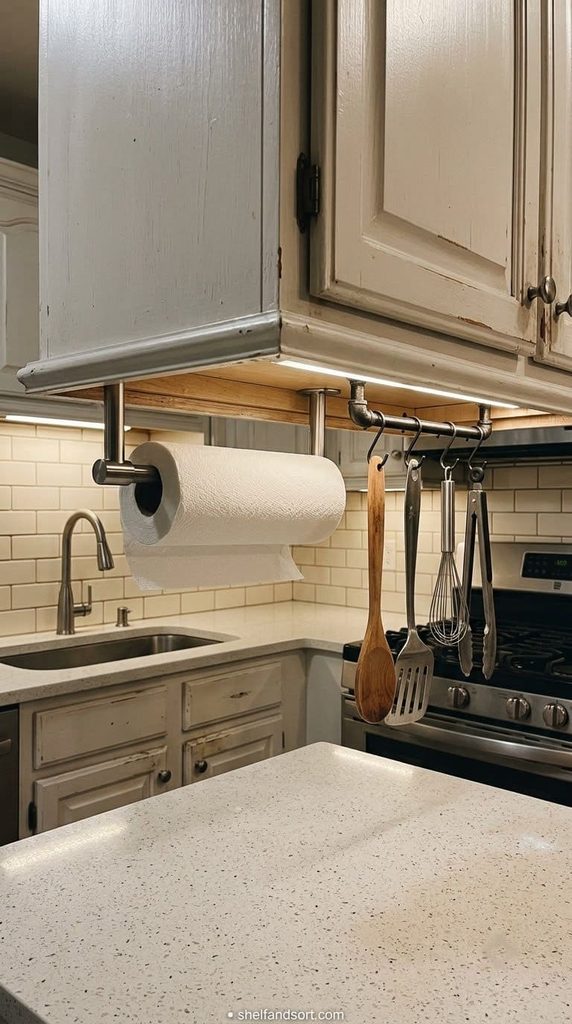
23. Mount a paper towel holder and utensil rail under a cabinet
The underside of an upper cabinet is unused space right above the counter. An under-cabinet paper towel bar and a small rail free up the counter below.
Screw-in or strong adhesive both work. Put the paper towels near the sink, the utensil rail near the stove.
The mistake is mounting a rail so low it blocks your workspace or your sightline to the backsplash. Keep it tight to the cabinet bottom.
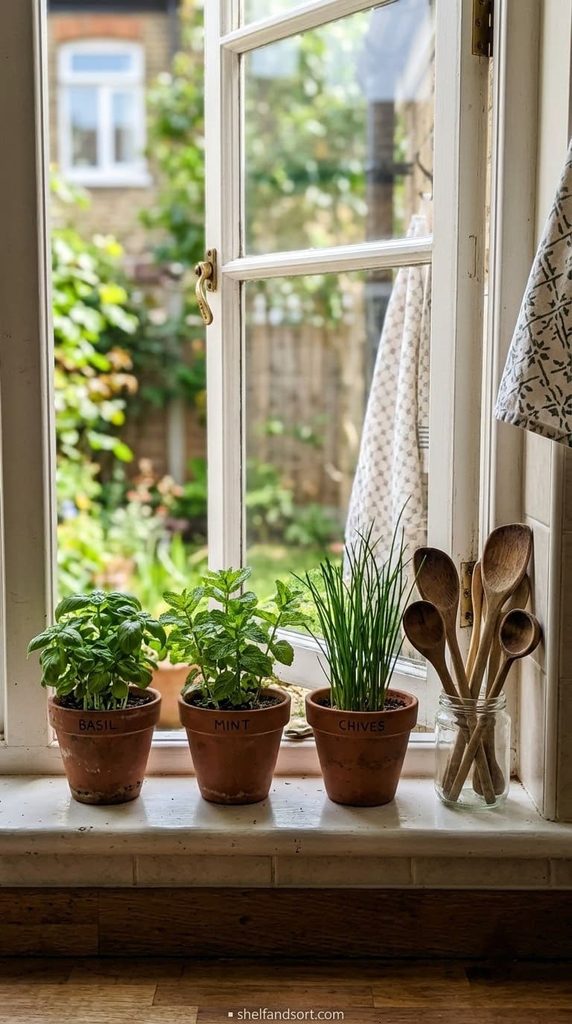
24. Use the windowsill for herbs and small jars
If your kitchen has a window, the sill is free shelf space with good light. Line up a few potted herbs, a small jar of wooden spoons, or your everyday olive oil.
Keep it to one row so you can still open the window and clean the sill. Herbs that tolerate a bright sill: basil, mint, chives.
The mistake is crowding the sill with things that block the light or tip into the sink. One tidy row, nothing precarious.
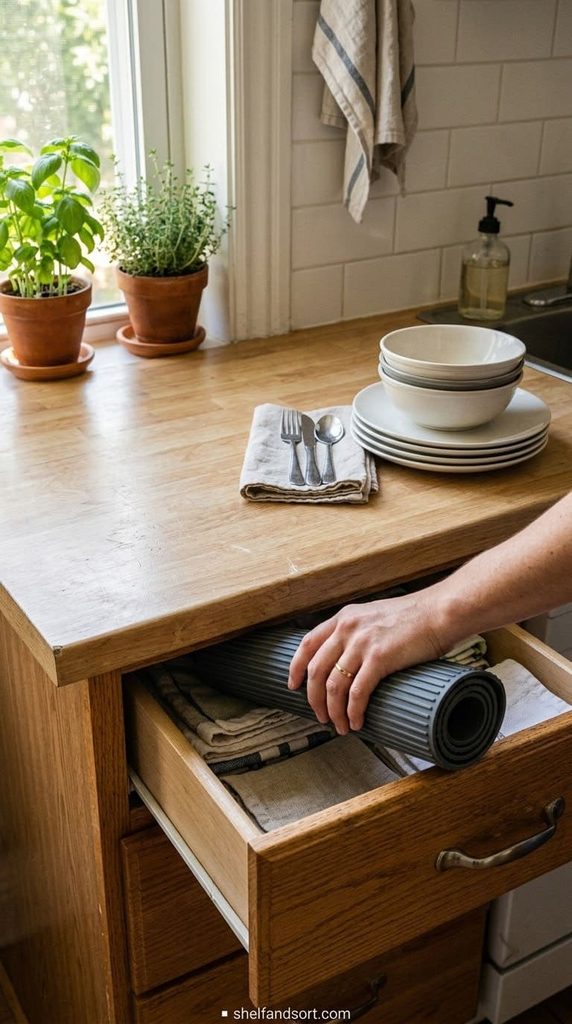
25. Keep a fold-flat drying mat instead of a standing rack
A standing dish rack claims a permanent chunk of counter and looks messy. A roll-up or fold-flat mat does the same job and disappears into a drawer when dishes are dry.
Wash, set dishes on the mat, then roll it up and stash it. The counter is back to full size in seconds.
The mistake is keeping the standing rack “for now” alongside the mat. Pick one. The mat wins in a small kitchen almost every time.
Go vertical on the walls
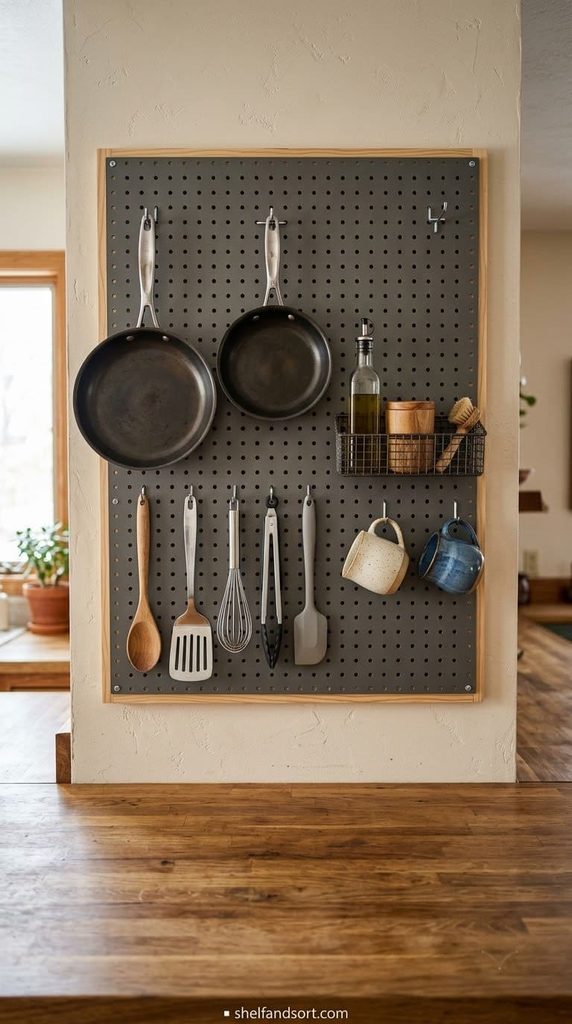
26. Hang a pegboard on any open wall
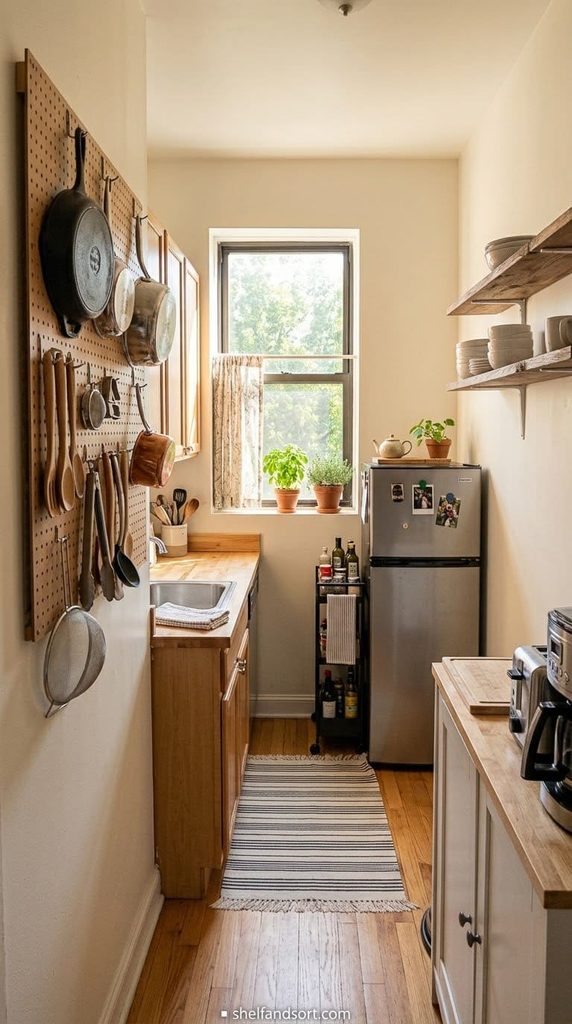
A pegboard is the highest-impact move for a small kitchen with a bare wall. Pots, pans, utensils, mugs, and small baskets all move off the counter and out of cabinets.
Mount it with a half-inch spacer so hooks sit flush. Trace each tool’s outline if you want the system to survive other people putting things back.
The mistake is overloading it into a wall of visual noise. Leave space between items. A pegboard at 70 percent full still looks intentional.
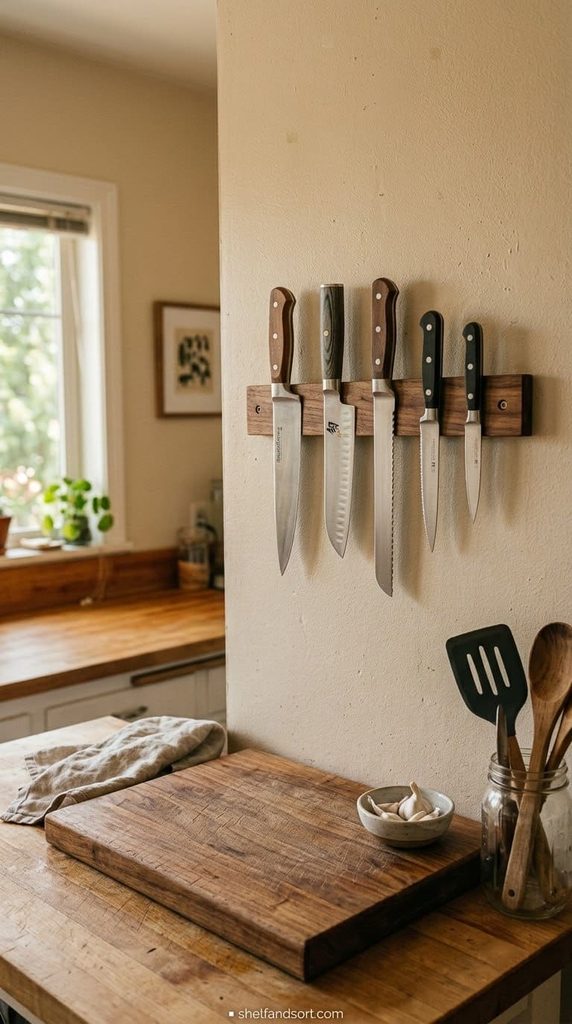
27. Put up a magnetic knife strip
A magnetic strip on the wall or the side of a cabinet holds your knives blade-down, visible, and off the counter. It also keeps edges better than a block.
Mount it near the cutting board at a height kids cannot reach. Test each knife: the strip should hold it firmly with a slight tug to remove.
The mistake is mounting it over the sink or stove where knives get wet or greasy. Dry wall space near prep only.
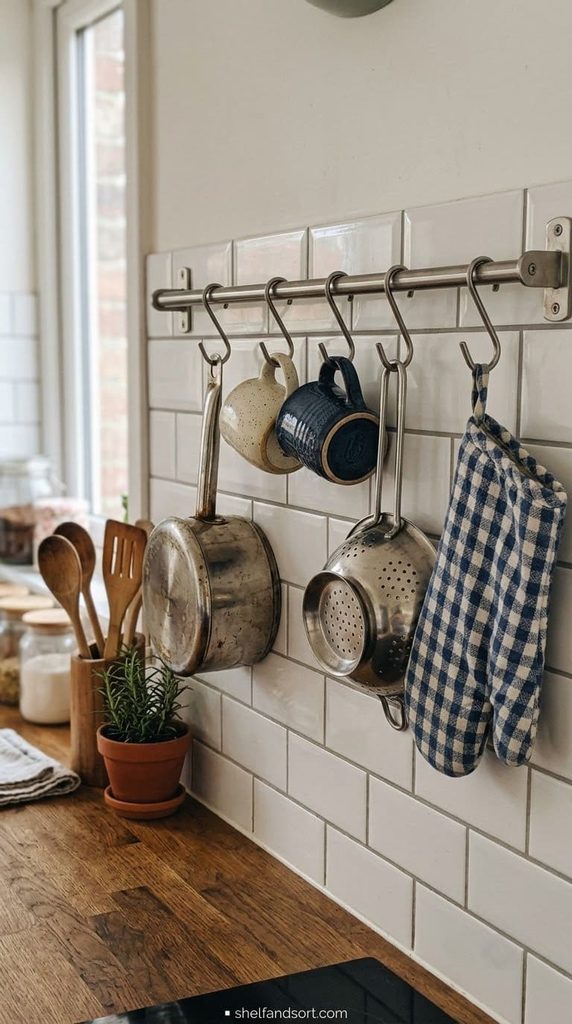
28. Add a rail with S-hooks for pots, mugs, and tools
A single rail with a row of S-hooks is cheap, renter-friendly, and holds a surprising amount. Pots, mugs, colanders, oven mitts, measuring cups.
Run it along a backsplash gap or the side of a cabinet. Hang the heaviest items nearest a stud or anchor.
The mistake is one rail crammed with everything so hooks slide and clink. Two shorter rails in different zones beat one overloaded one.
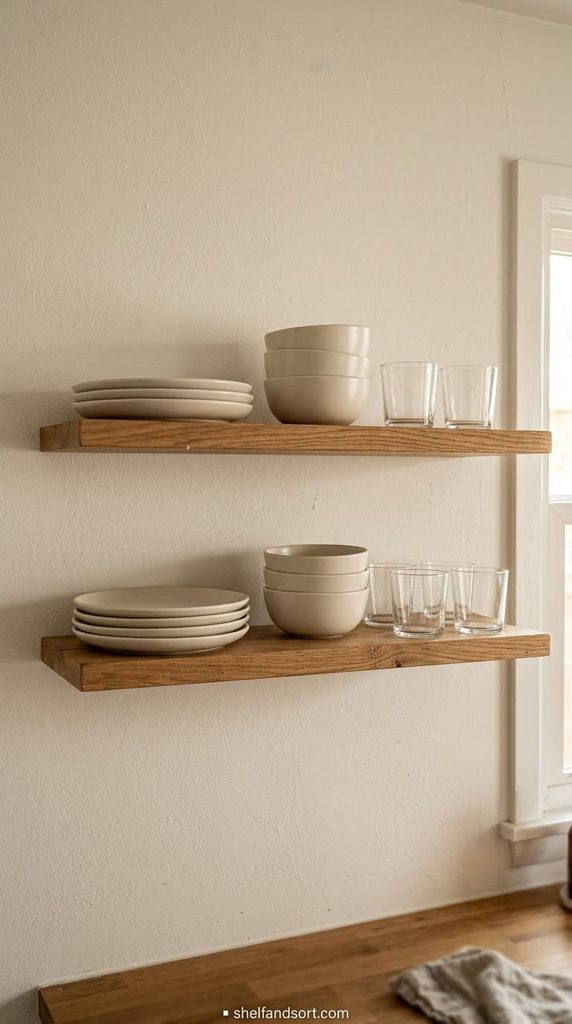
29. Float two narrow shelves for everyday dishes
Two slim shelves on a bare wall hold the plates, bowls, and glasses you use every day, right where you need them, freeing a whole cabinet.
Keep the depth to 6 or 7 inches so they do not crowd the room. Stack only what you use daily. Everything else stays in a cabinet.
The mistake is deep shelves stacked high with rarely used serving pieces. Open shelves show everything, so only your neat daily set earns a spot.
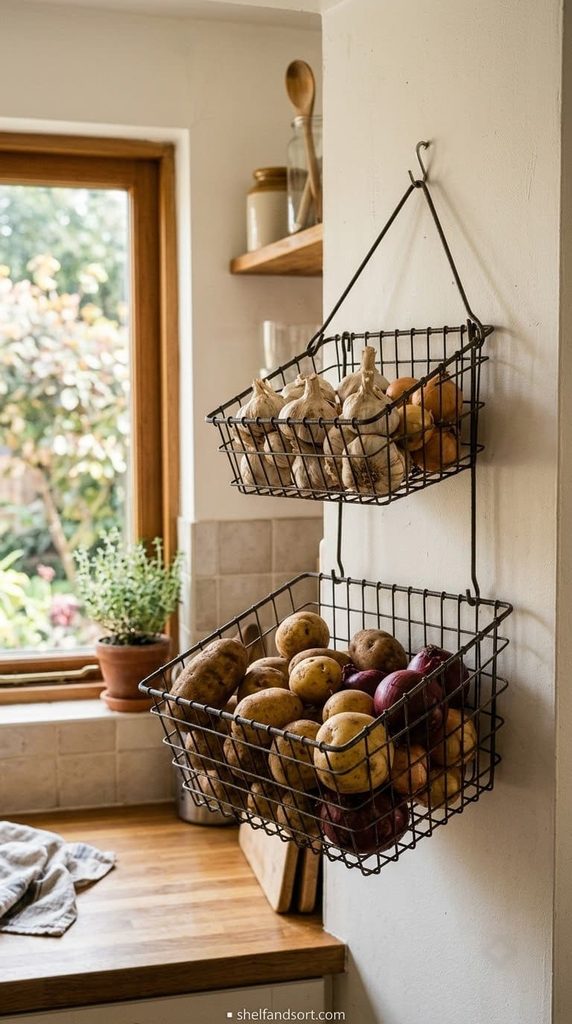
30. Hang a wire basket for produce off the wall or ceiling
Onions, potatoes, and garlic do not need the fridge and they eat counter space. A hanging wire basket or a two-tier wall basket gets them airborne.
Hang it away from the stove and out of direct sun so nothing sprouts or softens fast. Near a window with indirect light is ideal.
The mistake is a hanging basket over the prep counter where you keep bumping it. Put it in a corner or off the end of a cabinet run.
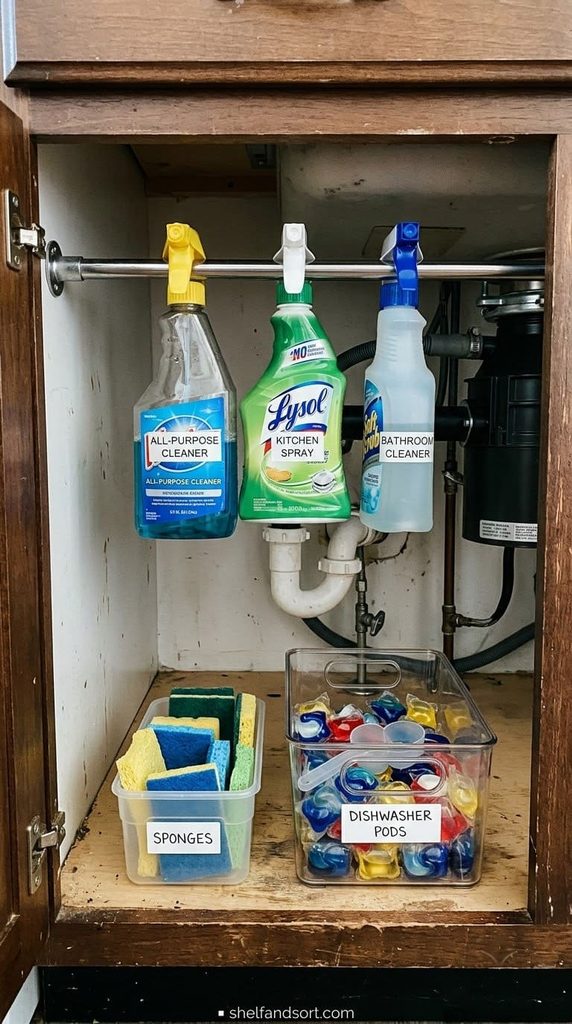
31. Use a tension rod under the sink for spray bottles
Under the sink is wasted vertical space and a tangle of bottles. A tension rod across the cabinet lets you hang spray bottles by their trigger heads.
The floor of the cabinet is now clear for a bin of sponges and a bin of dishwasher pods. Instant second level.
The mistake is a tension rod set too loose that drops under weight. Twist it tight and test with the heaviest bottle before you trust it.
Win the hard spots
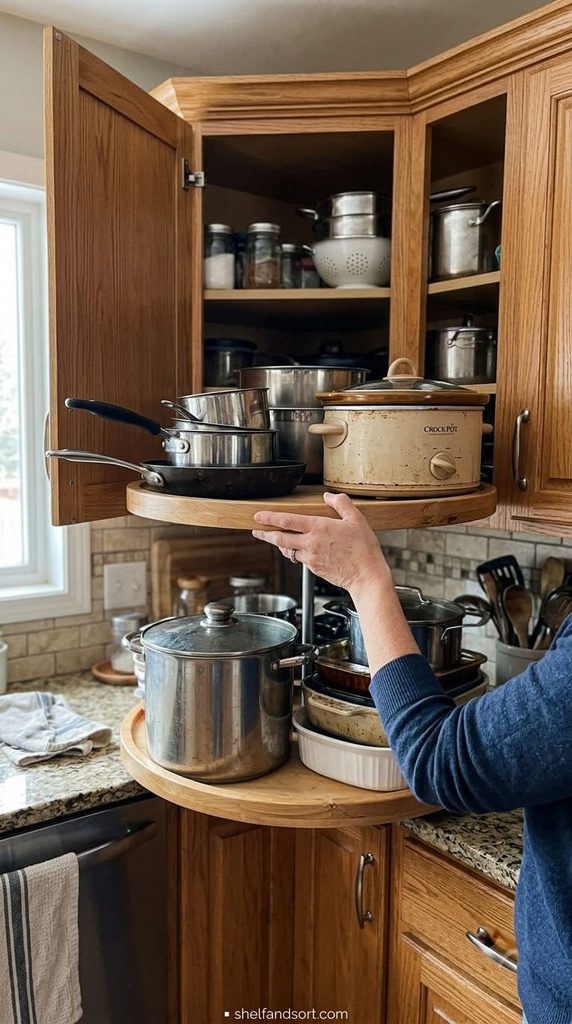
32. Add a pull-out or lazy Susan to the corner cabinet
The blind corner cabinet is the single most wasted space in most kitchens. A half-moon pull-out or a large two-tier turntable brings the back into reach.
Turntable is the cheap renter option, a pull-out is the upgrade if you own. Store pots, small appliances, or bulk backups there since you access it less often.
The mistake is leaving the corner as a black hole you shove things into once and forget. Even a basic turntable recovers real square footage.
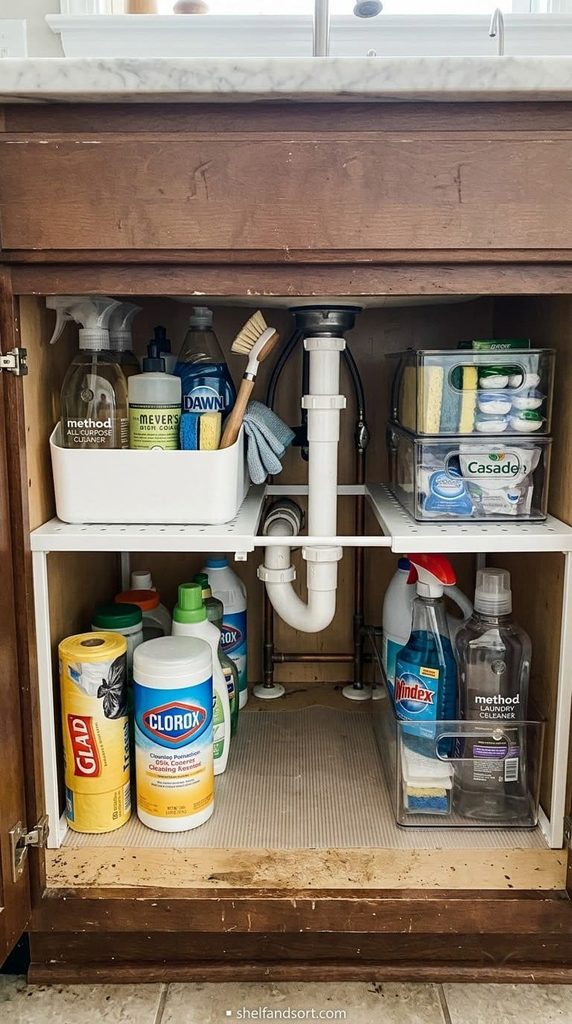
33. Use stackable bins and a riser under the sink
Around the pipes under the sink, an under-sink shelf with a cutout or a set of stackable bins builds a second and third level.
Put daily cleaning supplies on top, refills and backups below. Add a small caddy you can lift out whole to carry cleaning around the house.
The mistake is one deep pile under there where you knock everything over to reach the drain snake. Two levels and a lift-out caddy fix it.
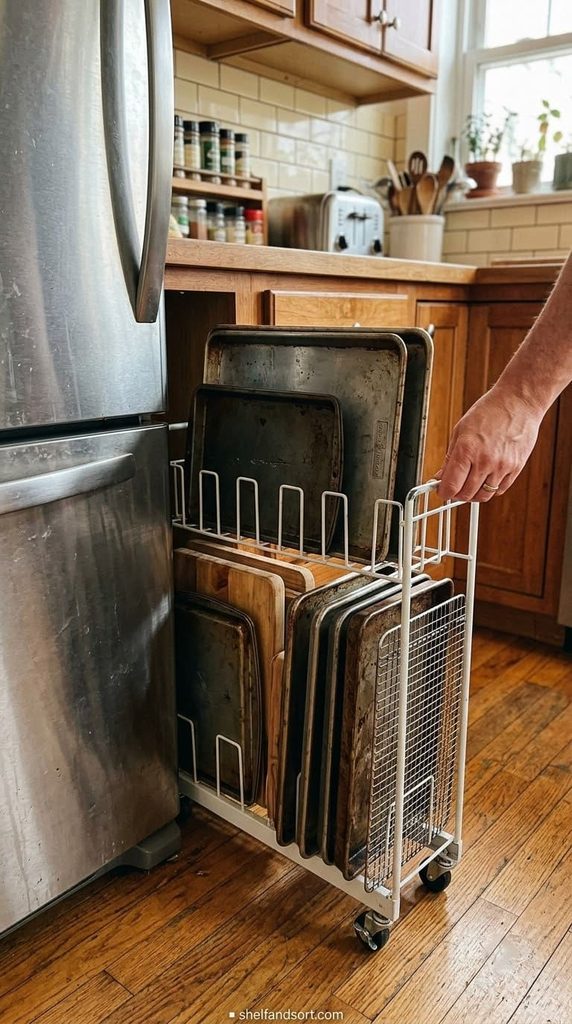
34. Slide trays and boards into the gap beside the fridge
The 3-inch gap next to the fridge or stove fits baking sheets, cutting boards, cooling racks, and serving trays on their edge.
Buy a slim pull-out rack on wheels or a simple vertical organizer that sits in the gap. Everything flat now has a dedicated slot.
The mistake is leaving that gap empty, or worse, letting it collect dust and a lost sponge. It is prime vertical storage for flat things.
35. Put a 10-minute weekly reset on the calendar
This is the one that makes the other 34 last. Once a week, spend 10 minutes returning the kitchen to its baseline.
Clear the counter tray, put strays back in their zone, wipe the shelves you touched, toss one expired item, and break down the recycling. That is it.
The mistake is waiting for a monthly deep clean. In a small kitchen the drift shows in days, not weeks. Ten minutes weekly beats two hours monthly.
Pair it with something you already do, like the night before trash day, so it sticks.
Where to start if you only do five
You do not need all 35 at once. If your kitchen feels out of control, these five move the needle most:
- Empty and purge in one pass (idea 1)
- Set up work zones (idea 2)
- Add shelf risers to every cabinet (idea 6)
- Add dividers to every drawer (idea 14)
- Start the weekly 10-minute reset (idea 35)
Ideas 1, 2, and 35 cost nothing. Ideas 6 and 14 are under $30 each. That is the whole foundation.
Small kitchen storage: what goes where
| Zone | Best for | Skip storing here |
|---|---|---|
| Stove-side drawer and cabinet | Daily utensils, go-to pan, oil, salt | Baking sheets, storage containers, party gear |
| Sink-side cabinet | Cleaning supplies, dish soap, sponges, trash and recycling | Food, small appliances |
| Prep-zone drawer | Knives in a tray, cutting boards, measuring tools | Junk, batteries, takeout menus |
| Upper cabinets | Everyday dishes and glasses, on risers | Heavy items, rarely used serveware |
| Above the fridge | Labeled bins of monthly-use items | Anything you need daily |
| Walls | Pots, pans, mugs, produce basket, knife strip | Anything that drips or needs a lid |
| Rolling cart | Overflow prep surface, produce, one appliance | Permanent heavy storage |
How to keep a small kitchen organized long term
The system is the zone map plus the weekly reset. Once each zone is set, every item coming into the kitchen has one obvious place to land. Groceries do not sit on the counter “for now.”
The 10-minute weekly reset from idea 35 catches the drift before it piles up. Skip it for two weeks in a small kitchen and you are back to a full re-sort. Do it every week and the kitchen mostly holds itself.
Twice a year, do a fast re-purge. Professional organizers point out that kitchen drawers and cabinets fill with duplicate tools and broken gadgets over 18 to 24 months if nobody edits them. Fifteen minutes with a donate box every six months keeps that from happening.
And wipe down the open shelves and the counter tray once a month. In a small kitchen everything is close to the stove, so a grease film builds up faster than you would think.
Frequently asked questions
How do I organize a small kitchen with almost no cabinet space?
Go vertical and go external. Put a pegboard or a rail with S-hooks on any bare wall for pots, pans, and utensils. Add two narrow shelves for your everyday dishes. Bring in a slim rolling cart for overflow. Inside the cabinets you do have, shelf risers and inside-door racks roughly double the capacity. Then move anything you use less than weekly out of the kitchen entirely, into a closet or under a bed in a labeled bin.
What is the first thing to do when organizing a small kitchen?
Empty everything out in one pass and purge. Pull every item from every cabinet and drawer onto the counter and table, then sort fast into keep, donate, and toss. You cannot build a good system around duplicates and gadgets you never use. Once the volume is down, set up work zones so each task has its tools in one nearby spot. Only then does it make sense to buy any organizers.
Are drawer dividers and shelf risers worth it in a small kitchen?
Yes, they are the two highest-value purchases. A shelf riser splits the dead air above a stack of plates into a second usable level, and it is often adjustable so one unit fits several cabinets. Dividers stop a drawer from becoming a single sliding pile and give every category a lane. Both are under $30, both are renter-friendly with no installation, and both pay off every single day.
How do I keep a small kitchen organized once it’s set up?
Run a 10-minute reset once a week. Clear the counter tray, return strays to their zones, wipe the shelves you used, toss one expired item, and break down the recycling. Attach it to something you already do, like the night before trash day. Then twice a year, spend 15 minutes with a donate box removing the duplicate tools and broken gadgets that always accumulate.
Should I use open shelves in a small kitchen?
Open shelves work in a small kitchen only if you keep them to your everyday dishes and stay disciplined. Two narrow shelves of matching plates, bowls, and glasses free up a full cabinet and put those items right where you need them. But open shelves show everything, so they are the wrong place for mismatched serveware or rarely used pieces. Keep the display tight and store the rest behind doors.
Products We Recommend
This post contains affiliate links. We may earn a commission on qualifying purchases at no extra cost to you.
Simple Houseware Cabinet Counter Shelf Organizer
This is the shelf-riser move from idea 6, and it has the biggest rating sample of anything here, so it is a safe first buy. It expands from about 12 to 22 inches wide and stacks, so one unit fits a plate cabinet, a mug cabinet, or under the sink. The steel top holds real weight, unlike the flexy acrylic versions.
Shop Now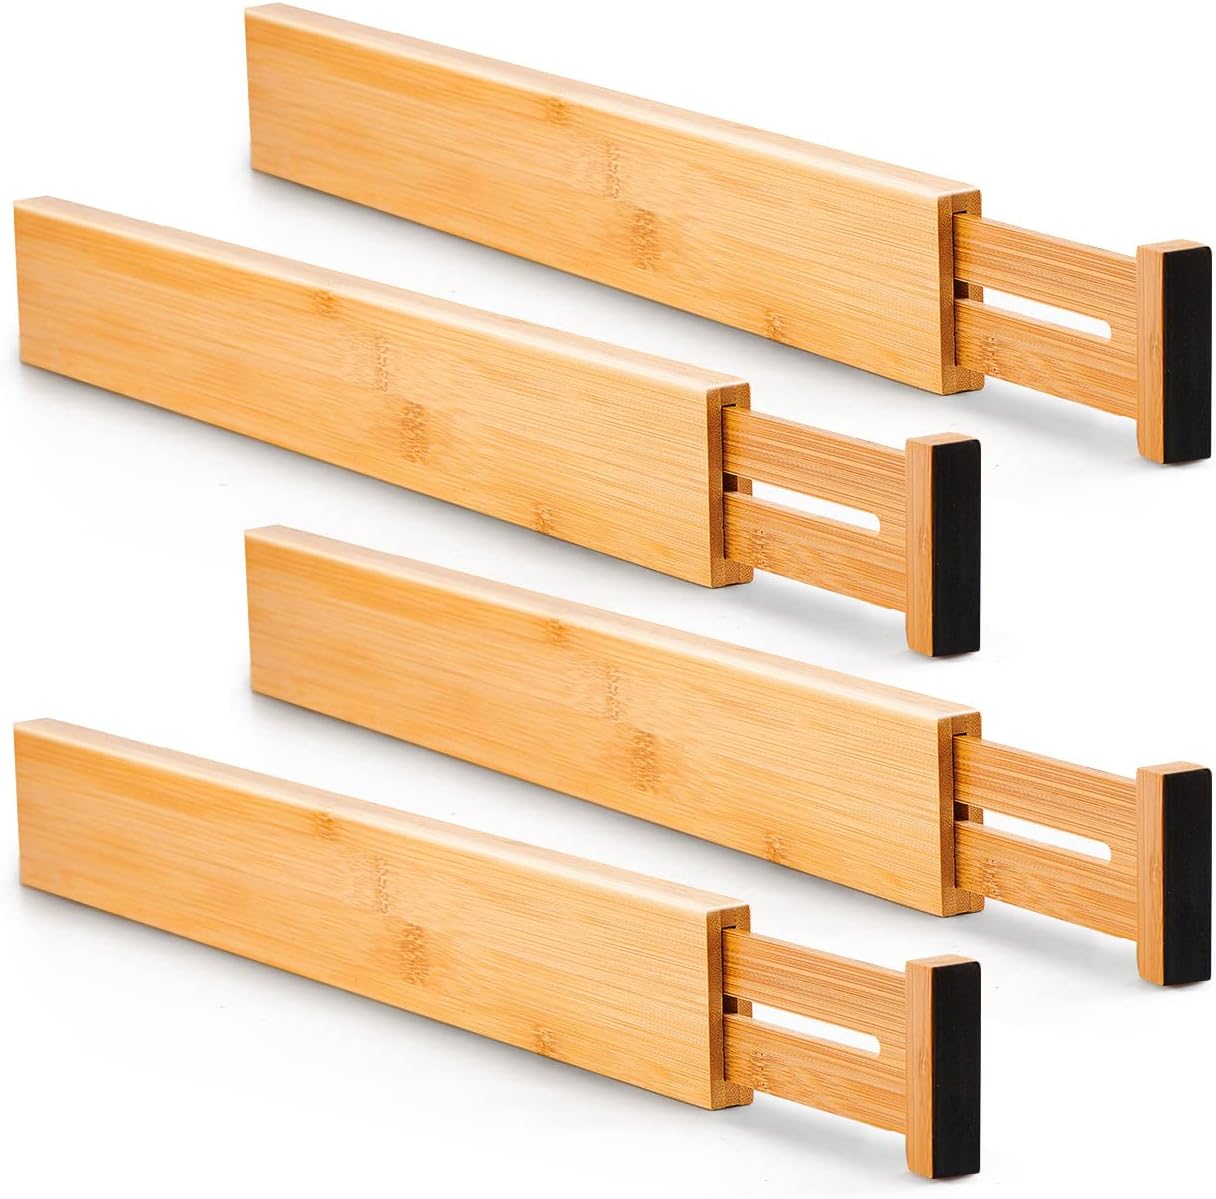
Utoplike 4-Piece Bamboo Adjustable Drawer Dividers
This is idea 14, the drawer fix that professional organizer Christian Pfeiffer calls turning chaos into zones. The spring-loaded ends expand from about 17.8 to 20.6 inches to grip most standard drawers with no tools or screws, which matters if you rent. Bamboo does not bow or slide the way the thin plastic dividers do.
Shop now
MAX Houser 3-Tier Rolling Utility Cart
This is idea 22, the extra counter and landing space a small kitchen is missing. It is narrow enough to park in the gap beside a fridge and rolls out to the stove when you prep. Three deep tiers hold produce, a stand mixer, and baking supplies, clearing all of that off the counter and out of a cabinet.
Shop now