25 Smart Ideas to Make Open Pantry Shelving Look Good (and Stay That Way)
Open pantry shelves put everything you own on display, which is why they slide into chaos so fast. This guide gives you 25 styling and system ideas, plus the weekly rule that keeps the whole thing looking good after the first grocery run.
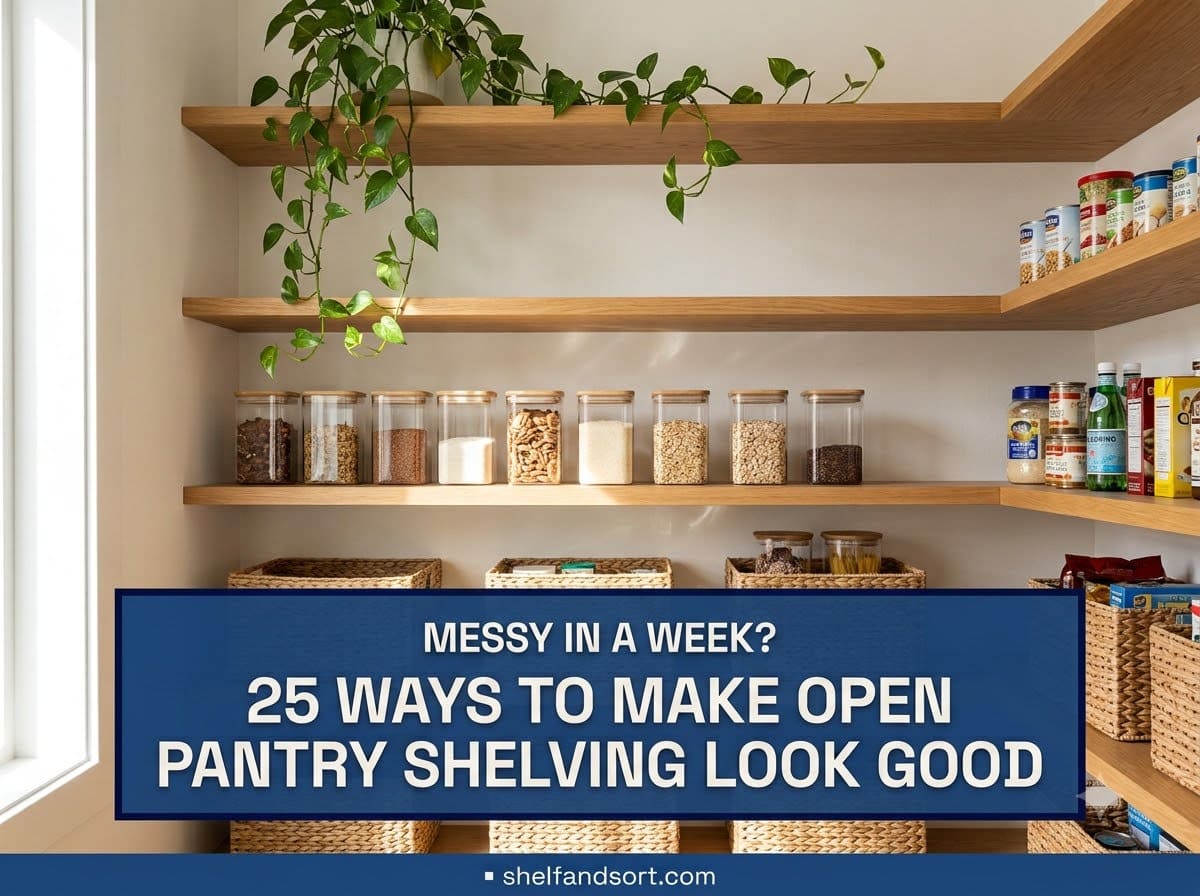
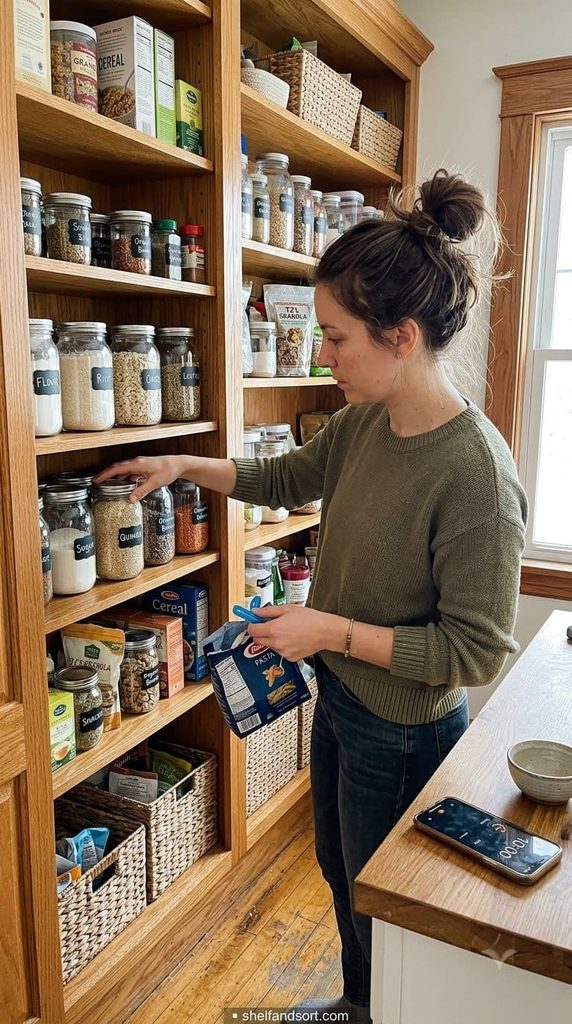
Open pantry shelving looks good when three things are true at once. Every item has a fixed home, similar things are grouped into zones, and the packaging you see is either clear glass or a matching basket. Start by emptying the shelves and sorting into keep, toss, and relocate piles. Then give each shelf one job, like breakfast on the top working shelf and snacks on a low shelf the kids can reach. Decant only the staples you refill often, such as flour, sugar, rice, and pasta, into matching airtight canisters. Everything else goes into opaque bins so odd boxes and bags stay hidden. Face labels forward on one line. Finish with a 10-minute reset every Friday to put strays back before they pile up. The system, not the containers, is what keeps it neat.
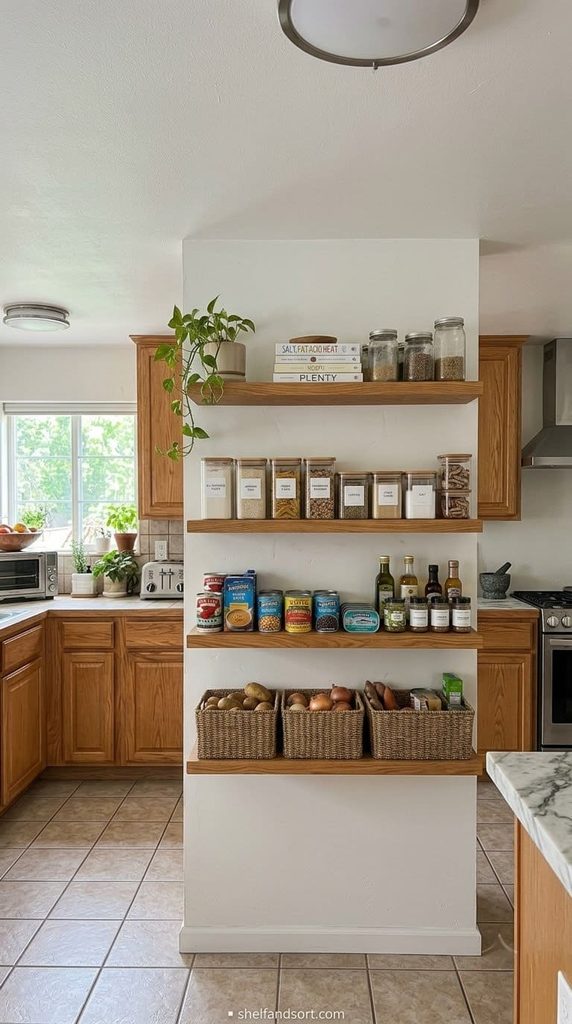
Why open pantry shelves are hard to keep neat
Closed pantry doors hide a multitude of sins. Open shelves do not. Every mismatched cereal box and half-crushed chip bag is right there in the kitchen, at eye level, all day.
So the bar is higher. An open pantry has to work like storage and read like decor at the same time. That sounds impossible, but it comes down to a few repeatable moves.
Most “pretty pantry” photos you have seen were styled for the shot and fell apart by the weekend. The ideas below are built to survive a real Tuesday grocery haul. Each one has a specific way to do it, a common mistake to skip, and a fast version for when you only have a few minutes.
Professional organizer Jolene Monaco, a board-certified organizer and professional member of the National Association of Productivity and Organizing Professionals, makes one point worth remembering before you buy anything. Decanting and container systems only work if you can keep up with them. Build a system you will actually maintain, not the one that looks best empty.
The 25 ideas
1. Empty the shelves and give every category one home
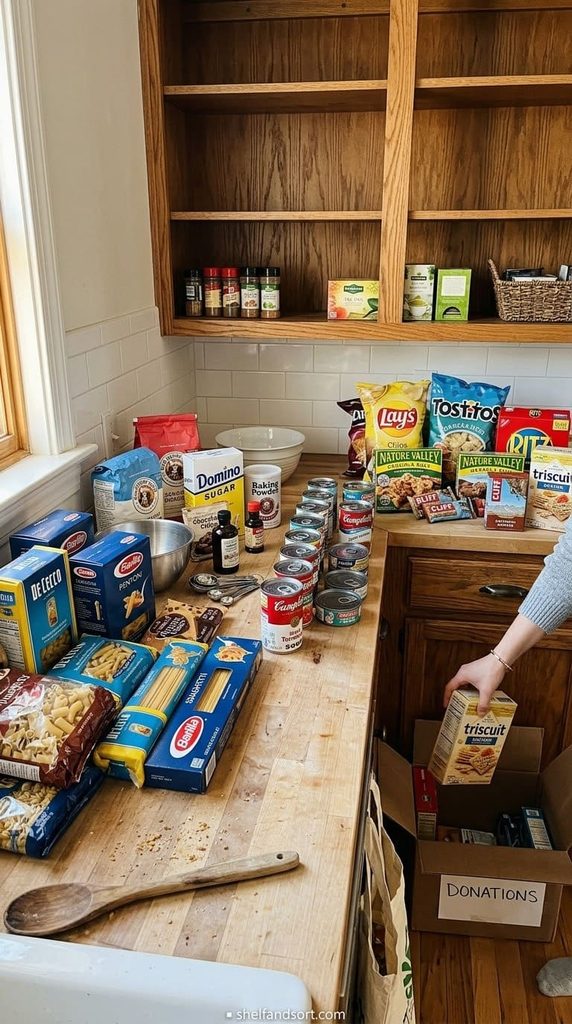
Pull everything off. All of it. Group like with like on the counter, so all the pasta is together, all the baking stuff is together, and so on.
Now you can see your duplicates and your dead weight. Toss anything expired, and set aside anything you will not use for a donation box. Then assign each category a single spot on the shelves and do not let it spread.
The common mistake is organizing before you empty. You end up building a system around clutter you should have removed. Short on time? Do one shelf start to finish instead of half the wall.
For a family, sort with the kids present so they know where snacks live now. That one step cuts down on “where is the…” questions later.
2. Pick a three-color palette before you buy a container
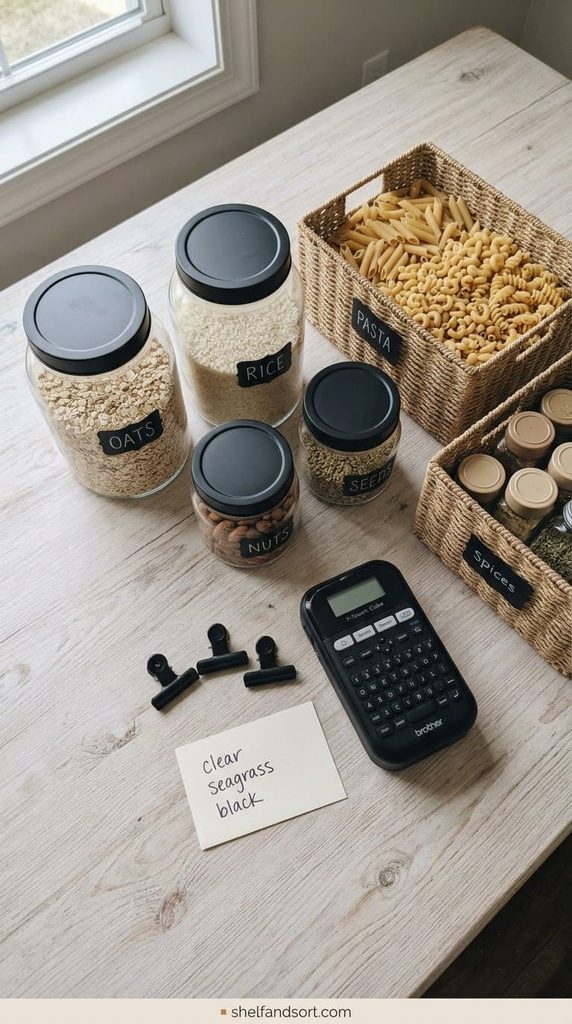
Open shelves look calm when the color story is tight. Choose one neutral for containers, like clear or cream, one natural tone for baskets, like tan seagrass, and one accent that matches your kitchen, maybe black lids or brass clips.
Write those three down. Shop to that list and nothing else.
The mistake here is buying containers you like one at a time. Six months later you have four brands, three lid colors, and a shelf that looks busy even when it is tidy. Stick to the palette even if it means returning something.
Renting? Keep the accent color in removable stuff like labels and bin clips, not anything attached to the wall.
3. Decant only the staples you refill often
Decanting every single item is a trap. It looks amazing on day one and becomes a chore you quietly abandon.
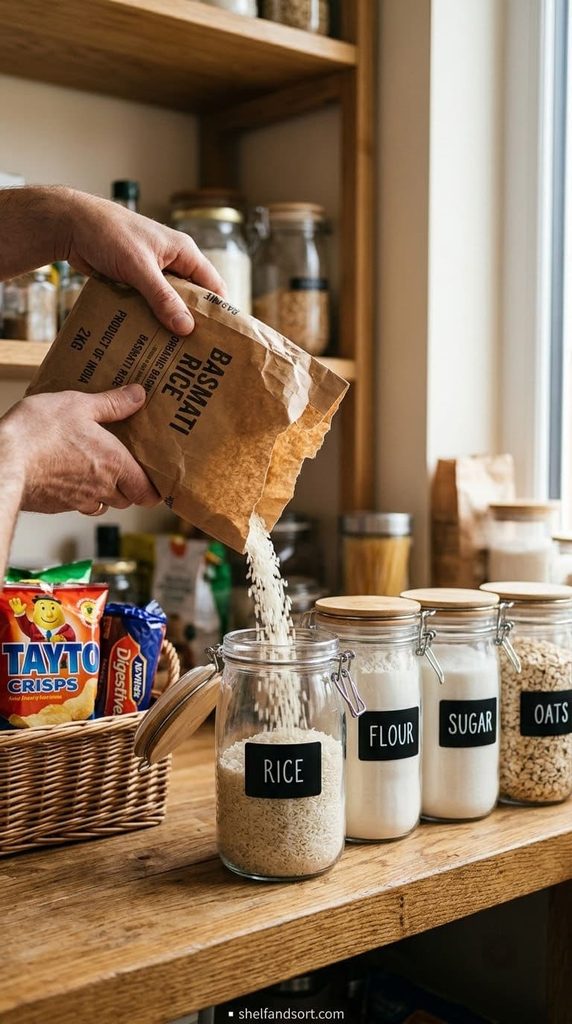
Decant the things you buy again and again and use slowly. Flour, sugar, rice, dried pasta, oats, coffee, and pet treats are good picks. Apartment Therapy’s organizer roundup suggests skipping items you use up in one shot or rarely buy, since the transfer step is wasted effort.

This is the matching-jar system from ideas 3 and 4. The square shape means no wasted gaps between canisters on a narrow shelf, and the one-push button lid gives you the airtight seal that University of Minnesota Extension recommends for keeping flour beetles and pantry moths out of grains and flour. Start with one set for your most visible shelf.
Shop NowThis post contains affiliate links. We may earn a commission on qualifying purchases at no extra cost to you.
The mistake is decanting snacks your kids eat in two days. You spend more time refilling than you save. Keep those in a basket in the original bag.
Two-minute version: decant just flour and sugar. Those two alone make the baking shelf look intentional.
4. Match your jars, not your food
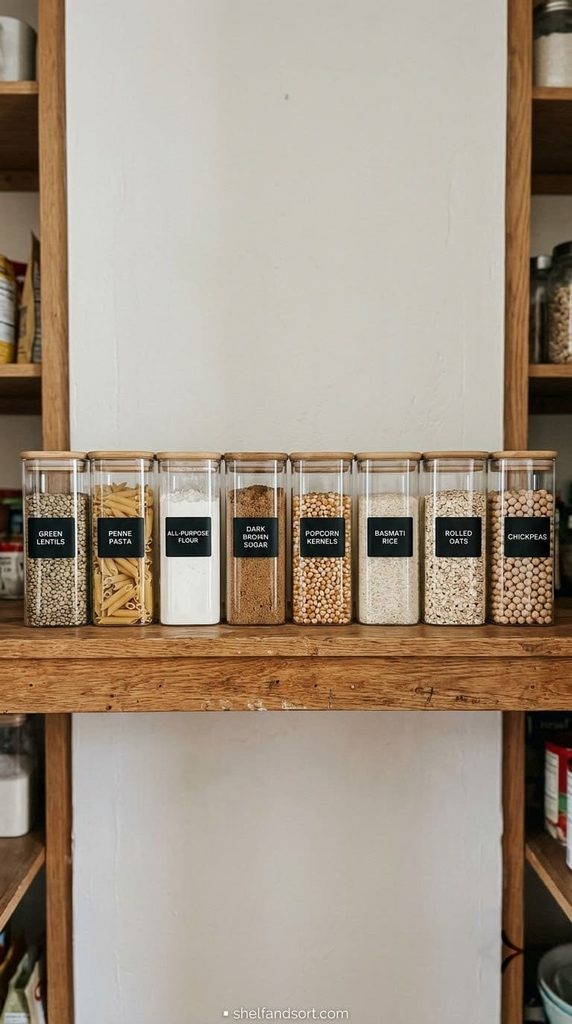
You do not need beautiful groceries. You need one jar shape repeated down the shelf.
When every canister is the same line, the eye reads a clean row instead of ten different products. The food inside can be as plain as it wants.
A common error is mixing square and round canisters on the same shelf to “use what you have.” The silhouette breaks and it looks cluttered. Pick one shape per shelf at minimum.
If budget is tight, buy one set of matching jars for the most visible shelf and use plain deli containers everywhere else.
5. Put a woven basket zone on the hardest shelf to style
There is always one shelf full of stuff that will never look good. Oddball bags, backup condiments, the waffle maker box. Give that shelf to baskets and stop fighting it.
Deep baskets hide the mess. Shallow baskets let you still see what is in there. Use deep ones down low and shallow ones at eye level.
The mistake is buying baskets that do not fit the shelf depth. Measure first, then subtract an inch so they slide out without catching. A basket you cannot pull out easily is a basket you stop using.
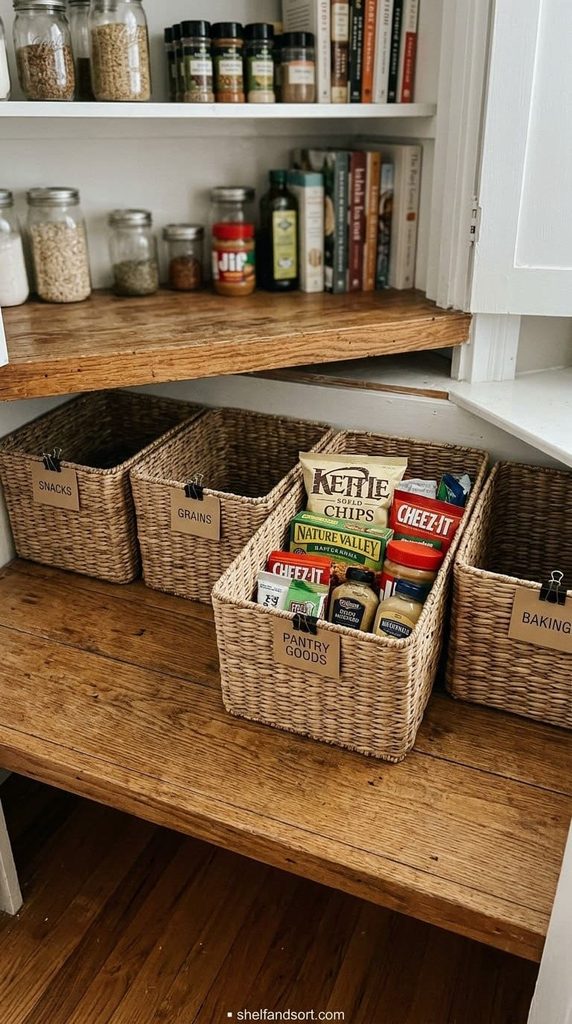
6. Line up labels on one baseline, all facing front
This is a five-minute fix that does more than a new container set. Turn every jar so the label faces out. Put the labels at the same height on each container.
Your eye follows that line across the shelf and the whole thing reads as organized, even if the contents are random.
The mistake is labels at different heights and angles. It looks noisy. Use a label maker or pre-printed labels so the text size matches too.
For a rental or a quick reset, painter’s tape and a marker work. Just keep them level and consistent.
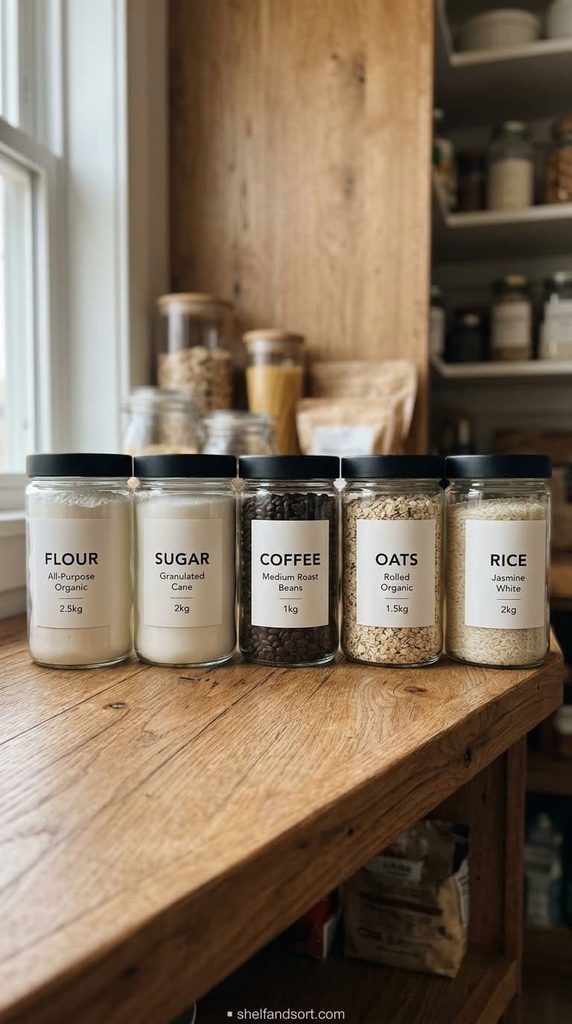
7. Give every shelf a single job
Zones are the backbone of a pantry that stays neat. When each shelf has one purpose, putting groceries away has only one right answer.
Try this from the top down: rarely used up high, breakfast and lunch-box items at the working middle, dinner staples below that, snacks low for kids, bulk and backups on the floor or bottom shelf. NEAT Method’s pantry breakdown uses a similar heavy-low, everyday-at-eye-level logic.
The mistake is zoning by food type when your habits do not match. Think about how you actually cook first, then build zones around that.
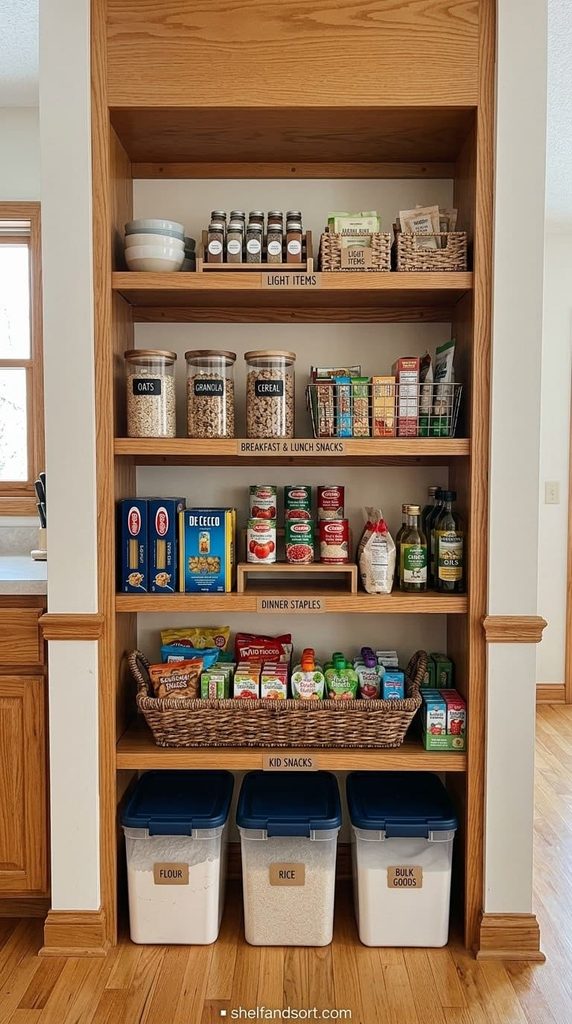
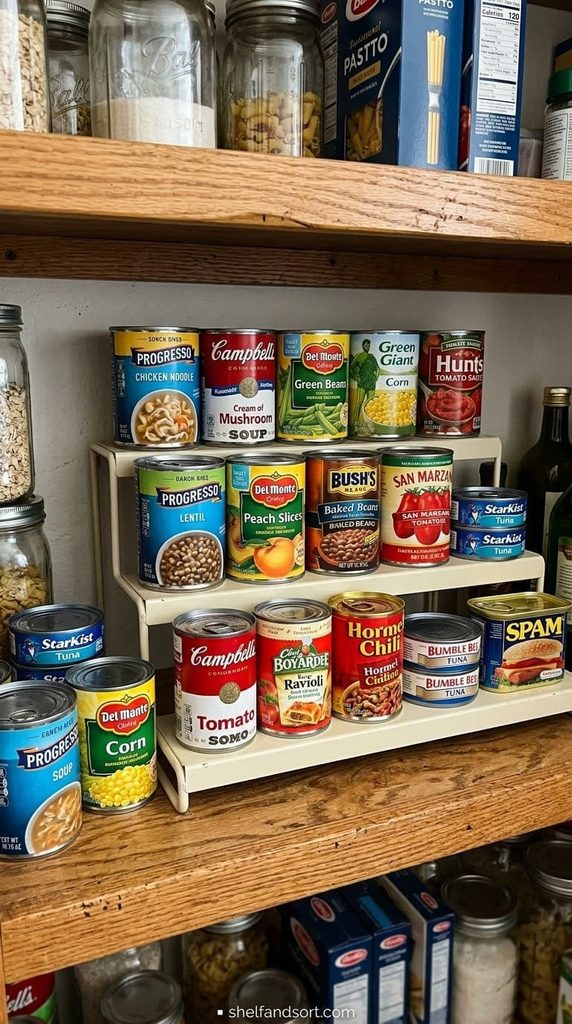
8. Use risers so back rows stop disappearing
Canned goods and jars vanish the second they sit behind another row. A stepped riser tilts the back row up so you can read every label at a glance.
Put risers on the shelves with cans, spices, and small jars. Tiered ones work best for anything short.
The mistake is stacking cans directly instead. The bottom can becomes a mystery and you rebuy things you already own. Risers cost a few dollars and pay for themselves in a month.
Tight budget? A sturdy shoebox turned upside down under the back row does the same job.
9. Add two turntables for oils, vinegars, and sauces
Bottles are the messiest thing in a pantry. They are tall, sticky, and different sizes. A turntable turns that chaos into one spin.
Use one for cooking oils and vinegars, one for hot sauces and condiments. Keep them near the front of a middle shelf.
The mistake is buying a turntable too big for the shelf so the door or edge blocks it from spinning. Measure the depth and leave clearance.
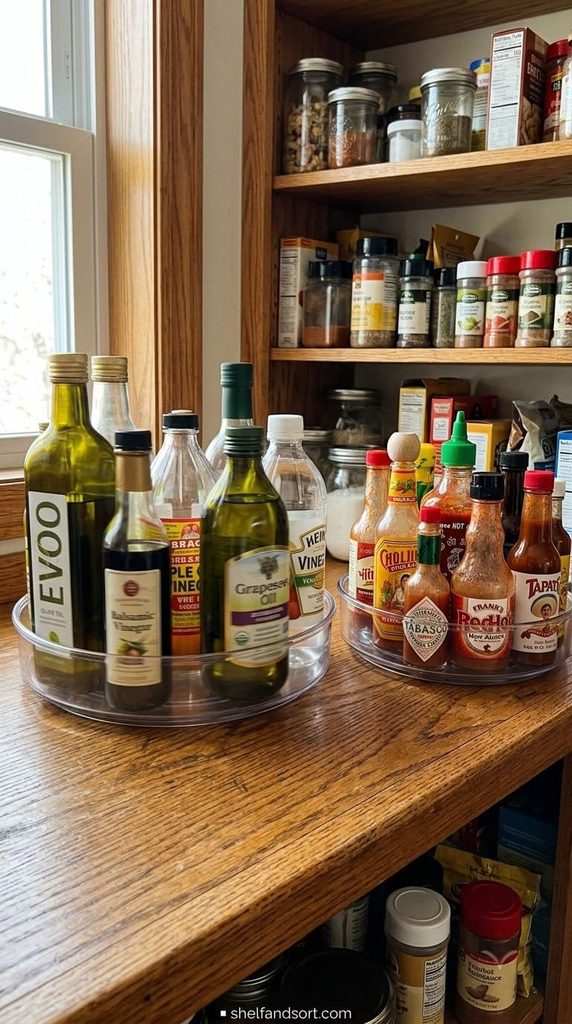
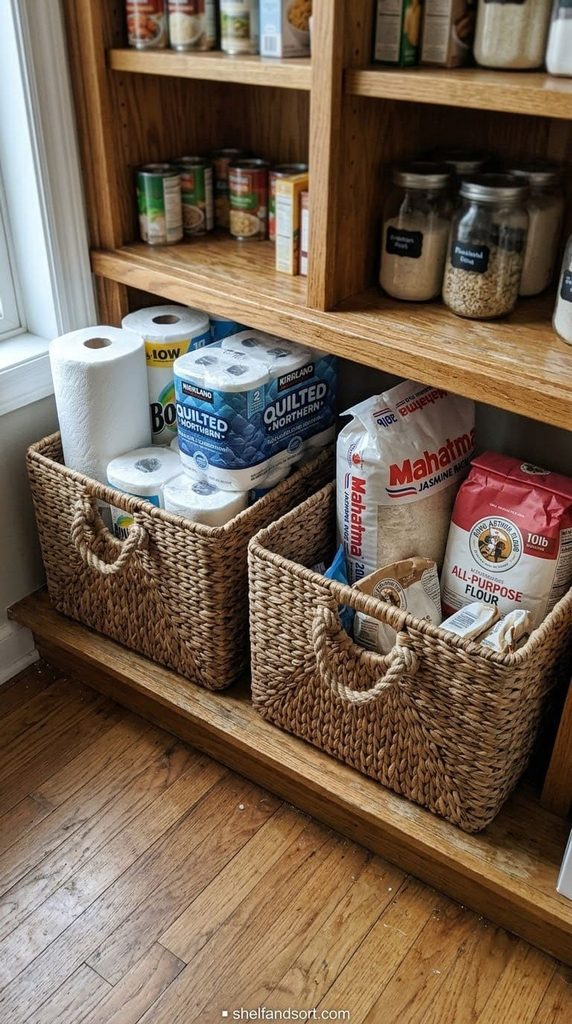
10. Keep the bottom shelf for bulk and backups
Heavy stuff belongs low. Flats of water, big bags of flour, backup paper goods, and the warehouse-size everything.
Corral it in one or two large open bins with handles so you can drag the whole thing out. This keeps the floor of the pantry clear and readable.
The mistake is letting backups creep up to eye level, where they crowd out the items you reach for daily. Backups live low, always.
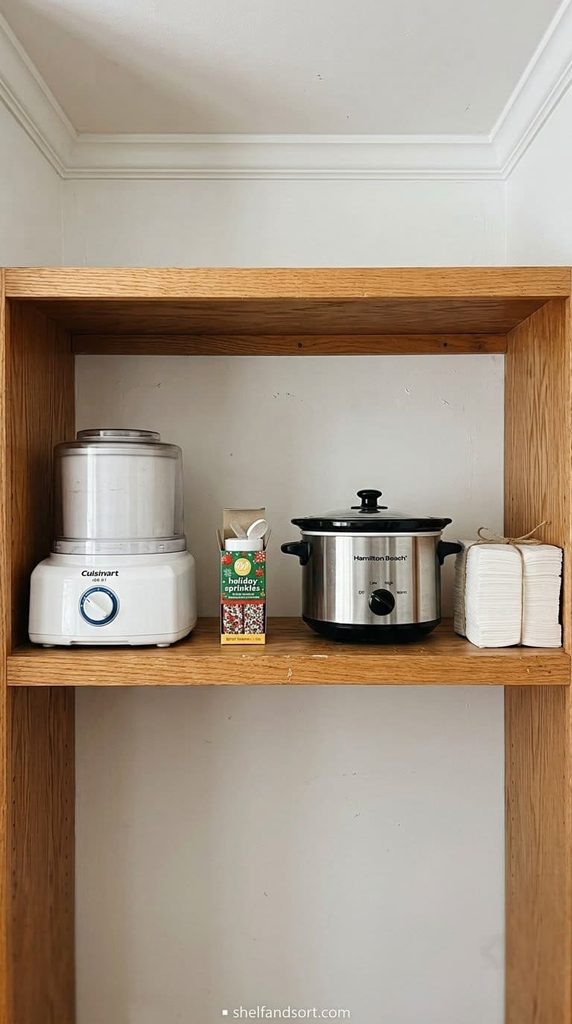
11. Leave the top shelf almost empty
An overstuffed top shelf makes the whole unit feel heavy and cramped. Leave breathing room up there on purpose.
Store only light, rarely used things: the ice cream maker, holiday sprinkles, the second slow cooker. A few items with space around them read as calm, not empty.
The mistake is treating the top shelf as overflow parking. It becomes a dusty pile you never see. If it is up there and you forgot about it, it is probably a donate item.
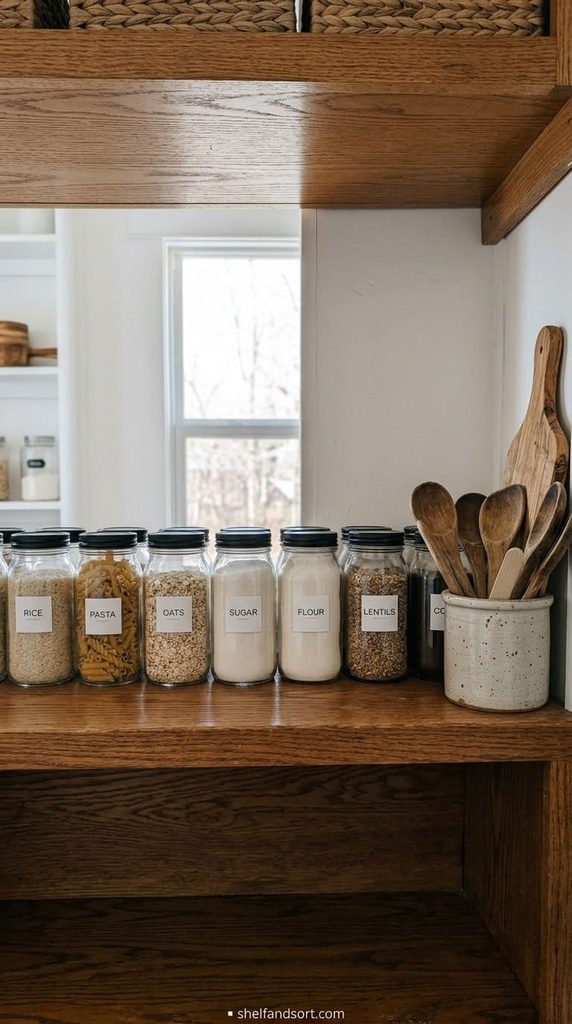
12. Stage the eye-level shelf like a store endcap
The shelf at eye level is your storefront. It gets the most attention, so it gets the most polish.
Put your best matching canisters here, front-faced and labeled. Add one non-food object, like a small wood board or a ceramic crock of utensils, to break up the row.
The mistake is cramming this shelf full because it is the easiest to reach. Give it a little negative space. One gap makes everything next to it look deliberate.
13. Corral snacks in one open bin the kids can reach
Snacks are the number one reason a pantry looks messy. Bags do not stack and boxes get torn open.
Put a single wide, open bin on a low shelf and every snack goes in it. Kids grab from the bin and the rest of the shelf stays clean. When the bin is full, that is the signal to stop buying snacks.
The mistake is decanting individual snacks into little jars. It is pretty for a day and impossible to keep up. The bin is the system.
Roommates? Give each person their own labeled bin so nobody eats the wrong stuff.
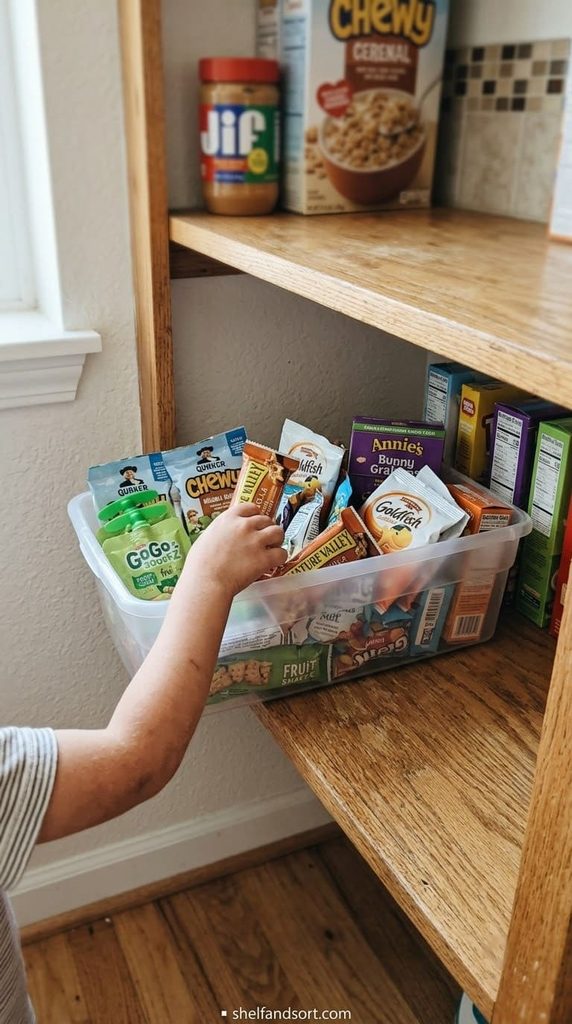
14. Hide ugly packaging in no-peek opaque bins
Some products just look bad. Bright red logos, cartoon mascots, clashing plastic. You cannot fix the packaging, so hide it.
Sort those items into solid, opaque bins with a plain label on the front. You see a clean bin, not a billboard.
The mistake is using clear bins for everything. Clear is great for produce and pretty pasta, bad for a jumble of loud wrappers. Match the bin to the contents.
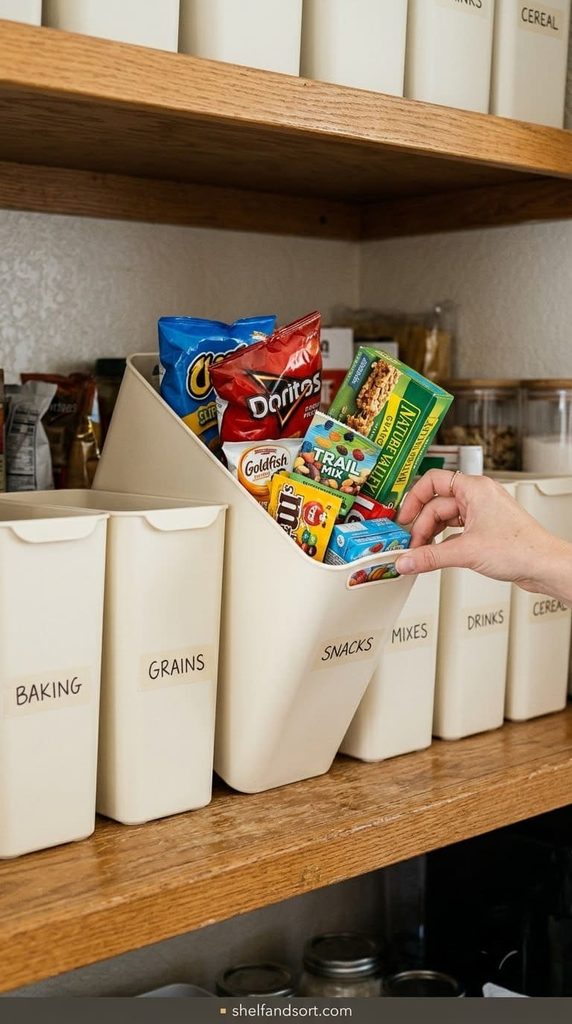
15. Repeat one material across the whole unit
Wood, wire, or seagrass. Pick one and let it carry the whole pantry.
When the shelves, bins, and accents share a material family, the space looks designed even with mismatched food. Wood shelves plus wood-toned accents. Or wire shelves plus wire baskets.
The mistake is one of everything, a wood shelf, a metal basket, a plastic bin, a wicker tray, all on the same unit. It looks like a junk drawer. Consistency is the shortcut to “styled.”
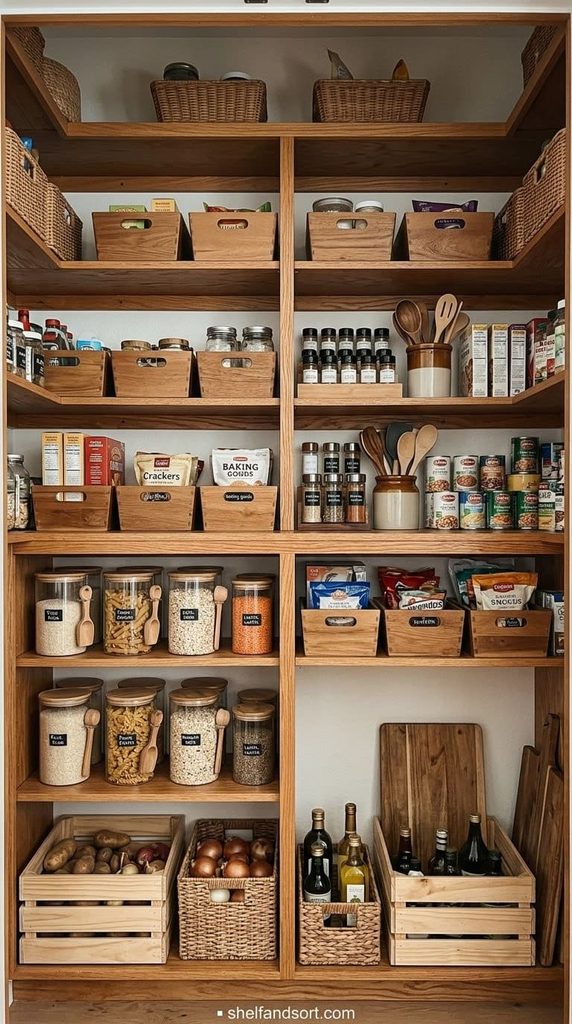
16. Add a small cutting board or crock as a styling anchor
A pantry made only of food and bins looks like a warehouse. One or two real objects make it feel like part of the kitchen.
Lean a small wood cutting board against the back of a shelf. Set a stoneware crock holding wooden spoons on another. Keep it to two objects total.
The mistake is over-decorating with fake books, faux plants, and signs that say “pantry.” It reads as staged. One useful object beats five decorative ones.
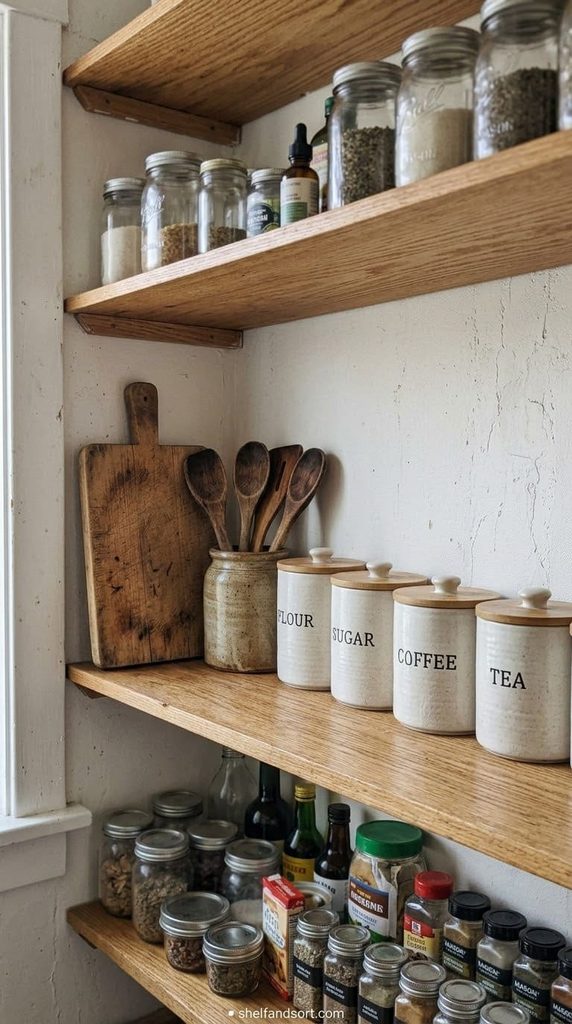
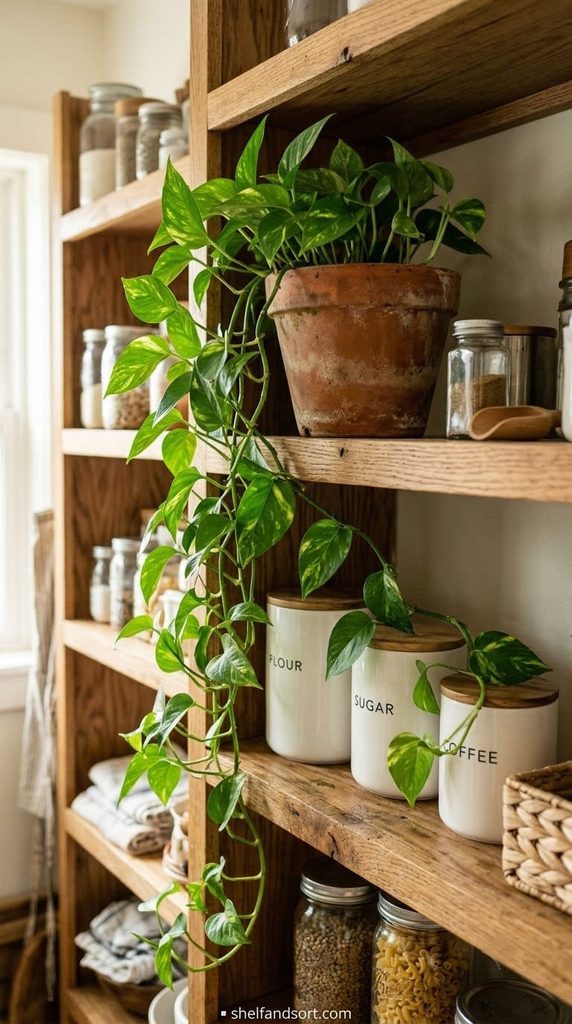
17. Bring in one live plant or a trailing pothos
A single plant softens all the hard lines of shelves and jars. It adds the one thing a pantry never has, which is something alive.
Pick something that tolerates low light, like pothos or a small snake plant. Set it on an upper shelf where a vine can trail down.
The mistake is a plant that needs sun in a windowless pantry. It dies, and a dead plant looks worse than no plant. If your pantry is dark, use one dried stem or branch instead.
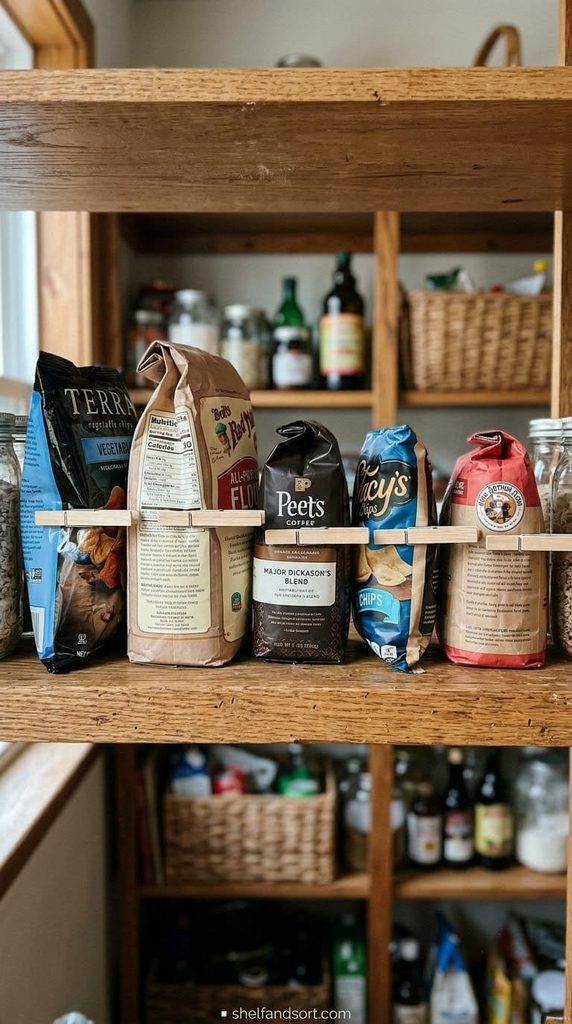
18. Roll bags down and clip them the same direction
Open bags of chips, flour, and coffee are the floppy chaos of any pantry. Roll each one down tight and clip it.
Use the same clip style and clip from the same side every time. A row of matching clips facing one way looks like a choice, not a mess.
The mistake is a drawer of random clips, chip clips, binder clips, clothespins, one lonely bag tie. Buy one set of ten matching clips and recycle the rest.
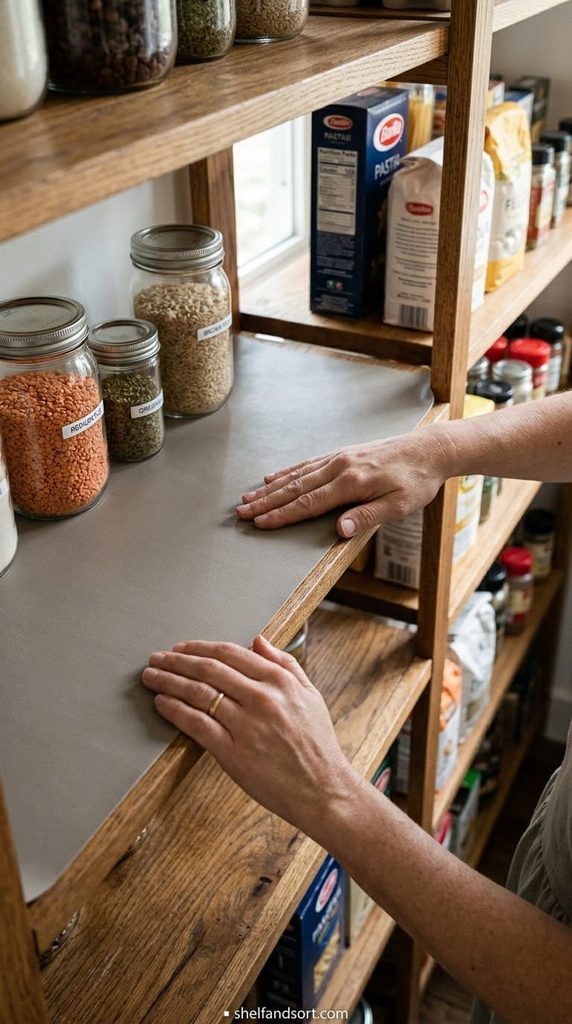
19. Use shelf liner in a color that reads as built-in
A thin liner in the right color makes cheap shelves look finished. Go for a tone close to your wall or cabinet color so the shelf edge disappears.
Cut it to fit exactly, with no overhang. Grippy liner also stops jars from sliding when you pull a basket out.
The mistake is a busy patterned liner. It fights everything you put on top. Solid, muted, matched to the room. That is the whole rule.
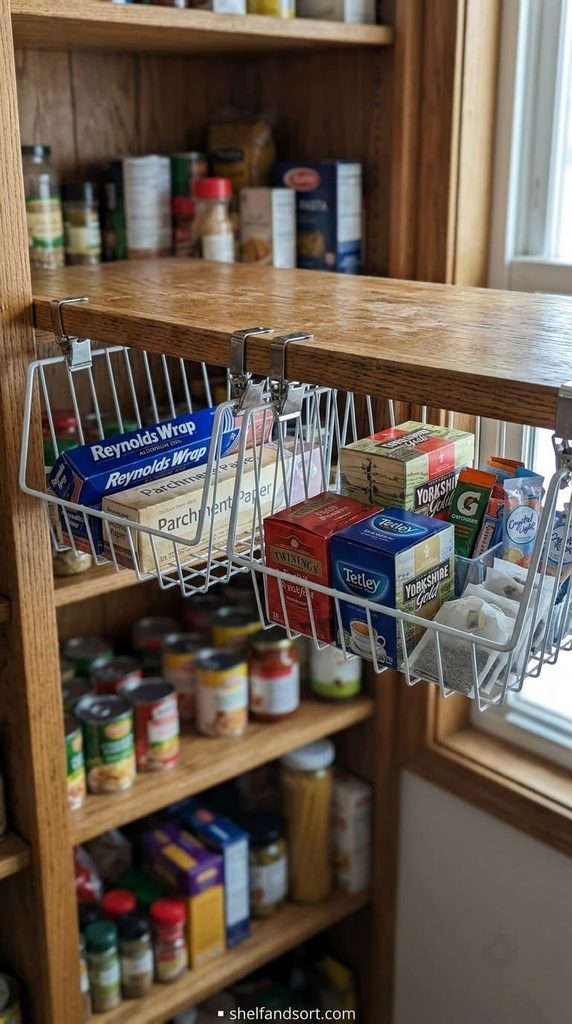
20. Add under-shelf baskets for flat, floppy stuff
The gap under a shelf is wasted space. A clip-on under-shelf basket grabs it back for the thin things that never stack: foil boxes, parchment, tea bags, drink packets.
Hang one or two under a middle shelf. It keeps flat items off the stack where they slide around.
The mistake is loading an under-shelf basket with heavy cans. It sags and pops off. Keep it light.
21. Front-face cans and boxes like a grocery shelf
Grocery stores pull every product to the front edge with the label out. It is called facing, and it works at home too.
After you put groceries away, take 20 seconds to pull each row forward and turn labels out. Suddenly the shelf looks stocked and shoppable instead of half-empty and random.
The mistake is skipping this because “it is just the pantry.” Facing is the difference between a photo-ready shelf and a messy one, and it costs almost no time.
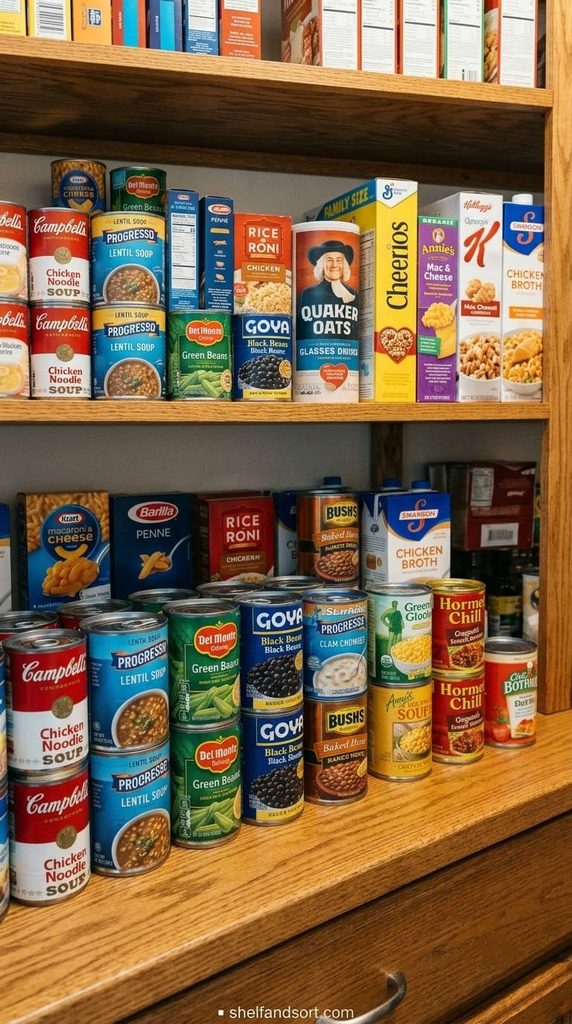
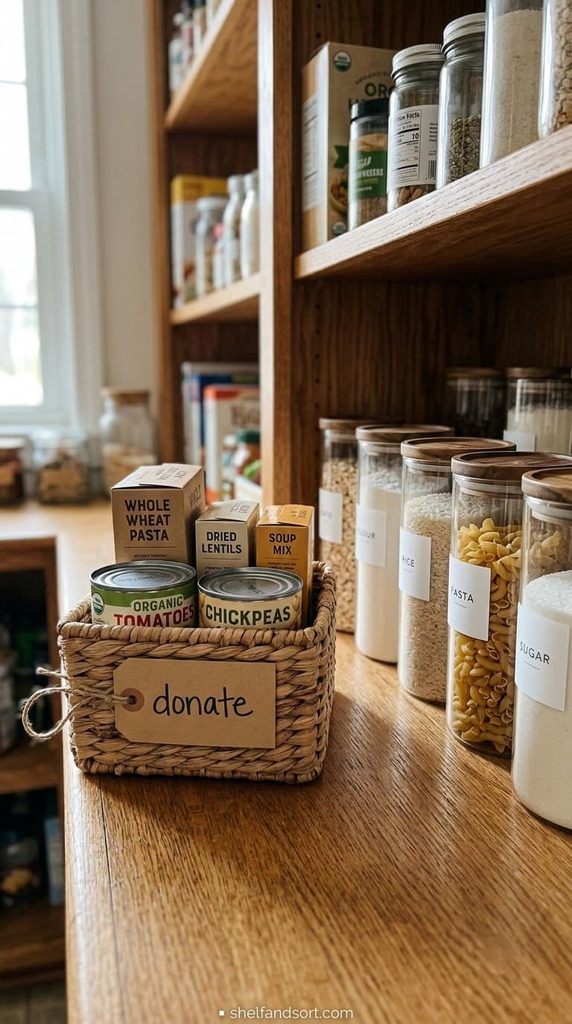
22. Keep a donate-now basket on the shelf itself
The stuff you will not eat should not sit next to the stuff you will. Put a small basket right on the shelf labeled donate.
When you reach past something for the third time, put it in the basket. When the basket is full, drop it at a food pantry and bring it back empty.
The mistake is a mental donate pile with no physical home. It never leaves. A real basket makes the decision a one-second move.
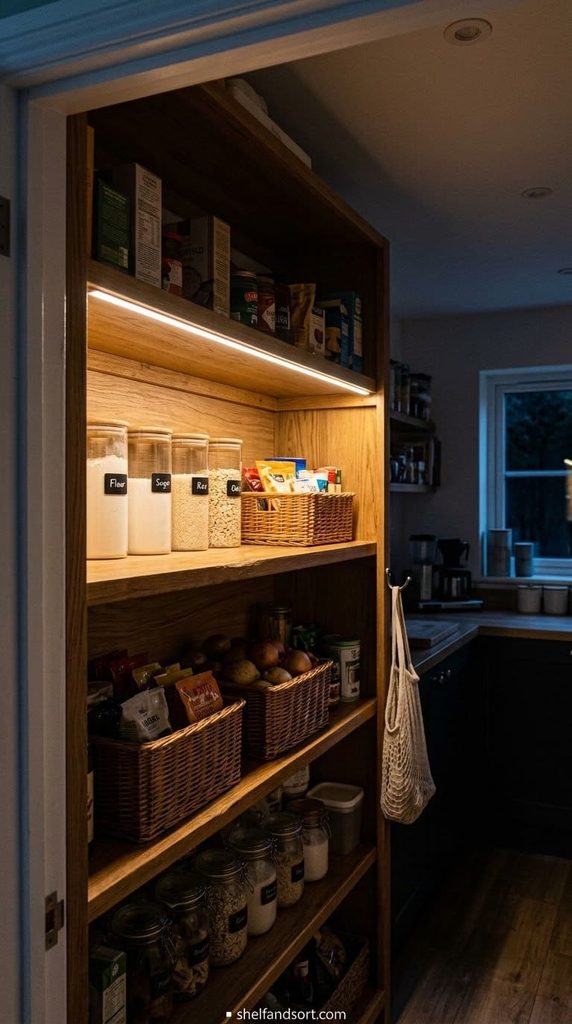
23. Light it with a plug-in puck or strip under the top shelf
Most pantries are lit by one overhead bulb behind you, so you cast a shadow on everything. A little light under the top shelf fixes that.
Stick-on rechargeable puck lights or a plug-in LED strip both work. Aim for warm white, around 2700K, so it matches kitchen light.
The mistake is cool blue light. It makes food look grim and clashes with a warm kitchen. Warm white only.
24. Style in odd-numbered groups with varied heights
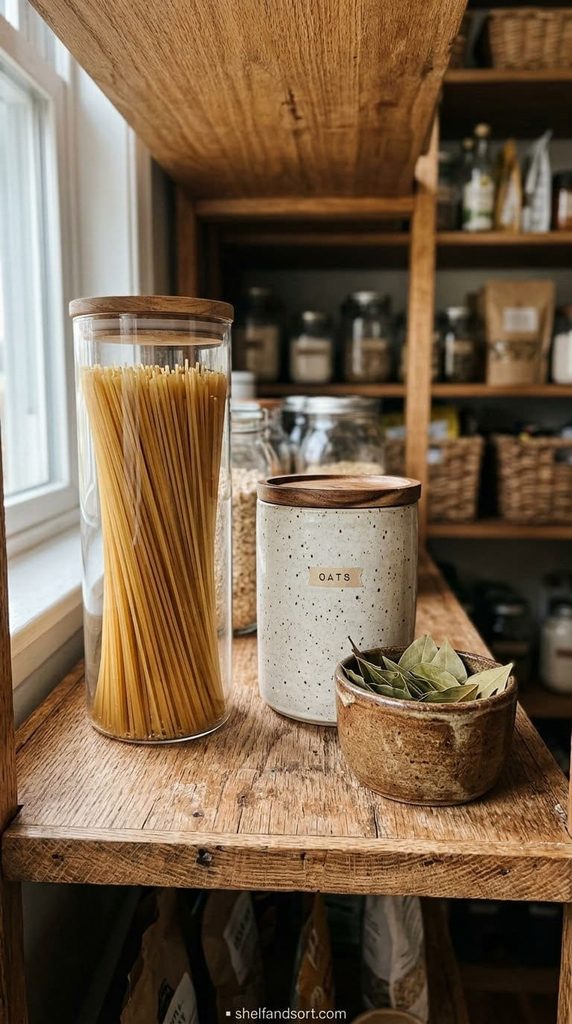
When you place non-food objects or canister clusters, use three or five, not two or four. Odd groups look relaxed. Even groups look like a showroom.
Vary the height in each group. A tall canister, a medium one, a short crock. Your eye moves across it instead of stopping.
The mistake is lining everything up at the same height like soldiers. Add one tall thing and one short thing to any flat row and it comes alive.
25. Set a 10-minute Friday reset as the maintenance rule
This is the one that makes the other 24 last. Once a week, spend 10 minutes putting the pantry back to its baseline.
Face the labels, refill the two or three canisters that are low, flatten and clip open bags, and move anything on the wrong shelf back home. Toss one expired thing. That is it.
The mistake is waiting for a big weekend overhaul. By then it is a two-hour job you dread. Ten minutes on a repeat schedule beats two hours once a season, every time.
Pair it with something you already do on Fridays, like starting the dishwasher or making a grocery list, so it sticks.
Open pantry shelving vs a closed pantry cabinet
| Factor | Open shelving | Closed cabinet or pantry |
|---|---|---|
| Upkeep needed | High, everything shows | Lower, doors hide the in-between |
| Cost to style | Higher, containers are on display | Can use cheaper mismatched bins |
| Access speed | Fast, grab and go | Slower, open a door first |
| Dust and grease | Collects more, wipe monthly | Protected |
| Best for | People who cook often and restock in small trips | Bulk shoppers, busy households, anyone who wants to close the door on it |
If you know you will not keep up with a weekly reset, a closed pantry is the honest choice. Open shelving rewards a light, steady habit and punishes neglect fast.
How to keep an open pantry looking good long term
The trick is not more containers. It is a fixed baseline plus a short weekly habit.
Your baseline is the zone map from idea 7 and the palette from idea 2. Once those are set, every grocery trip has a clear place to land. Nothing sits on the counter “for now.”
The weekly 10-minute reset from idea 25 catches the drift before it becomes a pile. Skip it for a month and you are back to a full re-sort. Do it every week and the pantry basically holds itself.
One more thing. Wipe the shelves down once a month with a barely damp cloth. Open shelves near a stove catch a fine grease film that dulls the whole look, and most people never notice until they finally wipe and see the difference.
Frequently asked questions
How do I make open pantry shelves look good on a budget?
Skip the container sets at first. The free moves do most of the work: empty and re-sort the shelves, give each shelf one job, face every label forward, and pull products to the front edge like a grocery store. Then buy one set of matching jars for the single most visible shelf and use plain deli containers or upside-down shoeboxes as risers everywhere else. A pack of ten matching bag clips for a few dollars is the highest-impact small purchase.
What should I not put on open pantry shelving?
Keep anything light-sensitive out of the display. Oils go bad faster in light, so keep them on a turntable toward the back or in a low bin. Skip loud, colorful packaging on the visible shelves, and move it into opaque bins instead. Do not put heavy bulk items up high where they make the unit look crowded and are a hazard to lift down. And do not store anything you are not sure you will use, since on open shelving every maybe-item is on display.
Is decanting pantry staples actually worth it?
For staples you rebuy often and use slowly, yes. Flour, sugar, rice, pasta, oats, and coffee stay fresher and look uniform in matching airtight canisters, and the airtight seal helps block pantry pests per extension-office guidance. For items you finish in one or two uses, or snacks your household plows through in days, decanting is wasted effort you will abandon. Decant the slow staples, basket the fast stuff in its original bag.
How often should I reset an open pantry?
Ten minutes once a week is the sweet spot. Face labels, refill low canisters, clip open bags, return strays to their home shelf, and toss one expired item. Attach it to something you already do on the same day, like writing the grocery list. Then wipe the shelves with a barely damp cloth once a month to cut the grease film that builds up on open shelving near a stove.
What is the fastest way to make a messy pantry look organized right now?
Three moves, about 15 minutes total. First, pull every product to the front edge of its shelf and turn the label out. Second, sweep all the loose bags and snacks into one open basket so the loose clutter is contained. Third, straighten every canister label to the same height and direction. You have not reorganized anything, but the shelf now reads as neat, which buys you time to do the full sort later.
Products We Recommend
This post contains affiliate links. We may earn a commission on qualifying purchases at no extra cost to you.
OXO Good Grips 10-Piece POP Food Storage Container Set
This is the matching-jar system from ideas 3 and 4. The square shape means no wasted gaps between canisters on a narrow shelf, and the one-push button lid gives you the airtight seal that University of Minnesota Extension recommends for keeping flour beetles and pantry moths out of grains and flour. Start with one set for your most visible shelf.
Shop Now
YCLADEC 4-Pack 11.5-Inch Lazy Susan Turntables
This is idea 9, the bottle fix. Four in a pack means one for oils, one for vinegars and sauces, and two more for baking add-ins or the coffee and tea shelf. The clear plastic keeps the look light instead of adding another visual block, and the raised edge stops a bottle from flying off when you spin it.
Shop now
Honey-Can-Do Water Hyacinth Wicker Storage Baskets, Nesting Set of 3
This is the woven basket zone from ideas 5 and 14. Three graduated sizes let you put the deep one down low to hide backup condiments and the shallow one at eye level for grab-and-go packets. Water hyacinth has enough structure to hold its shape on an open shelf instead of slumping the way soft cloth bins do.
Shop now