40 Pantry Shelving Ideas to Organize Your Stockpile (Without It Going to Waste)
A stockpile only saves money if you actually use it before it expires. These 40 pantry shelving ideas cover the setup, the right depth and spacing, deep-shelf fixes, a FIFO rotation system, and the weekly habit that keeps a full pantry from turning into buried, forgotten food.
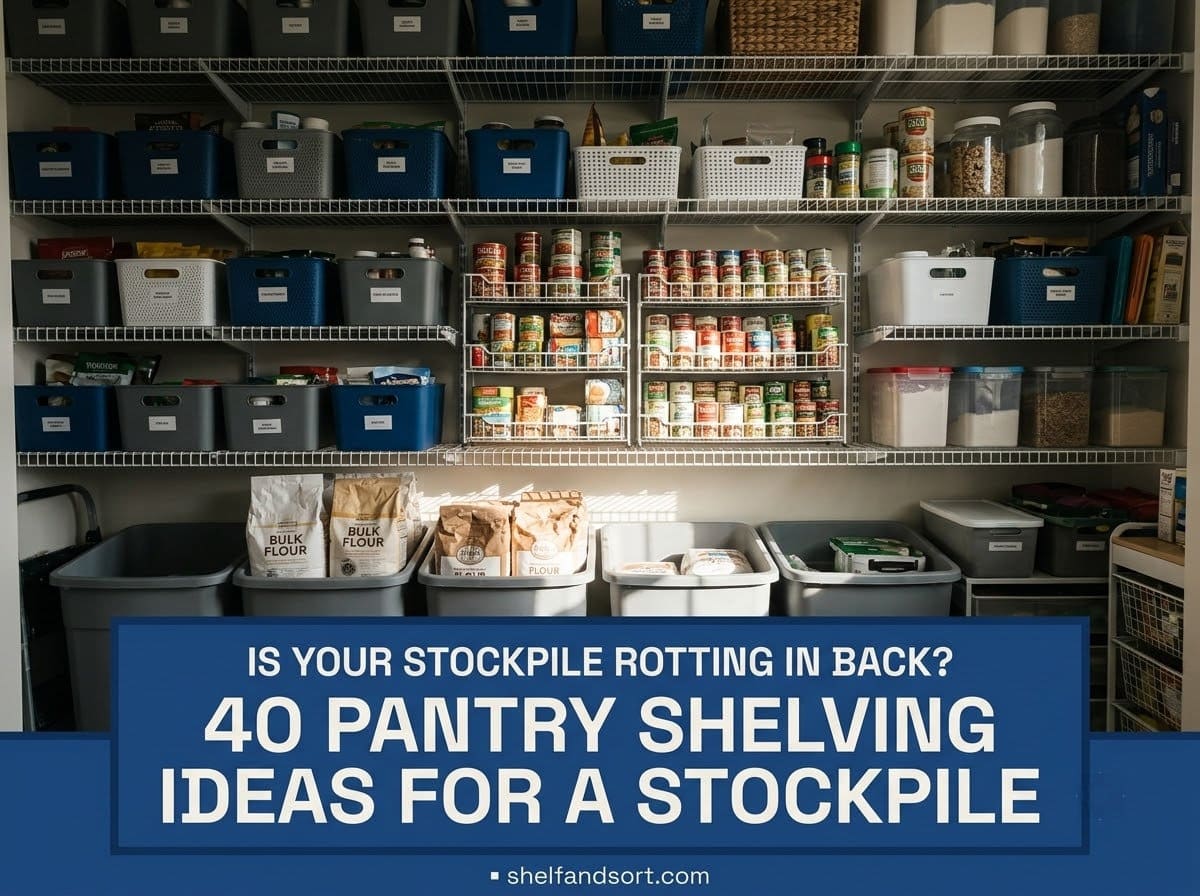
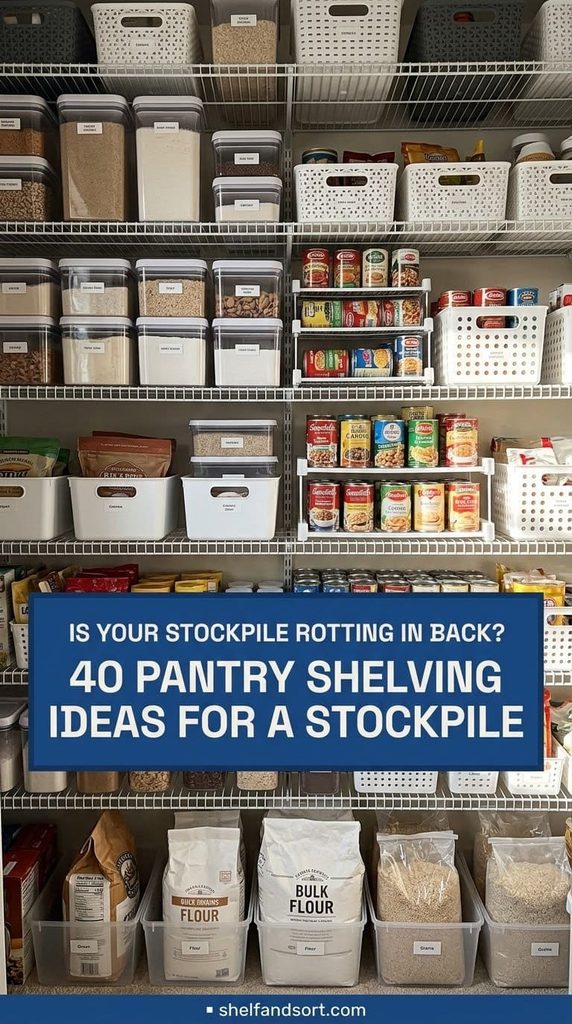
Pantry shelving works for a stockpile when the depth, spacing, and rotation system all match how you shop. Keep shelves 12 to 16 inches deep so nothing gets buried, and space them by contents: about 7 inches for canned goods, 14 to 16 inches for cereal and boxes, and 18 inches or more for bulk bins. Use adjustable shelving so you can change the spacing as your stockpile shifts.
On deep shelves, add pull-out bins, turntables, or risers so you can see and reach the back. Run a first-in, first-out system: date every item on purchase, put new stock behind old, and shop your own shelves from the front.
Do a 10-minute check each week and a full rotation once a month. Store everything cool, dry, and below 85 degrees Fahrenheit.
Why a stockpile needs different shelving than a regular pantry
A regular pantry holds a week or two of food. A stockpile holds a month or three, plus backups of everything.
That changes the math. Depth that is fine for one row of cans becomes a black hole with three rows. Fixed shelf spacing that fits your cereal today wastes half a shelf when you switch to bulk oats. And without a rotation system, the stuff in the back quietly ages out.
Professional organizer Laura Price, quoted in a Homes and Gardens piece on organizing after bulk buying, warns that without a real storage area for bulk items, the kitchen quickly becomes unmanageable. The shelving is the storage area. Get it right and the stockpile pays off. Get it wrong and you are just throwing away food in slow motion.
These 40 ideas are grouped into six parts: planning the shelving, zoning the stockpile, beating the deep shelf, rotating with FIFO, containing and labeling, and keeping it all working. If you want your shelves to also look good, that is a separate job covered in our guide to making open pantry shelving look good. This one is about capacity and not wasting food.
Part 1: Plan the shelving
1. Keep shelf depth between 12 and 16 inches
Deep shelves feel like more storage. They are actually less usable storage, because the back third becomes unreachable and forgotten.
For a stockpile, 12 inches handles most canned and boxed goods in two rows. Go to 16 inches only for bulk bins and large appliances. Anything past 18 inches needs a pull-out system or you will lose track of what is back there.
The mistake is building one deep run of 24-inch shelves to maximize square footage. You end up with a wall of food you cannot see. Shallower and more shelves beats deep and few.
2. Space shelves by what actually sits on them
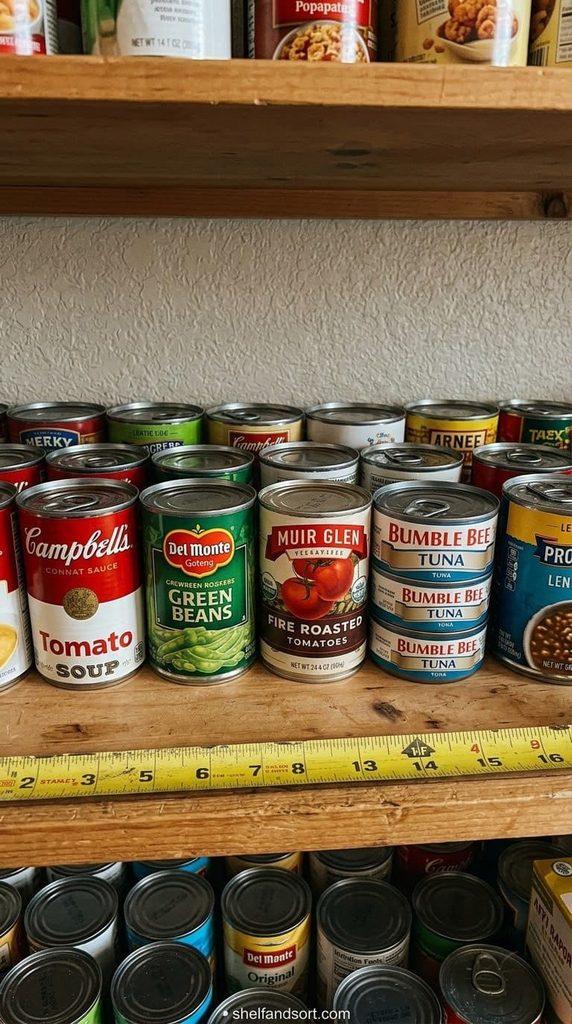
One height does not fit a stockpile. Match the gap to the contents.
Use about 7 inches between shelves for canned goods, 14 to 16 inches for cereal boxes and cracker boxes, and 18 to 20 inches for bins of potatoes, flour, or bulk bags, per pantry shelf spacing guidance from Kitchen Cabinet Kings. Measure your tallest item in each category before you set a shelf.
The mistake is evenly spaced shelves. You waste four inches of air above every can row and cannot fit the cereal at all.
3. Use adjustable shelving, not fixed
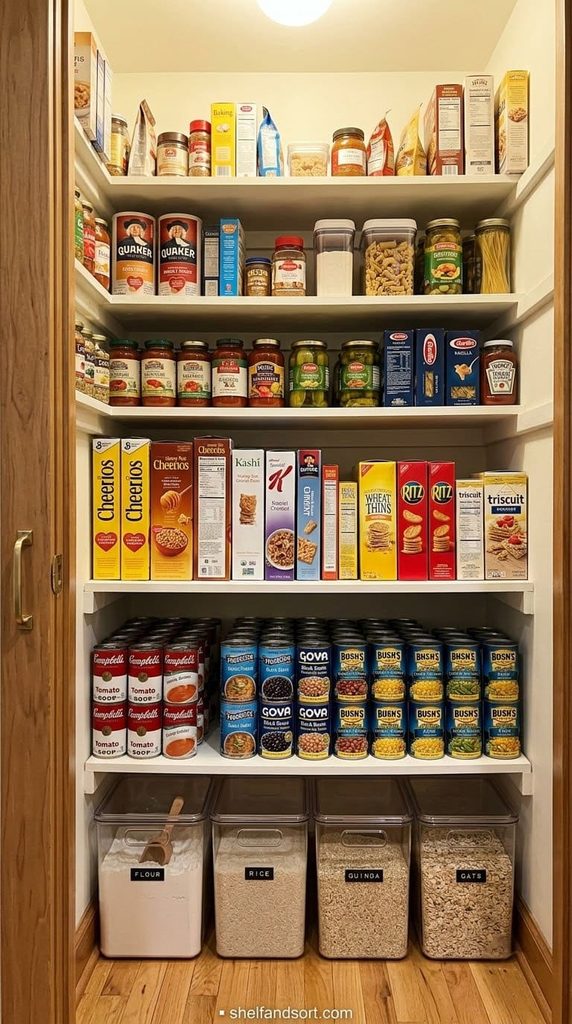
A stockpile shifts. This month it is cases of soup, next month it is 25-pound bags of rice. Fixed shelves lock you into one layout.
Adjustable wire or track shelving lets you move a shelf in 15 minutes when your buying changes. Buy a system with more shelf clips or brackets than you need so you always have room to add one.

This is the adjustable wire shelving from ideas 3 and 6, and its rating sample is larger than anything else on this list by far. Each shelf holds 200 pounds and adjusts in 1-inch increments, so you can set 7-inch gaps for cans and 16-inch gaps for bulk bins on the same unit. Add a liner for jars, since the wire spacing is standard grid.
Shop NowThis post contains affiliate links. We may earn a commission on qualifying purchases at no extra cost to you.
The mistake is nailing wood shelves at fixed heights because it looks more finished. You will regret it the first time you buy something tall.
4. Choose wire for airflow, wood for small items
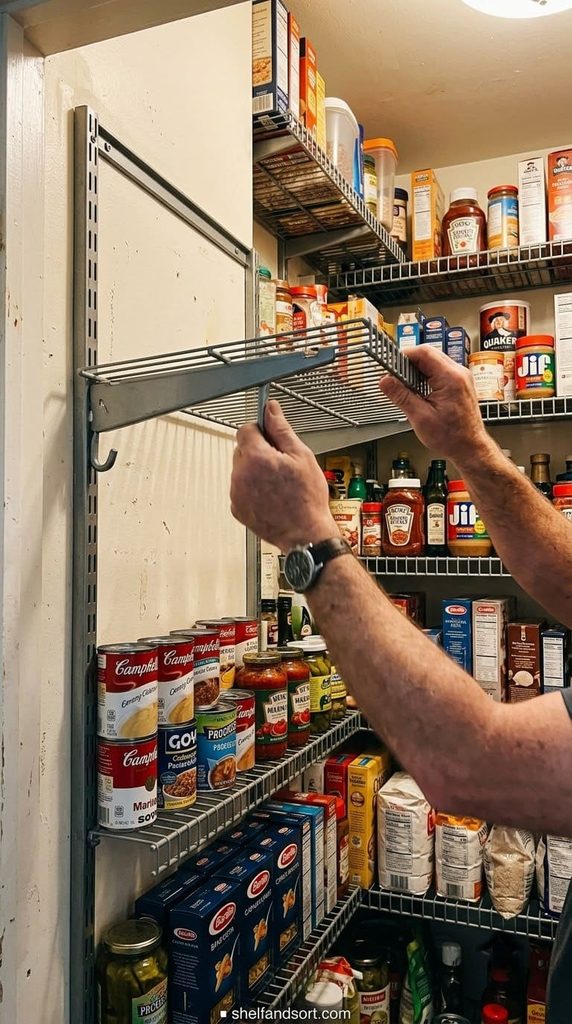
Wire shelving is cheaper, adjustable, and the open grid keeps air moving so you get less dust and mildew. The downside is small jars tip over in the gaps.
Wood or solid shelving holds small items flat and looks better, but it is pricier and traps heat and humidity against the wall. Many stockpile pantries use wire for the bulk and one wood or lined shelf for jars and bottles.
The mistake is wire shelving with wide 1-inch wire spacing. Get half-inch spacing or add shelf liner so cans and jars sit flat.
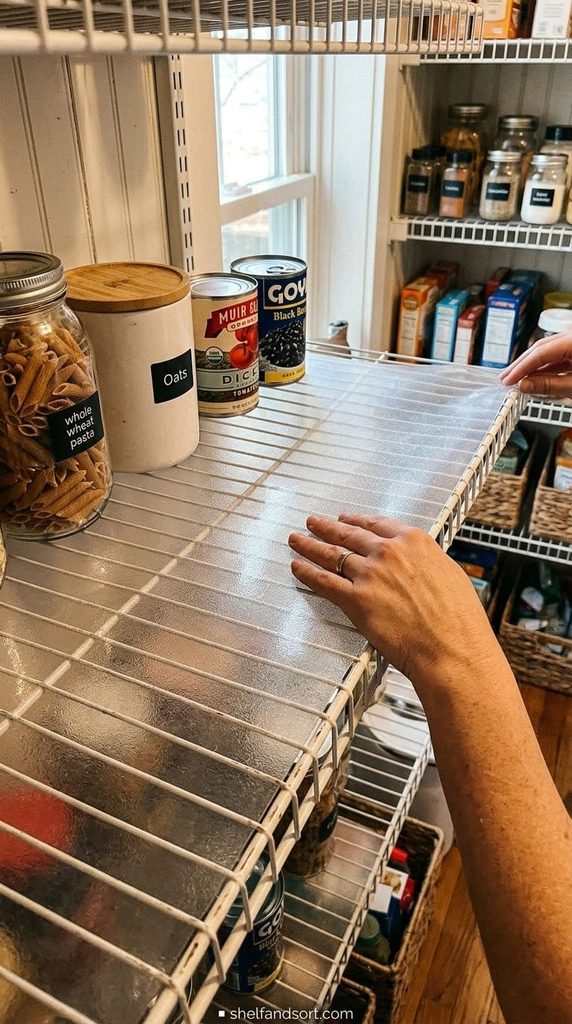
5. Line wire shelves so nothing tips or falls through
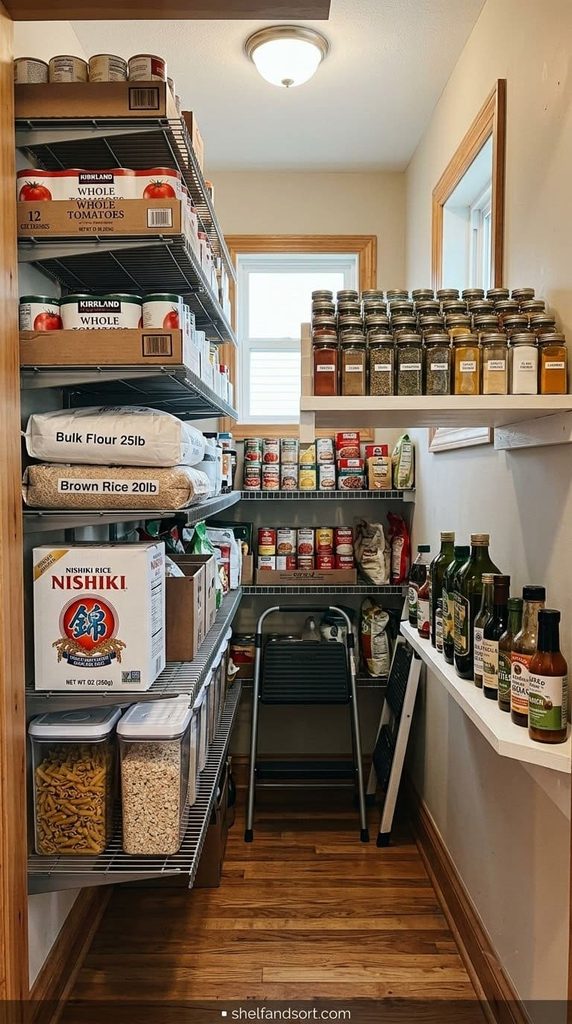
If you already have wide-grid wire shelving, a cheap liner fixes the tipping problem in five minutes.
Use clear plastic shelf liner or thin acrylic sheets cut to size. Grippy liner also stops jars from sliding when you pull a bin out from beside them.
The mistake is cardboard as a liner. It absorbs any moisture and attracts pantry pests. Use plastic or acrylic only.
6. Rate your shelves for real stockpile weight
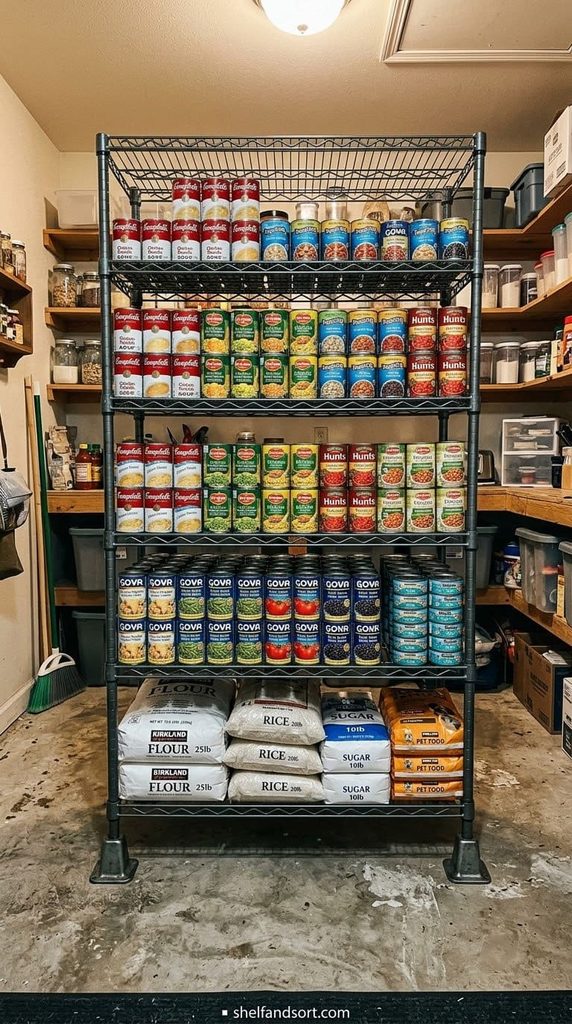
Canned goods are heavy. A single shelf of soup and sauce cans can top 60 pounds fast.
Check the per-shelf weight rating before you load it. Freestanding steel wire units often list 200 pounds or more per shelf. Wall-mounted brackets need a stud every 16 inches for that kind of load.
The mistake is loading a closet-rod-style bracket shelf with cans. It pulls out of the drywall. Heavy stock needs a freestanding unit or stud-mounted brackets.
7. Reserve the bottom shelf and floor for the heaviest bulk
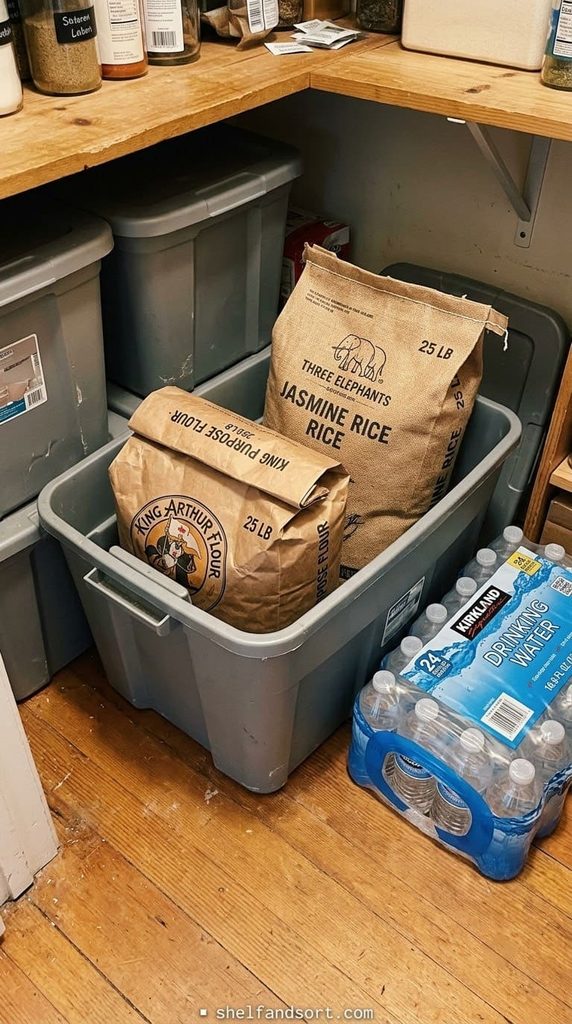
Put the 25-pound flour bags, the flats of water, and the case lots on the bottom shelf or the floor.
Low storage is safer to lift from and it keeps the weight off your bracket shelves. Slide heavy bags into a bin or onto a small wheeled dolly so you can pull the whole thing out.
The mistake is bulk bags directly on the pantry floor with no bin. They tear, they attract pests, and you cannot sweep under them. Always contain floor stock.
8. Add a light so the back of every shelf is visible
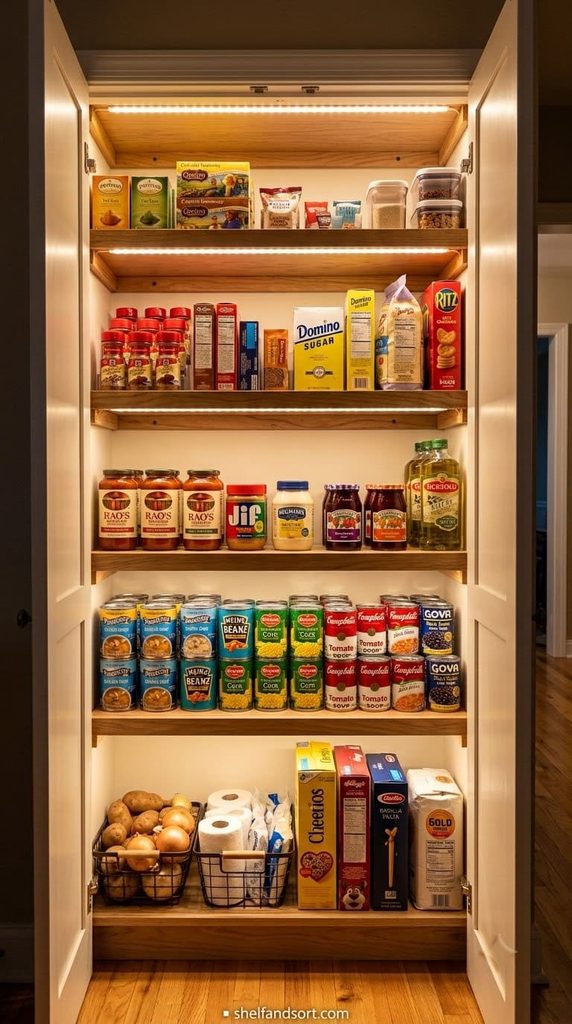
A dark pantry hides expiring food. If you cannot read a date without a flashlight, you will not check it.
Add a battery or plug-in LED strip under each shelf or a motion-sensor puck light at the top. Warm white around 2700 to 3000K shows labels clearly.
The mistake is relying on one ceiling bulb behind you. You shadow every shelf you reach for. Light each shelf from above its front edge.
Part 2: Zone the stockpile
9. Group the stockpile into fixed categories
Every item needs a category, and every category needs one shelf or section. Canned vegetables, canned proteins, pasta and grains, baking, breakfast, snacks, drinks, condiments, backup paper goods.
Store like with like so you can see at a glance that you have eight cans of tomatoes and zero of corn. That is what stops both hoarding and running out.
The mistake is storing by package shape or by shopping trip. You lose the ability to take inventory in one look.
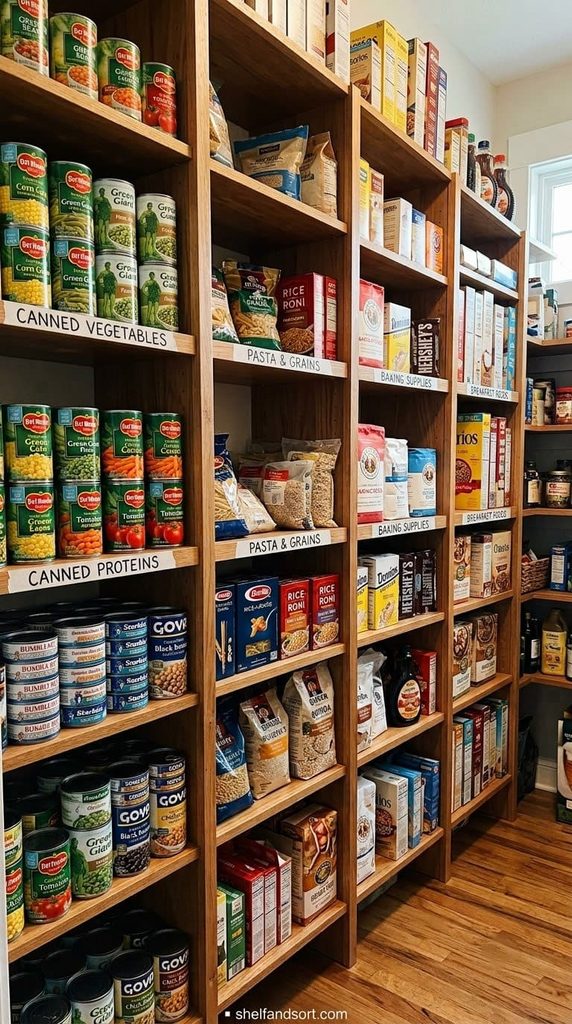
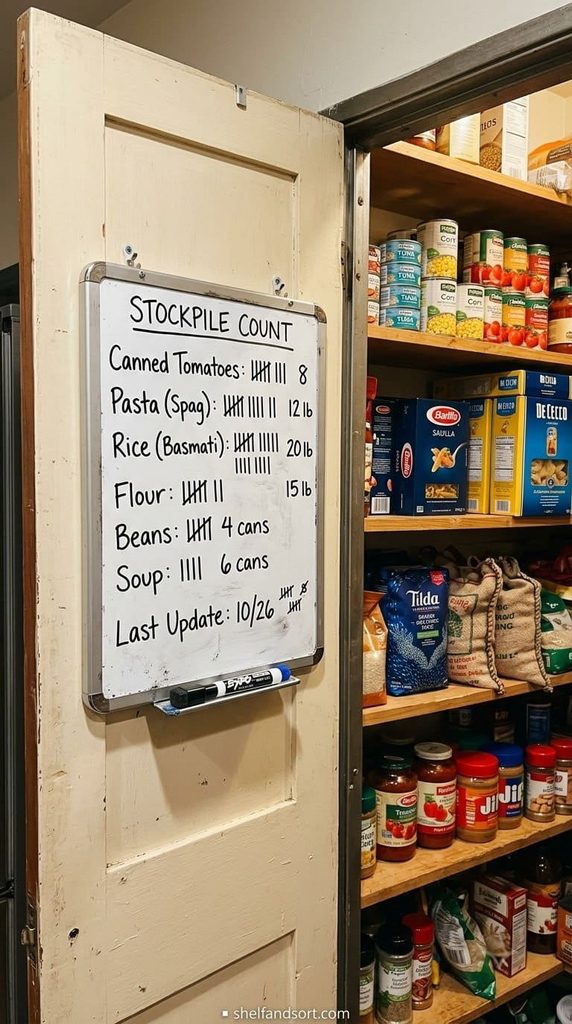
10. Keep a running inventory list
A stockpile you cannot see in your head leads to buying more of what you already have. Track it.
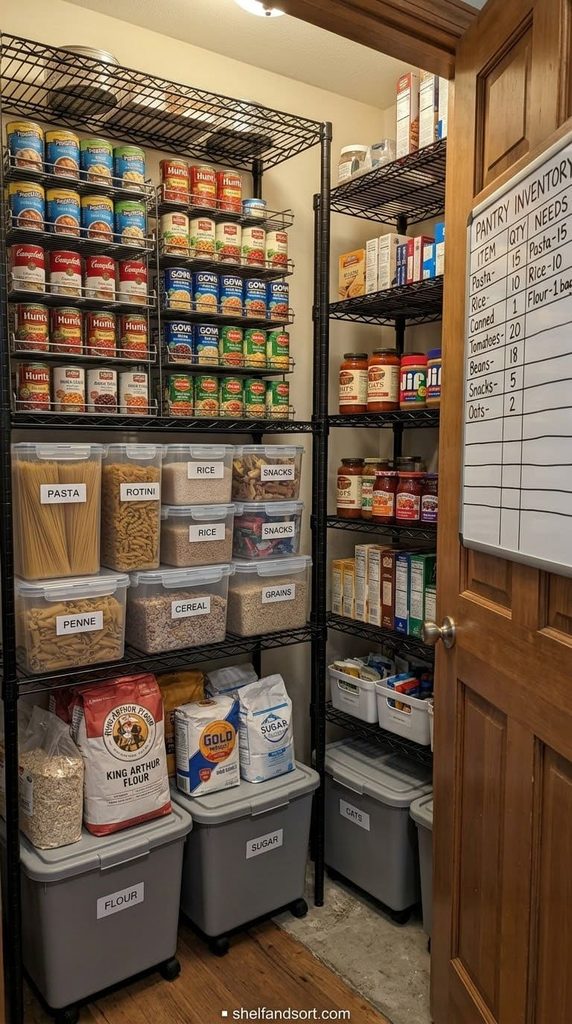
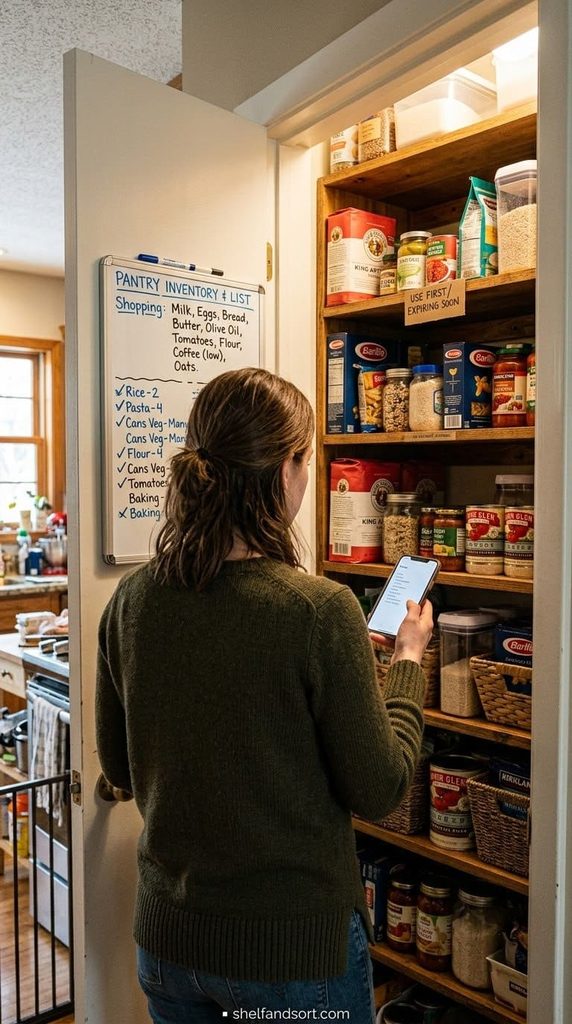
A simple whiteboard on the pantry door, a notes app, or a printed count sheet all work. Update it when you add or take a case, not item by item. The point is a rough count, not accounting.
The mistake is trusting memory. Real Homes’ pantry shelving guide, citing organizing pros, recommends an inventory list specifically for people who buy in bulk, to avoid overstocking.
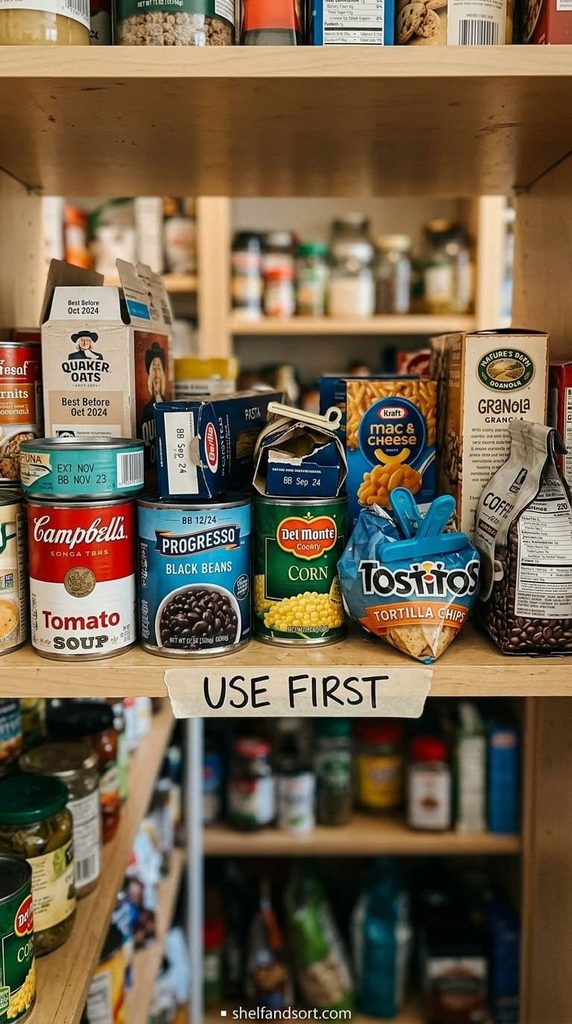
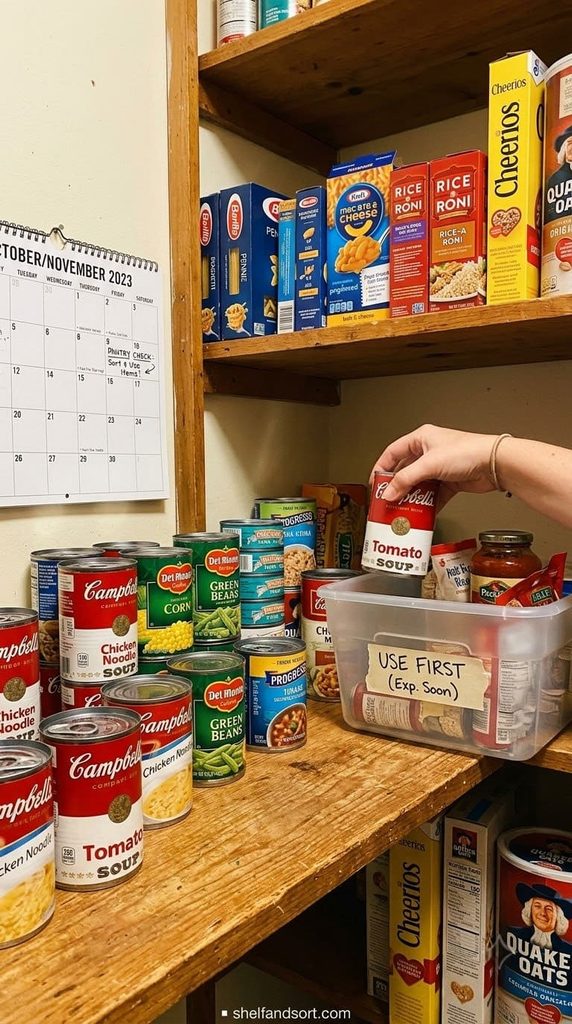
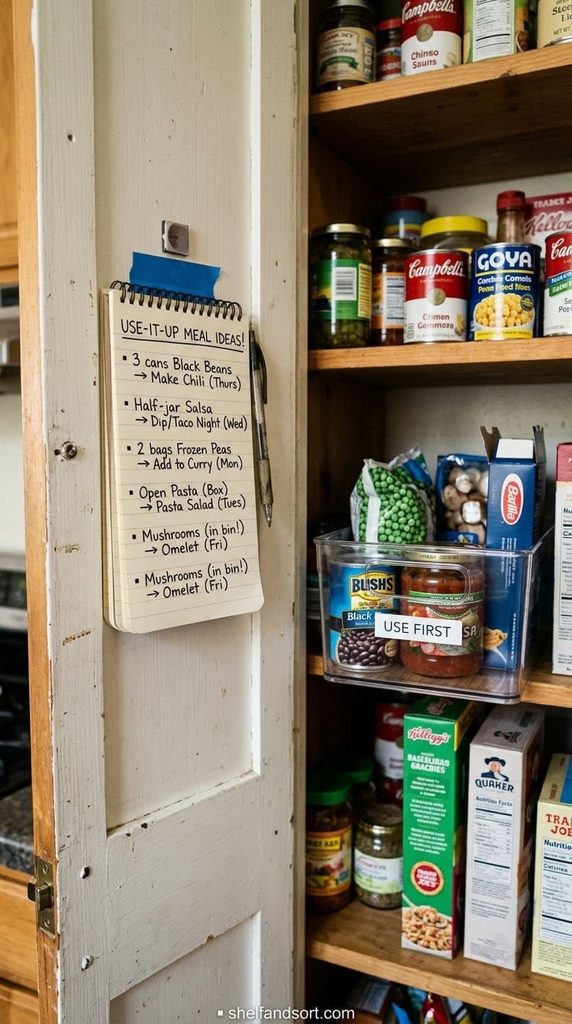
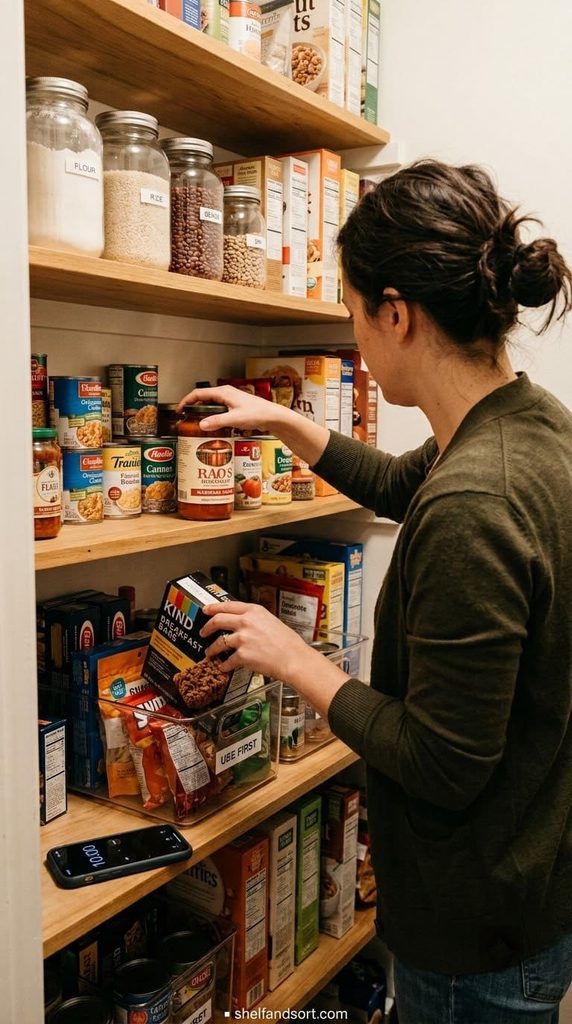
11. Put an eat-me-first zone at eye level
Pick one shelf or one bin at eye level and label it “use first.” Anything close to its date, or opened, or a duplicate you overbought, goes there.
You check that one spot before every meal and shop from it first. It is the single best defense against waste.
The mistake is a use-first pile in the back where you never see it. It has to be the most visible spot in the pantry, not the least.
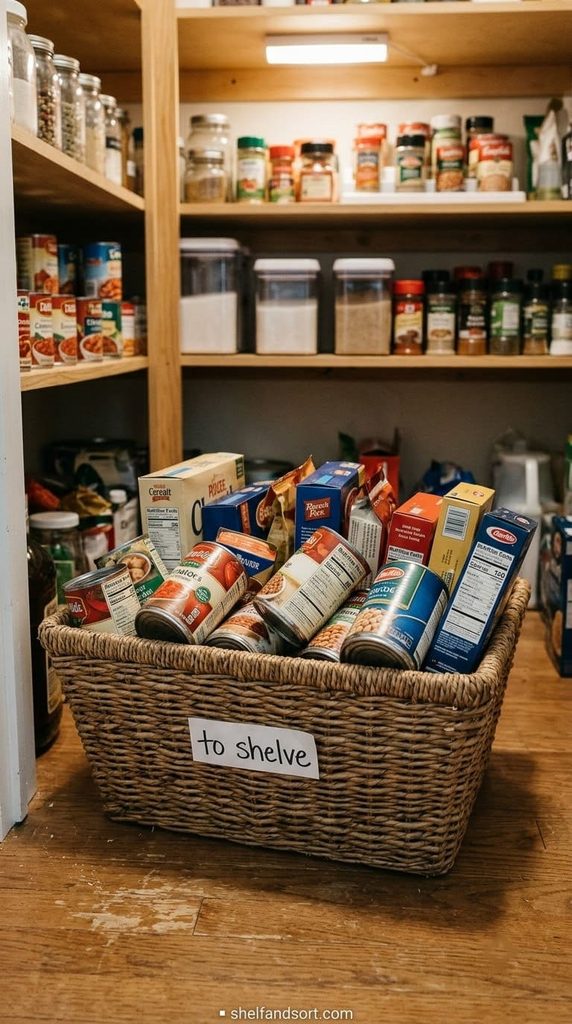
12. Stage new groceries in a landing bin before they go on the shelf
When you get home from a bulk run, dumping everything onto the shelves buries your older stock behind the new.
Keep one empty bin labeled “to shelve.” New stock waits there until you have a few minutes to rotate it in behind the existing stock. Ten minutes, not a whole project.
The mistake is shelving new stock in front because it is faster. That is how FIFO breaks on day one.
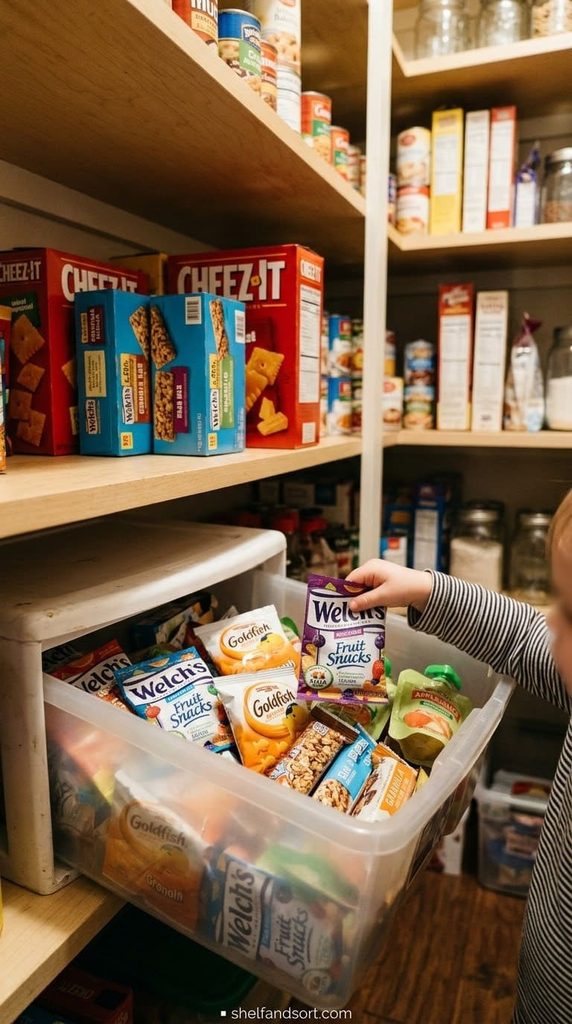
13. Give kids their own snack shelf low and in front
If kids raid the stockpile, they will tear open the case at the front and leave the rest a mess.
Decant a week of kid snacks into one low, open bin they can reach. Refill it from the stockpile on your schedule. The bulk stays untouched and organized.
The mistake is letting kids into the stockpile shelves directly. Set the boundary with a dedicated front bin.
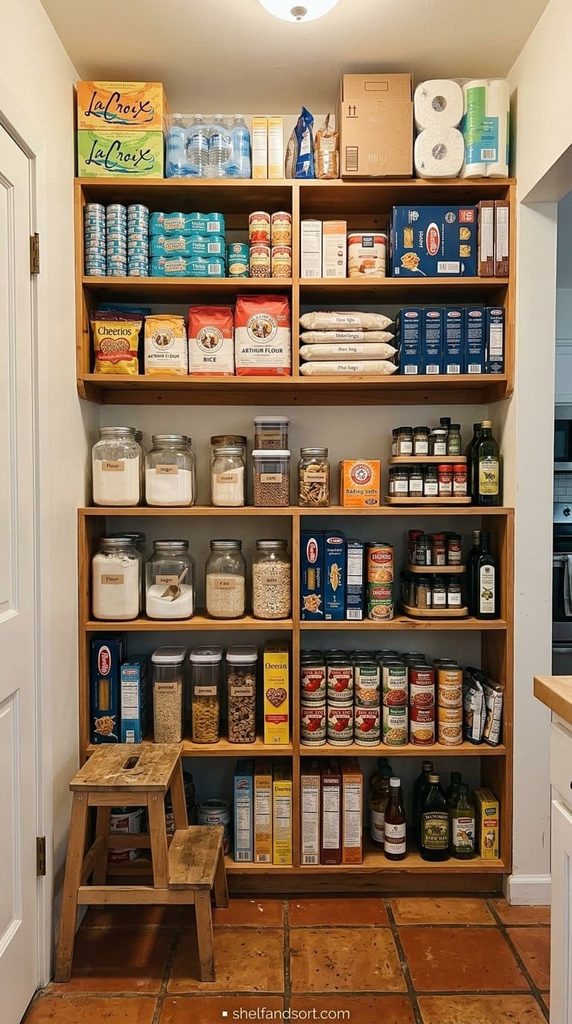
14. Keep a separate bulk-backup zone away from daily reach
Split the stockpile in two. A working zone with a week or two of everything at eye level, and a backup zone up high or in another spot with the deep reserves.
You shop the backup zone to refill the working zone, not for daily cooking. This keeps the everyday pantry from looking overwhelming.
The mistake is one giant undivided wall of stock. It is hard to cook from and hard to see what is low.
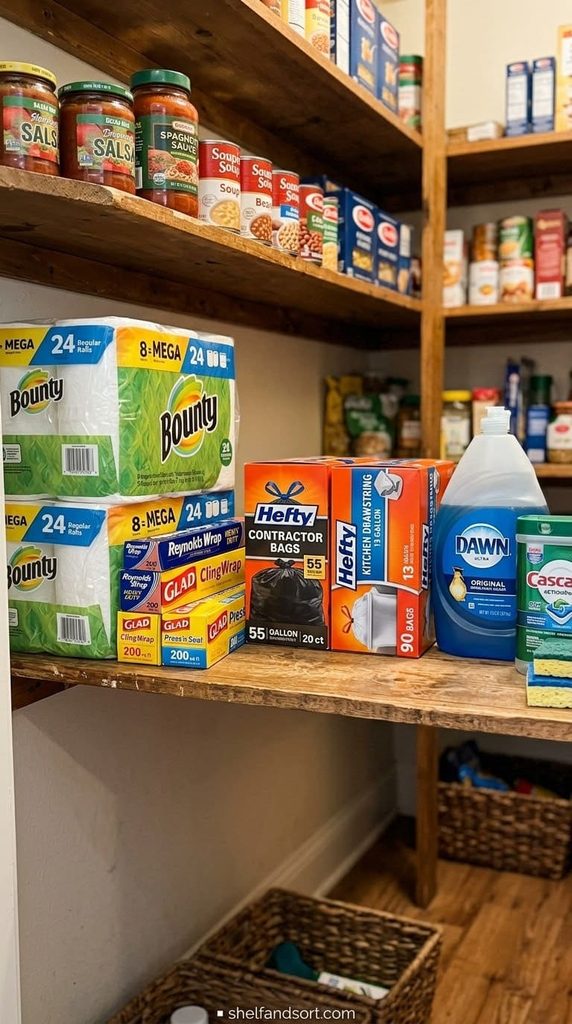
15. Store non-food stockpile items on a separate shelf
Paper towels, foil, trash bags, dish soap, batteries. Bulk non-food belongs in the stockpile but not mixed with food.
Give it its own shelf or the top of the unit. Keep cleaning chemicals below or away from food, never above it, so a leak cannot drip onto groceries.
The mistake is a case of dish soap next to the flour. One pinhole leak contaminates the food around it.
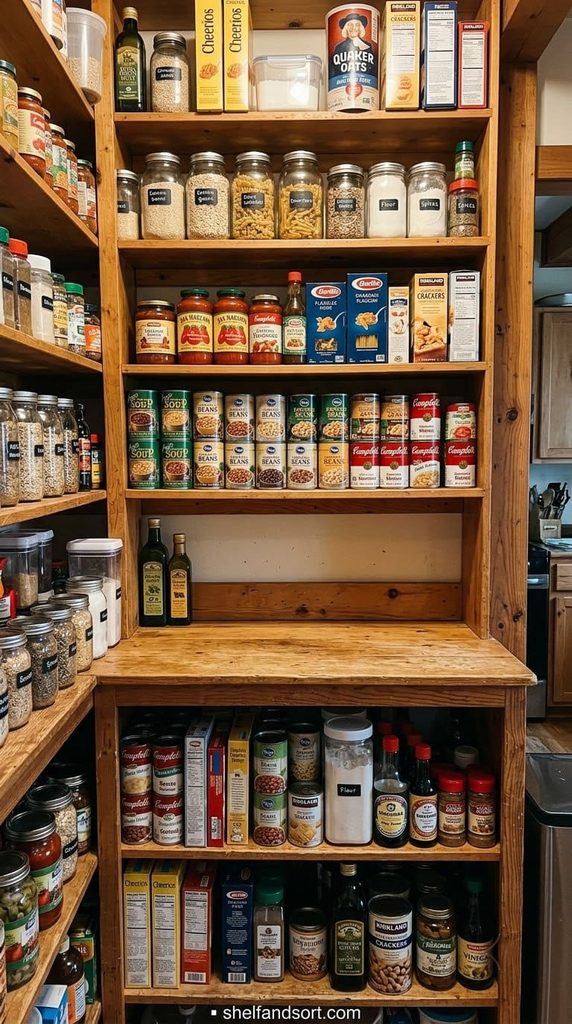
16. Leave one shelf empty on purpose
A stockpile that fills every inch has nowhere to put a sale haul, and no room to pull items forward during a rotation.
Keep one shelf, or a clear third of a shelf, open as working space. You will use it every restock.
The mistake is treating empty shelf space as wasted. In a stockpile, working room is part of the system.
Part 3: Beat the deep shelf
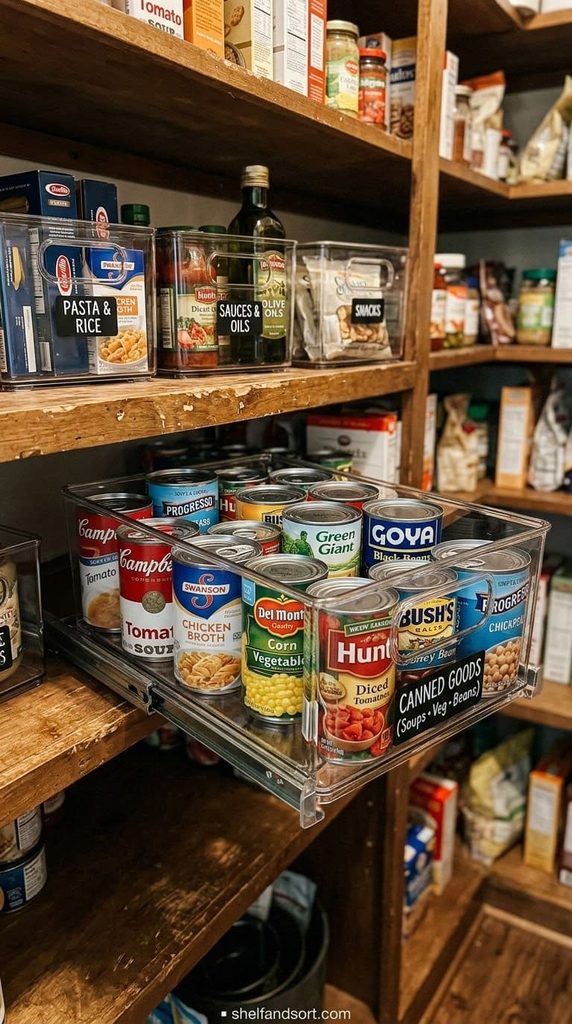
17. Turn deep shelves into pull-out bins
The back half of a deep shelf is where FIFO goes to die. Fix it with bins that slide out fully.
Group a category in a bin, pull the bin all the way out, take from the front, push it back. Now the back is as reachable as the front. Clear bins let you see the count without pulling.
The mistake is loose stacking on a deep shelf. You knock over the front to reach the back and never rotate properly.
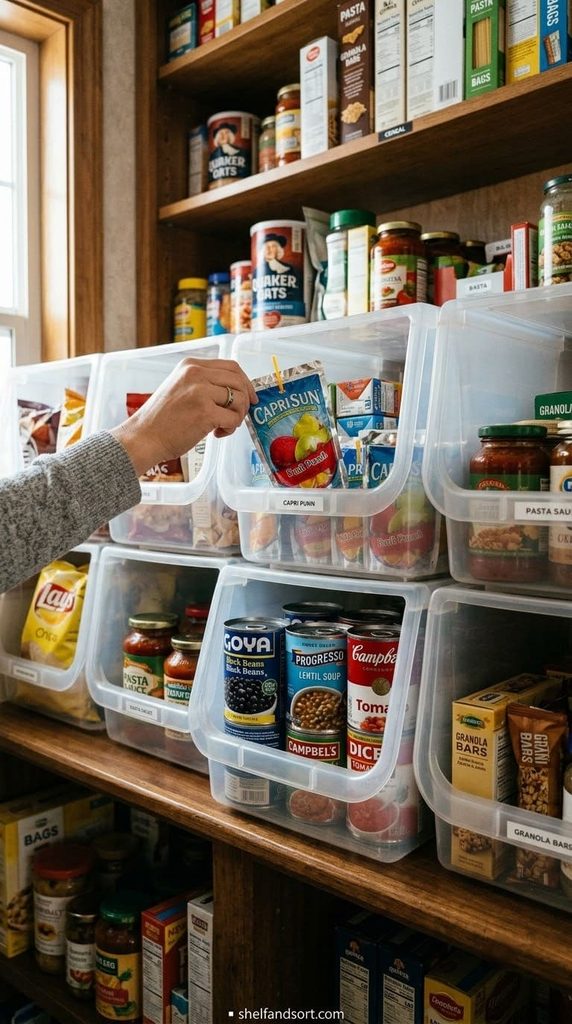
18. Use open-front bins so you grab without lifting
Open-front stacking bins let you take a can or pouch from the front while more slide down behind it, like a store shelf.
Line them up on deep shelves for canned goods, drink pouches, and boxed sides. The oldest is always the one your hand lands on.
The mistake is closed bins with lids for fast-moving stock. You stop opening the lid and just pile things on top instead.
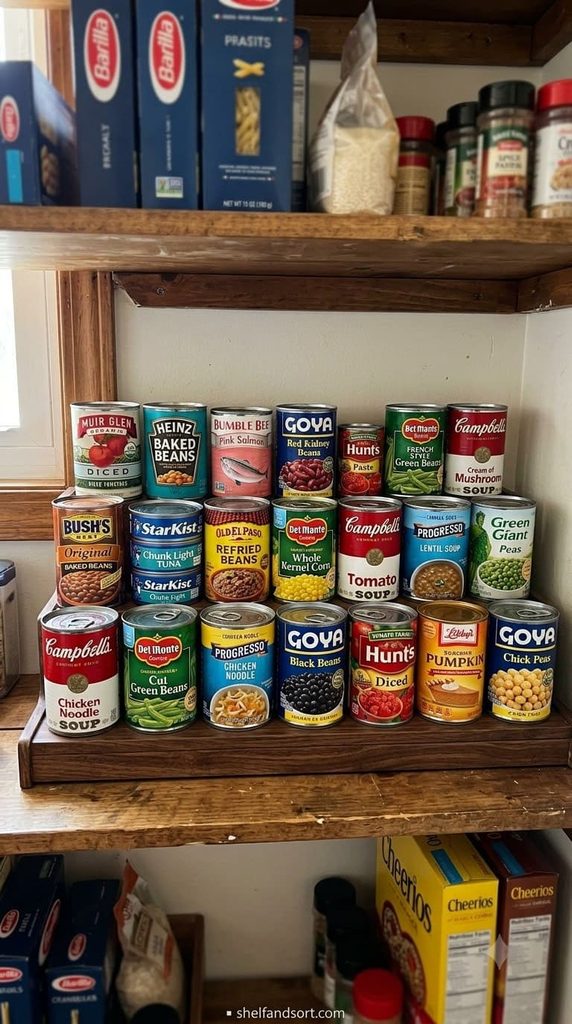
19. Add tiered risers so back rows sit higher
A stepped riser lifts the back row so you can read every label from the front without moving anything.
Put risers under canned goods and jars. Newest stock goes on the raised back tier, oldest sits front and low, so you naturally grab the oldest first.
The mistake is a flat shelf of cans three deep. The back two rows are invisible and you rebuy what you own.
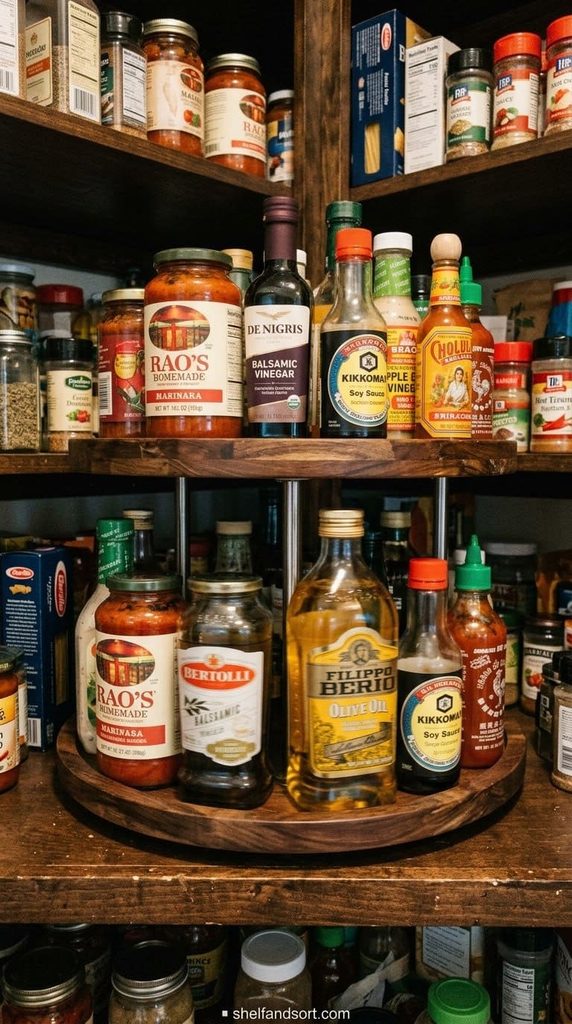
20. Put lazy Susans on deep corner shelves
A turntable brings a deep or corner shelf into reach with one spin. Oldest items rotate to the front as you turn it.
Use large two-tier turntables for sauce jars, oils, and vinegars. A non-slip surface keeps bottles from sliding when you spin.
The mistake is a turntable packed so full it cannot turn. Leave it at about 80 percent so it actually spins.
21. Store cans in a gravity-fed can rack
A stackable can dispenser loads new cans at the top and feeds the oldest out the bottom front. FIFO happens automatically with no thought.
One 36-can rack holds soups, beans, tomatoes, and tuna in labeled channels. Stack a second rack on top as your stockpile grows.
The mistake is stacking cans in a loose pyramid. The bottom can is a mystery and the whole thing collapses when you pull one.
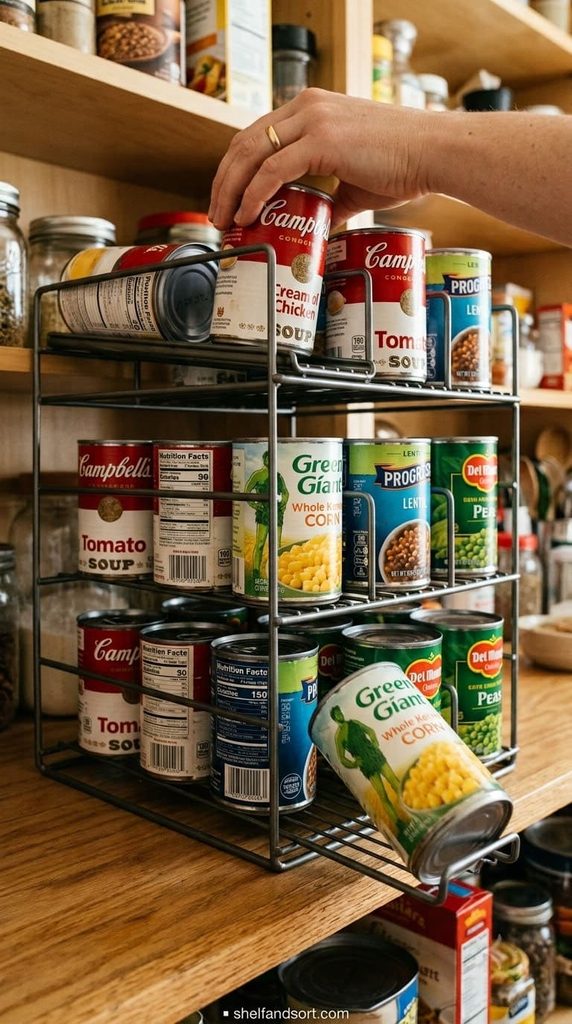
22. Keep deep shelves to one item type per row front-to-back
If a deep shelf holds only cans of black beans front to back, you always know what is there and you take from the front.
Mixed items front to back is what forces you to dig. One shelf, one lane, one product per lane.
The mistake is fitting “whatever fits” into the depth. The space looks used but the system is broken.
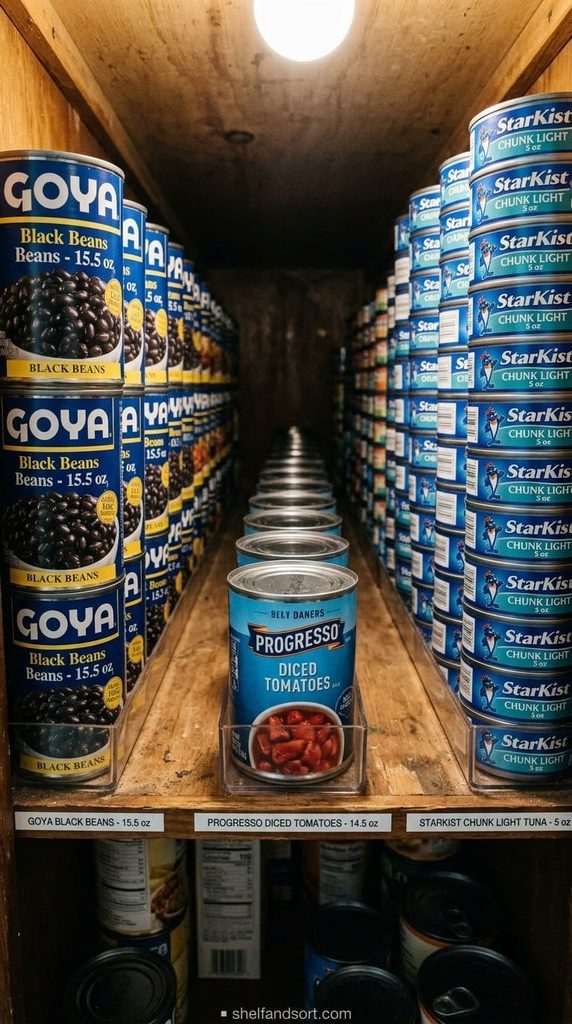
23. Label the front edge of every deep shelf and bin
On a deep shelf you see the front edge, not the contents. Put the label there.
A strip of tape or a clip-on label on the shelf lip, and a label on the front face of every bin. Now you read the pantry without pulling anything out.
The mistake is labeling the top of a bin you have to lift to see. On deep shelves, only front-facing labels work.
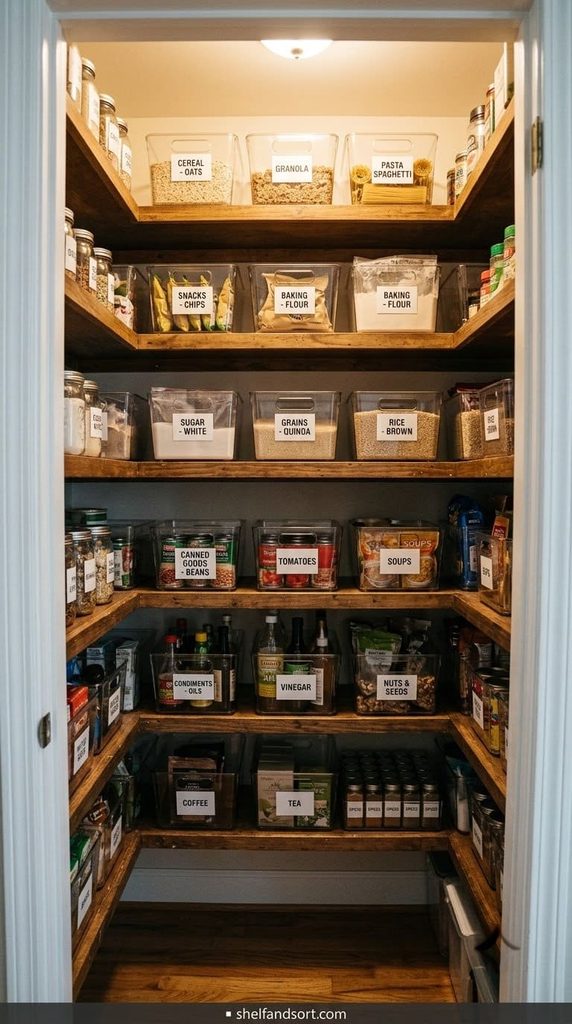
24. Split a very deep shelf into front and back with a divider
If you are stuck with a 24-inch shelf, run a divider across the middle. Front half is active stock you use now. Back half is sealed backups you slide forward only when the front empties.
Treat the back half like a second freezer: you open it rarely, on a schedule.
The mistake is treating a 24-inch shelf as one space. You will never rotate the back naturally.
Part 4: Rotate with FIFO so nothing expires
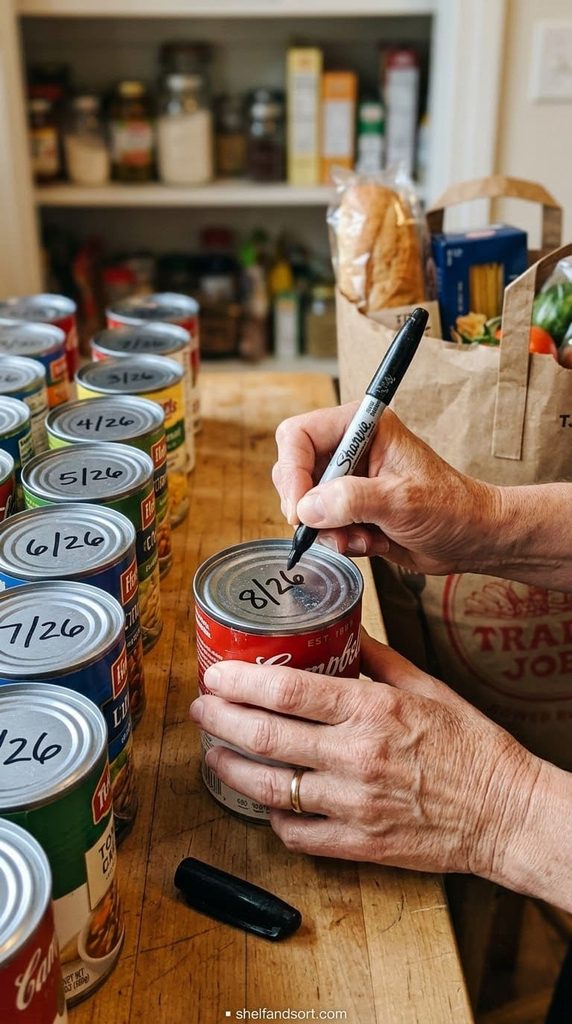
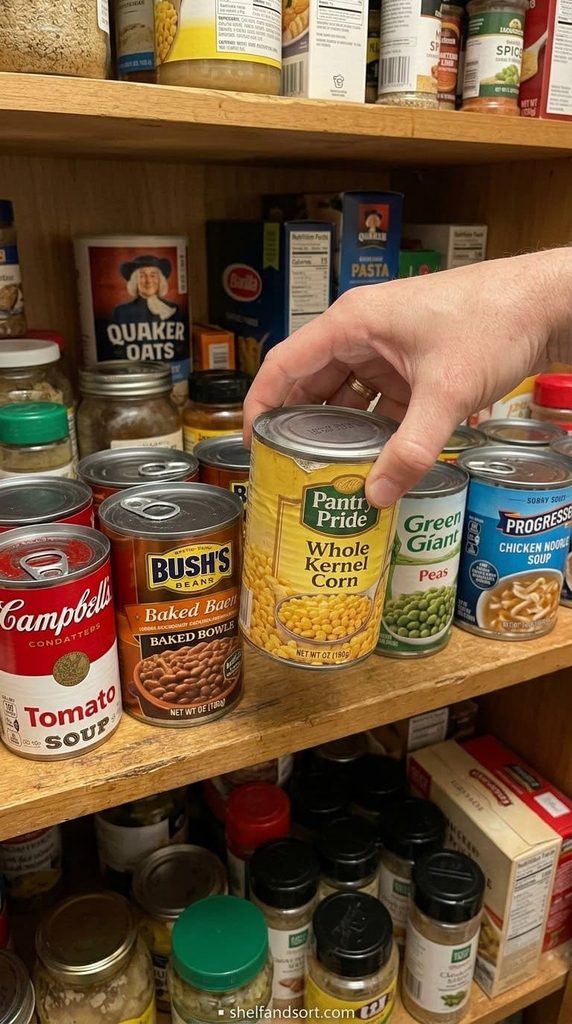
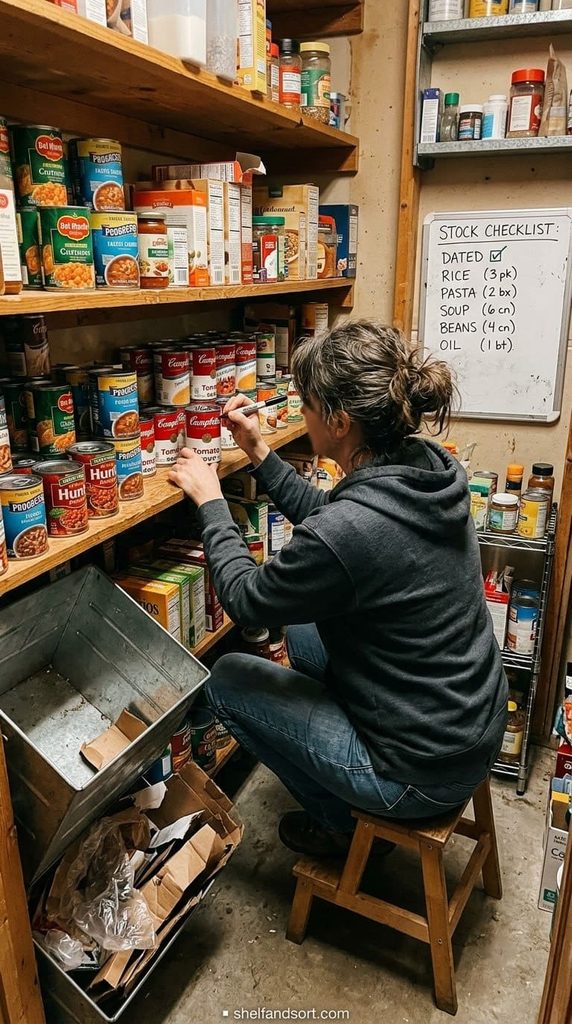
25. Date every item the day it comes home
FIFO needs a date you can see. Write the purchase month on the top of every can and the front of every box with a marker as you unload.
Use the purchase date, not the printed best-by, since best-by is buried and hard to compare fast. A quick “8/26” on the lid is enough.
The mistake is skipping this because the package “already has a date.” Finding and reading twelve tiny best-by codes during a rotation is why people give up on FIFO.
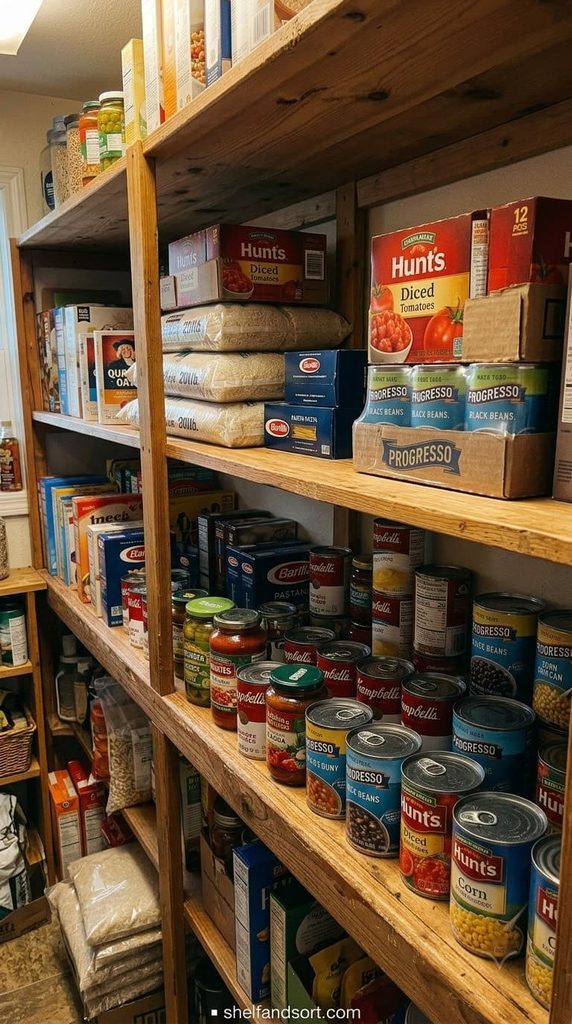
26. Always load new stock behind old
This is the whole rule. When you shelve new groceries, move the existing stock forward and put the new stuff behind it.
The landing bin from idea 12 buys you time to do this right instead of shoving new cans in front.
The mistake is front-loading. Every time you do it, the oldest item sinks another row back.
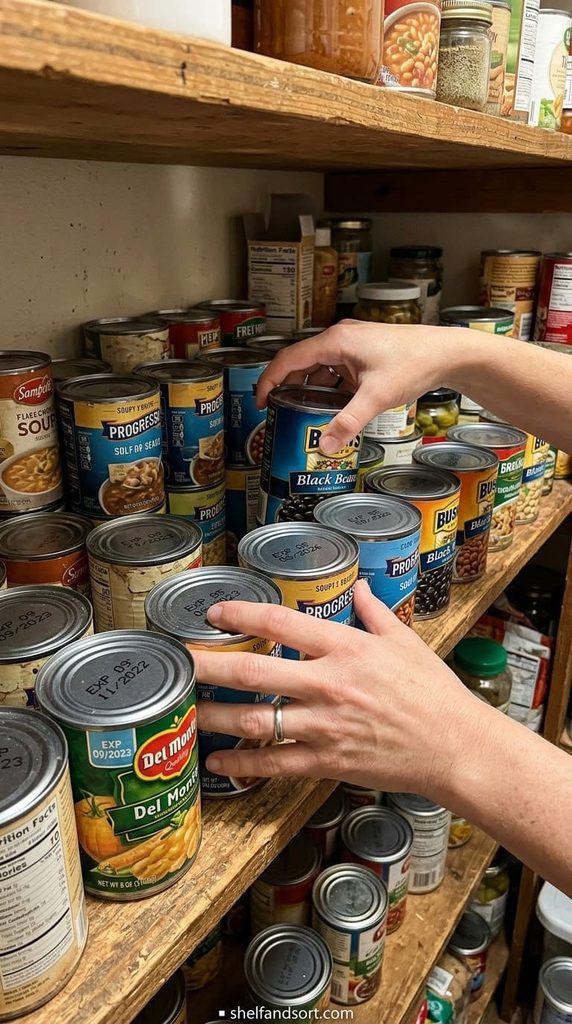
27. Shop your own shelves from the front, every time
Before you cook, take from the front of each bin or lane. Before you buy, check the front-edge labels to see what is actually low.
Front means oldest in a working FIFO system. Taking from the front is what closes the loop.
The mistake is grabbing the can that is easiest to reach, which is often the newest one you just put in front by accident.
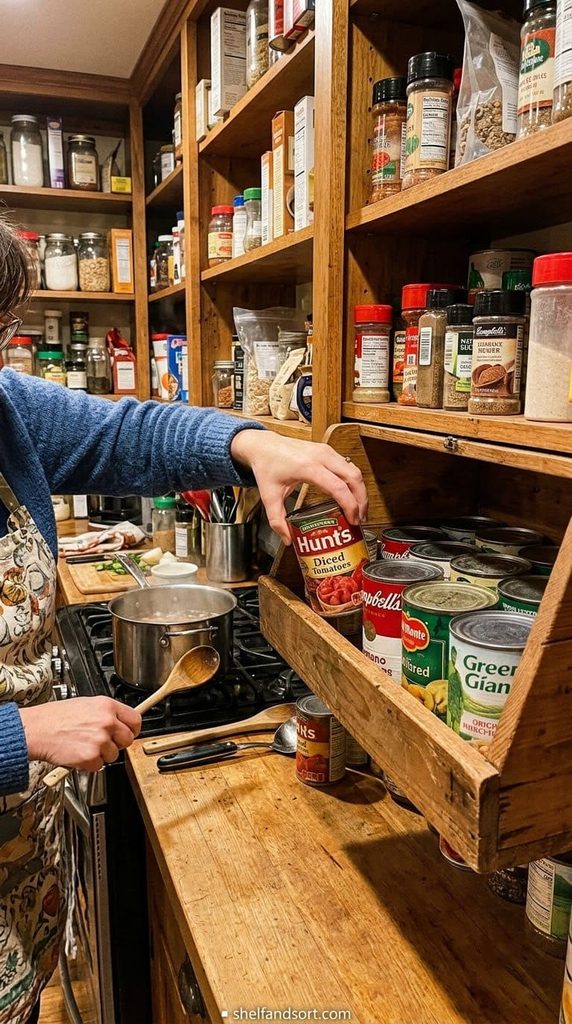
28. Do a full rotation once a month
Once a month, pull everything on one or two shelves forward, check dates, and move anything close to expiring into the use-first zone.
Rotate through the whole pantry over the month, a couple of shelves at a time, so it never becomes a big job.
The mistake is waiting for an annual clean-out. By then you are tossing bags of expired flour and cases of dented cans.
29. Keep a use-it-up meal list on the door
When something lands in the use-first zone, add a one-line meal idea for it to a list on the pantry door.
“3 cans black beans, close date, make chili Thursday.” This turns almost-waste into a plan instead of a vague intention.
The mistake is moving items to use-first and never actually planning a meal around them. They expire in the use-first bin instead of the back.
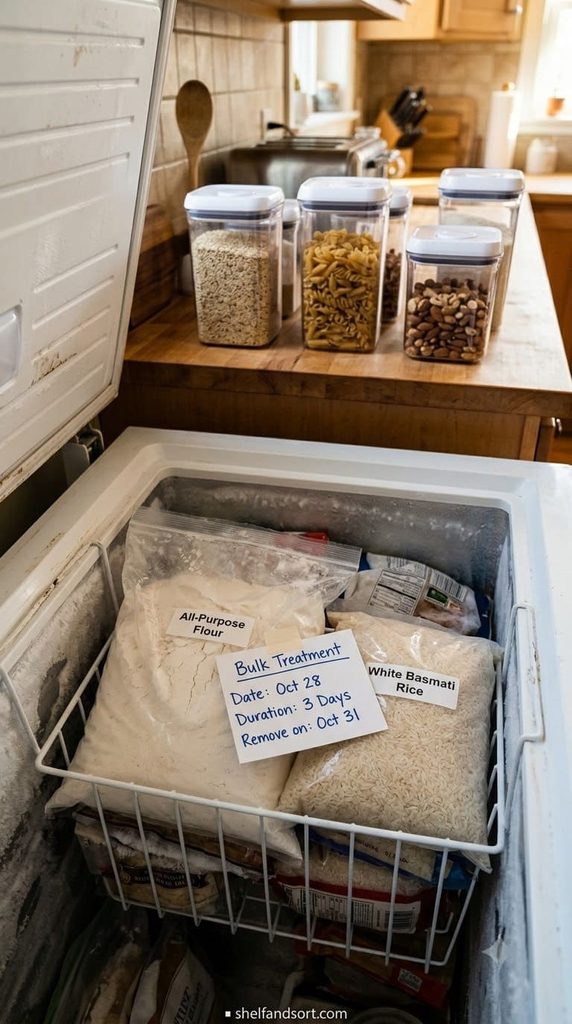
30. Freeze flour, grains, and cornmeal for a few days after buying
Bulk flour, rice, cornmeal, and grains can carry pantry-moth or beetle eggs from the store. Freezing new bags for three to four days kills them before they hatch.
Then store in airtight containers. University extension guidance is consistent on this for anyone buying grains in volume.
The mistake is pouring a new 25-pound bag straight into the bin. One infested bag can spread to the whole shelf.
31. Inspect for damaged cans on every rotation
During each monthly pass, pull any can that is bulging, leaking, heavily rusted, or dented on a seam. USDA guidance on shelf-stable food says not to use bulging, badly dented, or leaking cans.
A small side dent is usually fine. A dent on the top or side seam, or any swelling, is not.
The mistake is keeping a “still good probably” can in the stockpile. In a big rotation it is easy to miss again next month.
Part 5: Contain and label
32. Decant only the fast-moving staples
Decant flour, sugar, rice, pasta, and oats into airtight containers, since these move fast and benefit from a pest-proof seal.
Leave slow or rarely used items in their packaging. Decanting a case of specialty vinegar you use twice a year is wasted effort.
The mistake is decanting everything for looks. In a stockpile that is hours of work you will not keep up with.
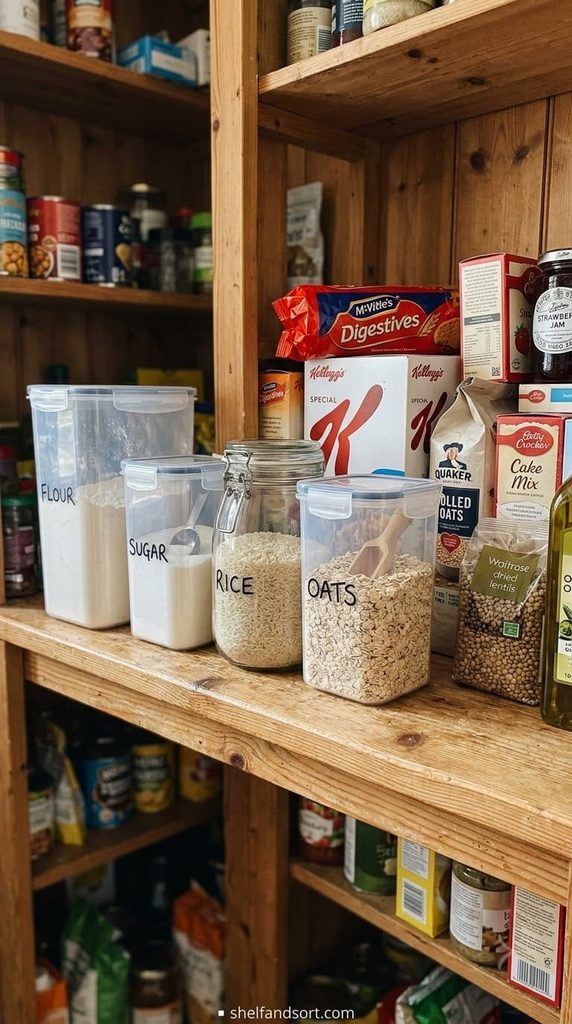
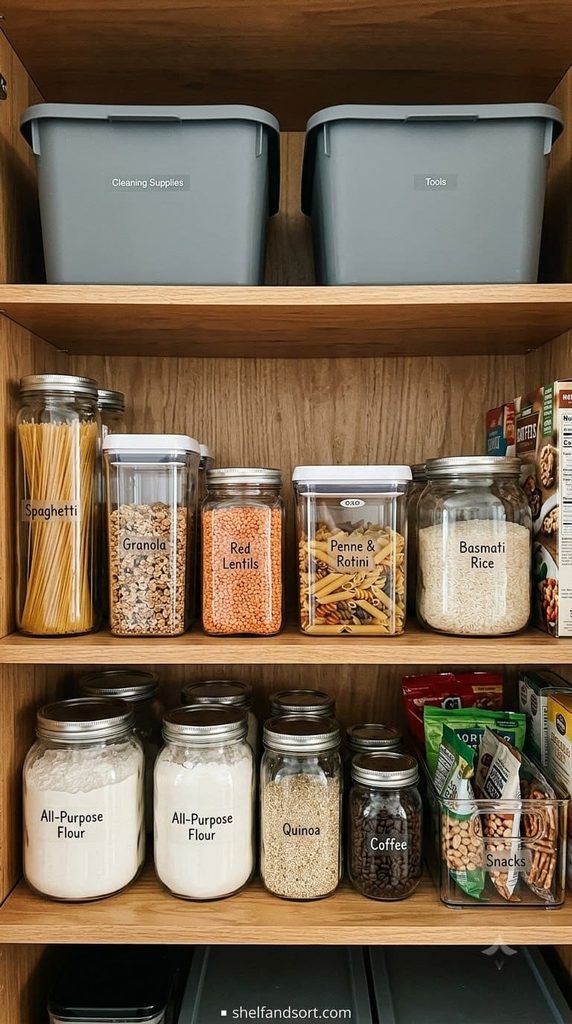
33. Use clear containers for anything you count
If you take inventory of it, you need to see it. Clear bins and canisters let you check the level from across the pantry.
Opaque bins are fine for backup paper goods and non-food, where you just need “have some” or “out.”
The mistake is a wall of matching opaque bins in a stockpile. It looks tidy and hides every low item until you are out.
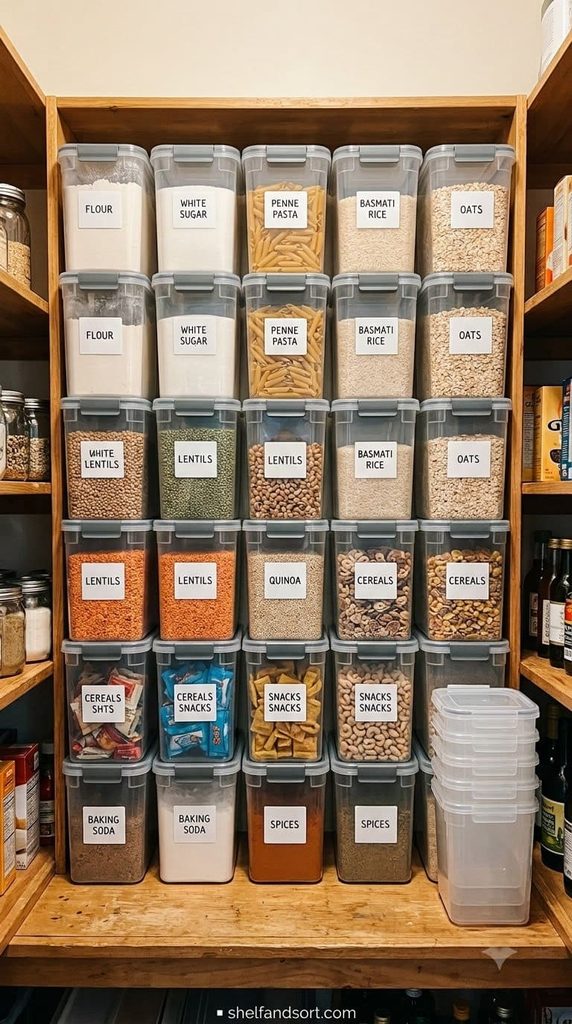
34. Match your bins so they stack and slide
In a stockpile, mismatched bins waste space because they will not stack or line up. Pick one or two bin sizes and buy multiples.
Uniform bins tile the shelf with no gaps, stack safely, and slide past each other. Buy a few extra for when the stockpile grows.
The mistake is grabbing whatever bin is on sale each trip. Six months later nothing fits together.
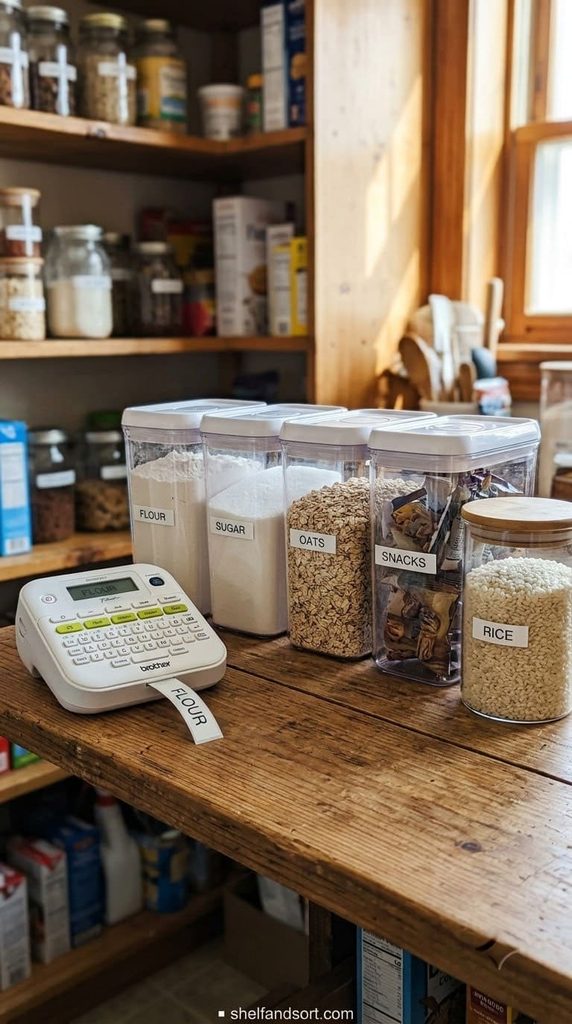
35. Get a label maker and label everything the same way
A stockpile has too many categories to keep straight with memory or handwriting. A cheap label maker makes it consistent.
Label the front of every bin, the front edge of every shelf, and the lid of every decanted container. Same font, same size, same spot.
The mistake is a mix of masking tape, sticky notes, and marker. It reads as chaos even when the pantry is organized.
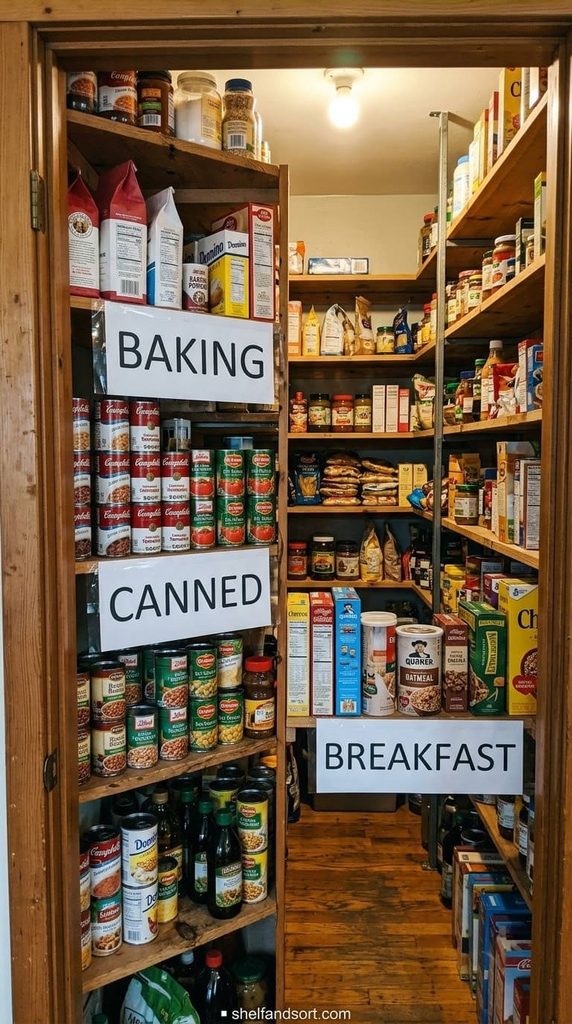
36. Add category signs you can read from the doorway
Big section headers, “CANNED”, “BAKING”, “BREAKFAST”, let anyone in the house put groceries away in the right spot.
Print them large, tape them to the shelf edge or the wall behind each zone. This is what makes the system survive other people.
The mistake is only small item labels. Someone unloading groceries in a hurry needs a sign, not fine print.
Part 6: Keep it working
37. Make a restock ritual out of putting groceries away
Every bulk trip ends the same way: date the items, empty the landing bin from last time, load new stock behind old, update the inventory board.
Fifteen minutes, same steps, every time. A ritual you repeat beats a system you have to think about.
The mistake is putting groceries away differently every time depending on how tired you are. The rotation only holds if the restock is consistent.
38. Check the use-first zone before writing any grocery list
Before you shop, look at the use-first shelf and the inventory board. Plan meals around what is close to expiring and what is genuinely low.
This is a two-minute habit that stops you from buying case number nine of something while case one expires.
The mistake is writing the list from habit or from what looks empty at a glance. Check the actual counts.
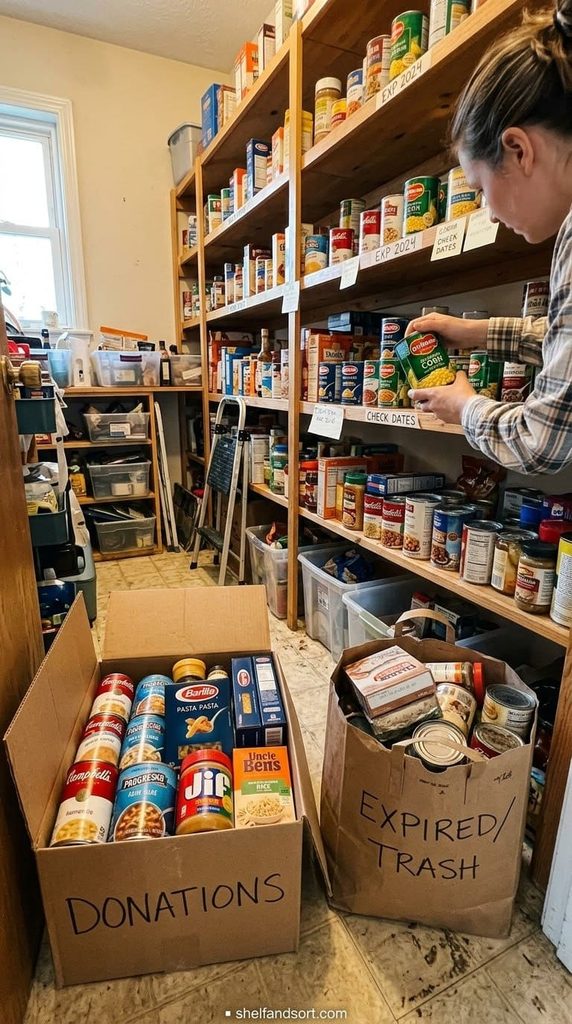
39. Purge the stockpile twice a year
Twice a year, go shelf by shelf and pull anything expired, anything you will realistically never use, and any impulse bulk buy that did not work out.
Donate the unexpired items you will not use to a food bank while they are still good, not after they expire in your pantry.
The mistake is a once-a-year purge. Six months is short enough to catch things before they cross the line from donatable to trash.
40. Run a 10-minute reset every week
Once a week, face the labels forward, move any close-date items to the use-first zone, refill the kid bin and the working zone from backups, and wipe one shelf.
Ten minutes weekly is what keeps a stockpile from sliding back into a buried pile. Pair it with the day you plan meals or write the list.
The mistake is skipping the weekly reset because the monthly rotation “covers it.” The weekly pass catches drift the monthly one is too slow for.
Shelf spacing and depth quick reference
| What you’re storing | Shelf spacing | Shelf depth | Best organizer |
|---|---|---|---|
| Canned goods | 6.5 to 7 inches | 12 to 14 inches | Can rack or tiered riser |
| Cereal, crackers, boxed sides | 14 to 16 inches | 12 to 14 inches | Open-front bins |
| Baking staples (decanted) | 12 to 14 inches | 12 inches | Airtight canisters |
| Bulk bags (rice, flour) | 18 to 20 inches | 14 to 16 inches | Large handled bin on the floor or bottom shelf |
| Bins of produce (potatoes, onions) | 18 inches or more | 14 to 16 inches | Ventilated bin or basket |
| Backup paper goods, non-food | 16 to 20 inches | any | Opaque bins, top shelf |
Wire vs wood shelving for a stockpile
| Factor | Wire shelving | Wood or solid shelving |
|---|---|---|
| Cost | Lower | Higher |
| Adjustable | Yes, easily | Sometimes, with a track system |
| Airflow | High, less dust and mildew | Low, can trap humidity against the wall |
| Small jars and cans | Tip in wide grid, need a liner | Sit flat |
| Weight capacity | High on freestanding units | High if properly braced |
| Best use | Bulk boxes, bags, cases | Jars, bottles, a display shelf |
Most stockpile pantries do well with mostly wire shelving plus one lined or solid shelf for jars and bottles.
How to keep a stockpile pantry from turning into waste
The shelving sets the capacity. The FIFO system is what protects the money you spent.
Three habits carry the whole thing. Date every item as it comes home. Load new stock behind old, every time, using a landing bin so you are not rushed. And shop your own front row before you shop the store.
Layer the checks: a 10-minute reset weekly, a shelf-by-shelf rotation monthly, and a full purge twice a year. Miss the weekly one for a month and you are back to digging. Keep them and the stockpile mostly runs itself.
And store it right. USDA guidance is to keep shelf-stable food cool, dry, and below 85 degrees Fahrenheit, away from heat and light. A pantry against a warm exterior wall or next to the oven ages food faster no matter how well you organize it. If that is your only option, keep the most perishable stock, oils, whole grains, nuts, on the coolest lower shelves.
Frequently asked questions
How deep should pantry shelves be for a stockpile?
Between 12 and 16 inches for most of the shelving. Twelve inches holds canned and boxed goods two rows deep and keeps everything visible. Go to 16 inches only for bulk bins, bags, and large items. Anything past 18 inches becomes unreachable in the back and needs pull-out bins, turntables, or a front-and-back divider system to stay usable. Shallower shelves with more levels beat deep shelves with few, because a stockpile fails when food gets buried and forgotten.
What is the best shelf spacing for canned goods?
About 6.5 to 7 inches between shelves for standard canned goods, which fits the cans with just enough clearance to lift one out. For cereal and cracker boxes, jump to 14 to 16 inches. For bulk bins and bags, 18 to 20 inches. Use adjustable shelving so you can change the spacing as your stockpile shifts, and measure your tallest item in each category before setting a shelf height.
How do I organize a stockpile so nothing expires?
Run a first-in, first-out system. Write the purchase month on every item as it comes home, always load new stock behind existing stock, and take from the front when you cook. Keep a “use first” bin at eye level for anything close to its date, and check it before you write a grocery list. Do a 10-minute reset weekly, rotate a couple of shelves fully each month, and purge the whole pantry twice a year, donating unexpired items you will not use while they are still good.
Is wire or wood shelving better for a pantry stockpile?
Wire shelving is usually the better choice for the bulk of a stockpile. It is cheaper, adjusts easily as your buying changes, and the open grid keeps air moving so you get less dust and mildew. Its one weakness is that small jars tip in the wide wire gaps, so add a clear liner or keep one solid shelf for jars and bottles. Wood shelving looks better and holds small items flat, but it costs more and can trap humidity against the wall.
How should I store a food stockpile safely?
Keep it cool, dry, and below 85 degrees Fahrenheit, away from direct heat and light, per USDA guidance. Avoid pantry walls shared with the oven or an exterior wall that heats up. Contain all floor storage in bins so bags do not tear or attract pests. Freeze bulk flour and grains for three to four days after buying to kill any pantry-pest eggs, then move them to airtight containers. On each monthly rotation, pull any can that is bulging, leaking, badly rusted, or dented on a seam.
Products We Recommend
This post contains affiliate links. We may earn a commission on qualifying purchases at no extra cost to you.
Amazon Basics 5-Shelf Steel Wire Shelving Unit
This is the adjustable wire shelving from ideas 3 and 6, and its rating sample is larger than anything else on this list by far. Each shelf holds 200 pounds and adjusts in 1-inch increments, so you can set 7-inch gaps for cans and 16-inch gaps for bulk bins on the same unit. Add a liner for jars, since the wire spacing is standard grid.
Shop Now
Deco Brothers Stackable Can Rack Organizer
This is the gravity-fed can rotation from idea 21. It holds 36 cans, loads new cans at the top, and feeds the oldest out the bottom front, so FIFO happens with no effort. The dividers adjust for soup cans versus tuna cans, and a second unit stacks on top as the stockpile grows.
Shop now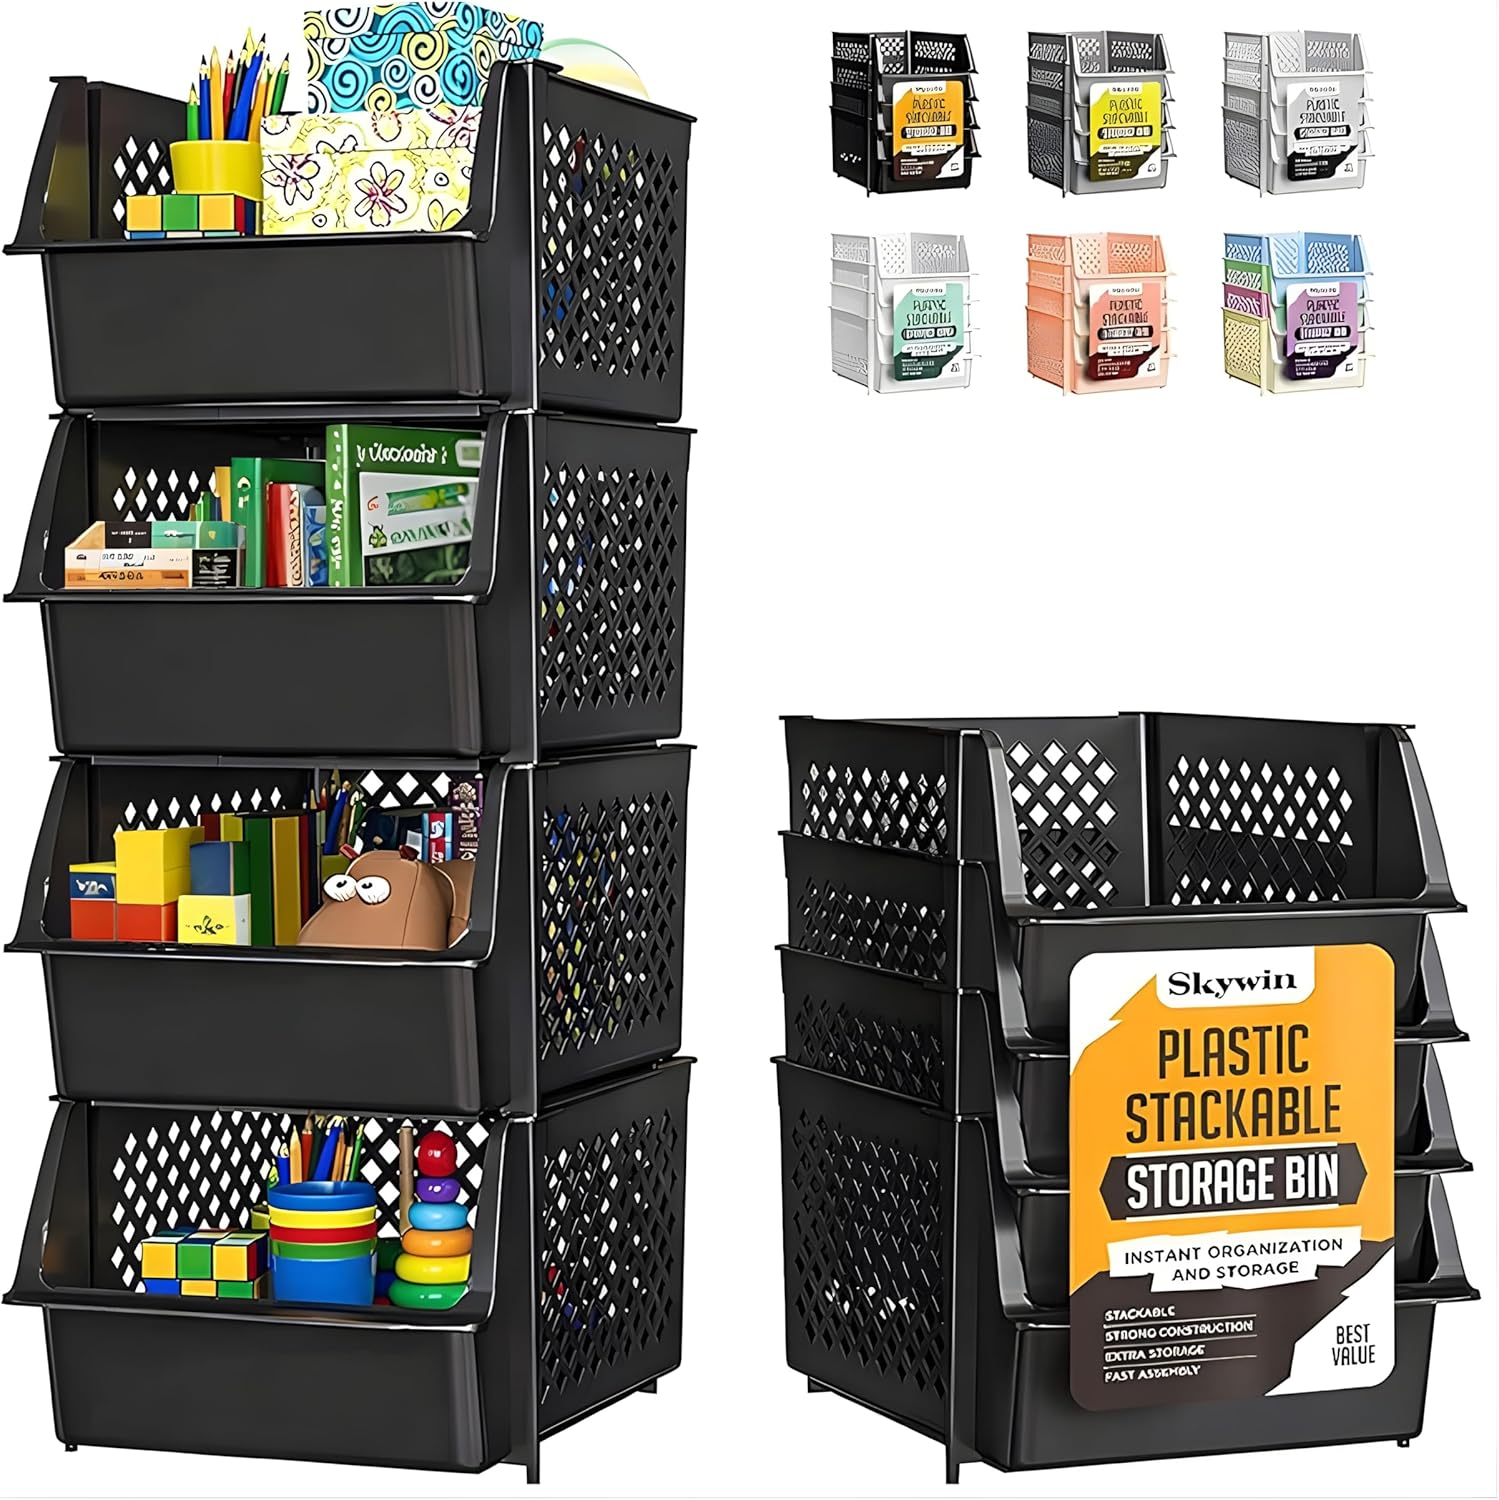
Skywin Open-Front Stackable Pantry Bins, 4-Pack
This is the open-front deep-shelf fix from idea 18. The cutout front lets you grab a pouch or box from the front while the rest slide down behind it, and the ventilated sides keep air moving. They stack two high, which turns a single deep shelf into a organized wall of grab-from-the-front stock.
Shop now